

Wireshark内嵌解析协议的LUA脚本
Wireshark官网对lua插件的API介绍英文的,看起来很头疼,小编这里是下载个网易有道翻译截图翻译的。最头疼的还不是这个,而是怎么调用这些API,从何下手才是最头疼的,只能通过代码边用边熟悉了。下面我给的是一些常用的API以及在网址的位置。
1.LUA脚本简介
Lua 是一种轻量级的脚本语言,由标准C编写而成,几乎在所有操作系统和平台上都可以编译、运行,可以很方便的嵌入到其他C/C++环境中,广泛应用于各种领域。
-
游戏引擎:Unity、Unreal Engine、Cocos2d-x、CryEngine 等游戏引擎都支持使用 Lua 脚本进行游戏逻辑的编写和扩展。
-
嵌入式系统:Lua 可以嵌入到各种嵌入式系统中,例如 OpenWrt、ESP8266、Raspberry Pi 等。通过在 C/C++ 代码中嵌入 Lua 解释器,可以使用 Lua 脚本进行系统配置和控制。
-
软件扩展:许多软件平台支持使用 Lua 进行扩展和定制,例如 Adobe Photoshop、VLC Media Player、MySQL 等。通过在 C/C++ 代码中嵌入 Lua 解释器,可以让用户使用 Lua 脚本来扩展软件的功能和行为。
-
嵌入式脚本语言:有些 C/C++ 软件平台专门设计了嵌入式脚本语言,例如 Redis、Nginx、OpenResty 等。这些平台提供了 Lua 解释器作为嵌入式脚本语言,使得开发者可以使用 Lua 脚本来编写和定制特定的功能。
-
图形界面框架:一些图形界面框架,如 wxWidgets、Qt,提供了对 Lua 的支持。开发者可以使用 Lua 脚本来编写图形界面的逻辑和事件处理。
这些平台提供了与 C/C++ 代码交互的接口,使得开发者可以在 C/C++ 程序中嵌入 Lua 解释器,并通过 Lua 脚本来实现特定的功能和定制。这种方式可以提供更灵活和可扩展的应用程序架构。
LUA源码下载地址:Lua: download area
2.Vscode平台编译LUA脚本
lua的官方下载Lua库和可执行文件的链接: Lua Binaries Download
2.1步骤
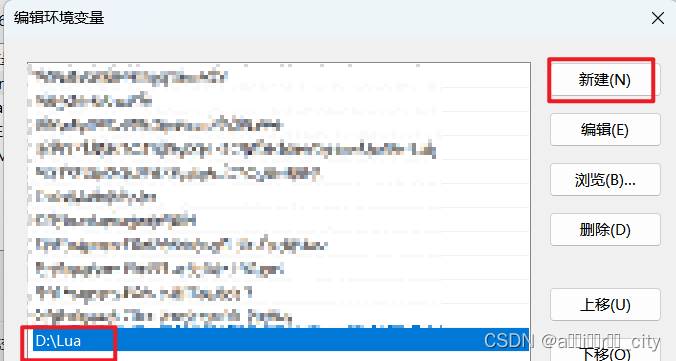
1.先在上面的链接下载编译lua脚本的可执行文件( 我这里下载的是lua-5.4.2_Win64_bin.zip 版本的)下载完成后,创建一个文件夹命名为Lua,把下载的包拖进Lua文件夹进行解压。 然后把Lua文件添加系统变量中的Path里。
2.去vscode把基本插件下载好CodeRunner,LuaDebug 。
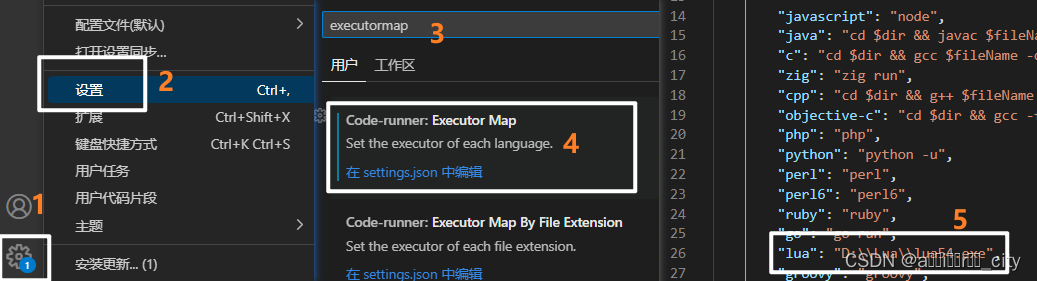
3.打开vscode的设置界面,并在搜索栏搜索executorMap,点击在settings.json中编辑,会跳转到页面,在里面 "lua": 添加上lua的lua54.exe路径( D:\\Lua\\lua54.exe ),注意路径是双斜杠 " \\"
4.做完上面的步骤就可以直接在Vscode平台开发啦,可以创建 .lua 文件,输入代码试试水print("Hello World")
3.LUA开发汇总
3.1开发网址
1.Lua语言基础,可以去菜鸟教程网站去学习,边开发边学习效率最高
Lua 运算符 | 菜鸟教程
2.熟悉wireshark的使用,并且去浏览一下wireshark支持Lua语言的API。
3.2 基于Wireshark开发LUA脚本的基本语法介绍
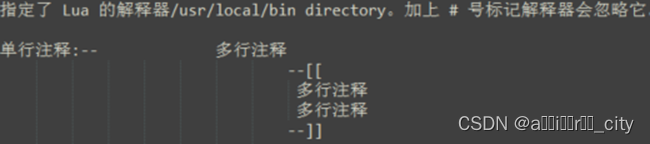
3.2.1注释
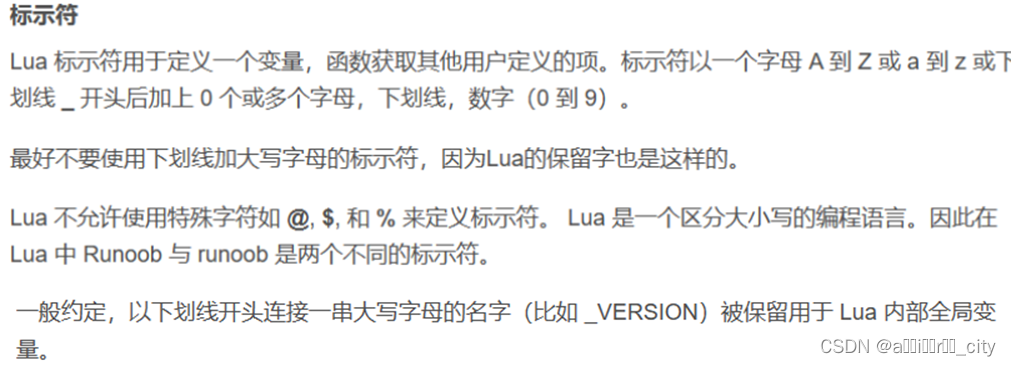
3.2.2标识符
3.2.3 函数命名

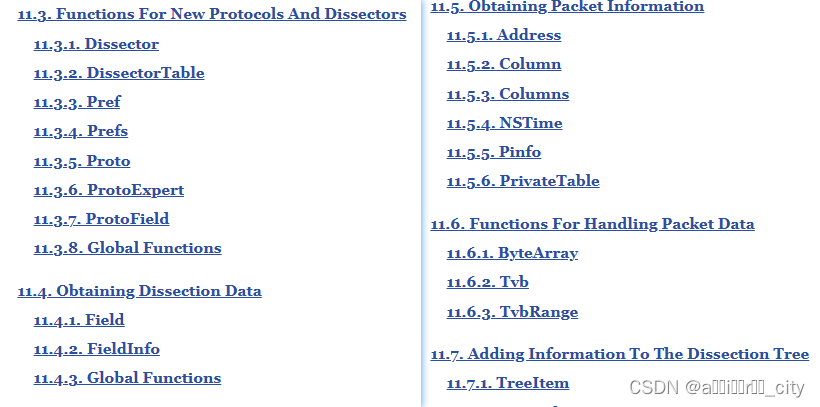
3.2.4 wireshark的lua插件API介绍
Wireshark官网对lua插件的API介绍英文的,看起来很头疼,小编这里是下载个网易有道翻译截图翻译的。最头疼的还不是这个,而是怎么调用这些API,从何下手才是最头疼的,只能通过代码边用边熟悉了。下面我给的是一些常用的API以及在网址的位置
3.2.5举例
1.先弄个Hello World!到Wireshark看看
AirCityProto = Proto("aircity", "AirCity Protocol")
function AirCityProto.dissector(tvb, pinfo, tree)
local data_length = tvb:len()
if data_length == 0 then return end
--解析数据头
pinfo.cols.protocol = AirCityProto.name
local Headtree = tree:add(AirCityProto, tvb(), "Hello World!");
PrintHead(tvb, Headtree)
end
function PrintHead(tvb, headtree)
headtree:add(AirCityProto, tvb(), "Hi!");
end
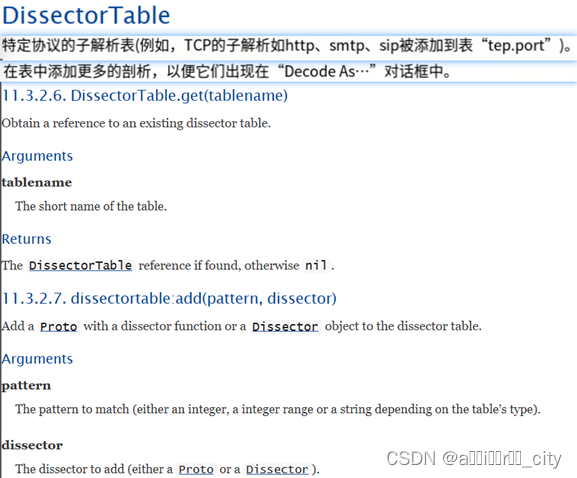
local UdpPort = DissectorTable.get("udp.port") --如果获取tcp就是tcp.port
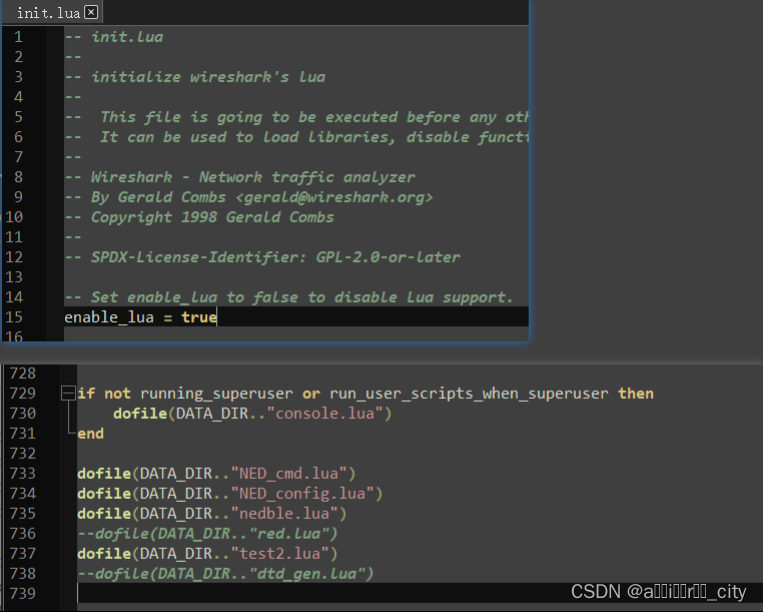
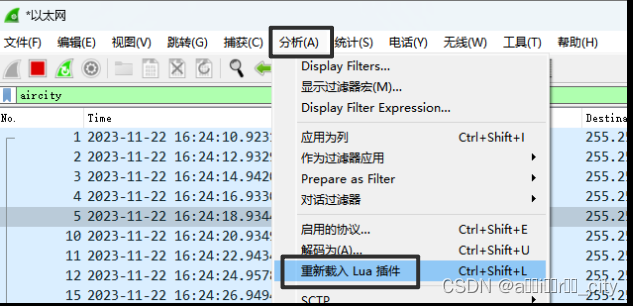
UdpPort:add(20209,AirCityProto)--抓到的20209端口的数据,按AirCityProto的规则来解析这里我以"test2.lua"来命名文件,将代码复制进去后,接下来需要到Wireshark安装目录里,找到 init.lua 文件,打开它(小编用的是Notepad++软件打开的),执行两个操作(使能、添加路径)。弄完接下来还需要把保存好代码的test2.lua文件移植到和init.lua的同一个路径下。然后就是在Wireshark软件里添加lua插件就ok了。

运行结果

2.可以拿里面的数据进行实战(小编创建了虚拟IP"192.168.0.253"来弄的)
AirCityProto = Proto("aircity", "AirCity Protocol")
--[[
Field Type: one of: ftypes.BOOLEAN, ftypes.CHAR, ftypes.UINT8, ftypes.UINT16,
ftypes.UINT24, ftypes.UINT32, ftypes.UINT64, ftypes.INT8, ftypes.INT16, ftypes.INT24,
ftypes.INT32, ftypes.INT64, ftypes.FLOAT, ftypes.DOUBLE , ftypes.ABSOLUTE_TIME,
ftypes.RELATIVE_TIME, ftypes.STRING, ftypes.STRINGZ, ftypes.UINT_STRING, ftypes.ETHER,
ftypes.BYTES, ftypes.UINT_BYTES, ftypes.IPv4, ftypes.IPv6, ftypes.IPXNET, ftypes.FRAMENUM,
ftypes.PCRE, ftypes.GUID, ftypes.OID, ftypes.PROTOCOL, ftypes.REL_OID, ftypes.SYSTEM_ID,
ftypes.EUI64 or ftypes.NONE.
]]
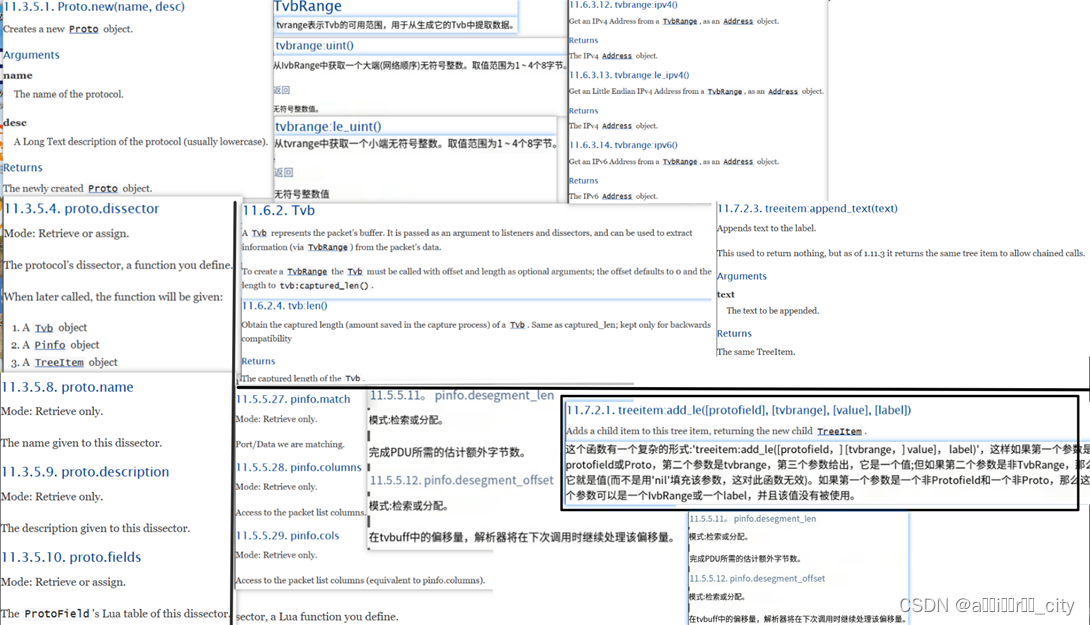
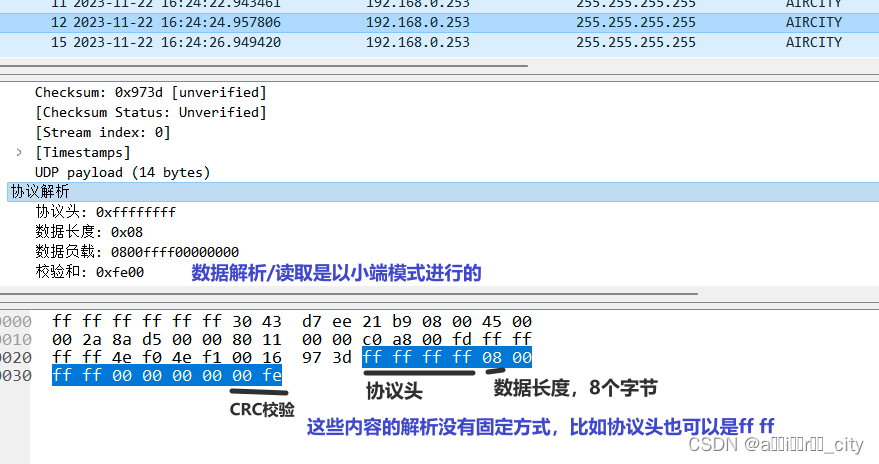
Head = ProtoField.uint8("head", "协议头", base.HEX) --将uint8的数据以16进制进行存储,如上所示,具体可以在官网查看
Len = ProtoField.uint8("len", "数据长度", base.HEX)
CRC16 = ProtoField.uint16("CRC16", "校验和", base.HEX)
Payload = ProtoField.bytes("payload", "数据负载", base.NONE)
AirCityProto.fields = { Head, Len, CRC16, Payload }
function AirCityProto.dissector(tvb, pinfo, tree)
local data_length = tvb:len()
if data_length == 0 then return end
local Len_dsc = "长度符合"
local Head = tvb(0, 4):le_uint()
if Head ~= 0xffffffff then return end
local data_len = tvb(4, 1):le_uint()
local total_len = data_len + 6
if data_len < (data_length - 6) then
Len_dsc = "长度不足"
elseif data_len > (data_length - 6) then
pinfo.desegment_len = total_len - data_length
pinfo.desegment_offset = 0
return
else
pinfo.desegment_len = 0
pinfo.desegment_offset = 0
end
--解析数据头
pinfo.cols.protocol = AirCityProto.name
local Headtree = tree:add(AirCityProto, tvb(), "协议解析");
PrintHead(tvb, Headtree, data_len)
end
function PrintHead(tvb, headtree, len_dsc)
headtree:add_le(Head, tvb(0, 4)) --在子树添加协议头
headtree:add_le(Len, tvb(4, 1)) --在子树添加数据长度
headtree:add_le(Payload, tvb(4, len_dsc)) --在子树添加数据负载
headtree:add_le(CRC16, tvb(12, 2)) --在子树添加CRC校验
end
local UdpPort = DissectorTable.get("udp.port") --如果获取tcp就是tcp.port
UdpPort:add(20209, AirCityProto) --抓到的1900端口的数据,按AirCityProto的规则来解析
有个需要注意的点是,Wireshark输出是UTF-8的编码形式,所以.lua脚本也是一样,否则可能会输出乱码。上面的代码是自动对数据包的Udp payload,也就是协议内容进行解析的
3.2.6 其余解析协议内容可能会用到的用法
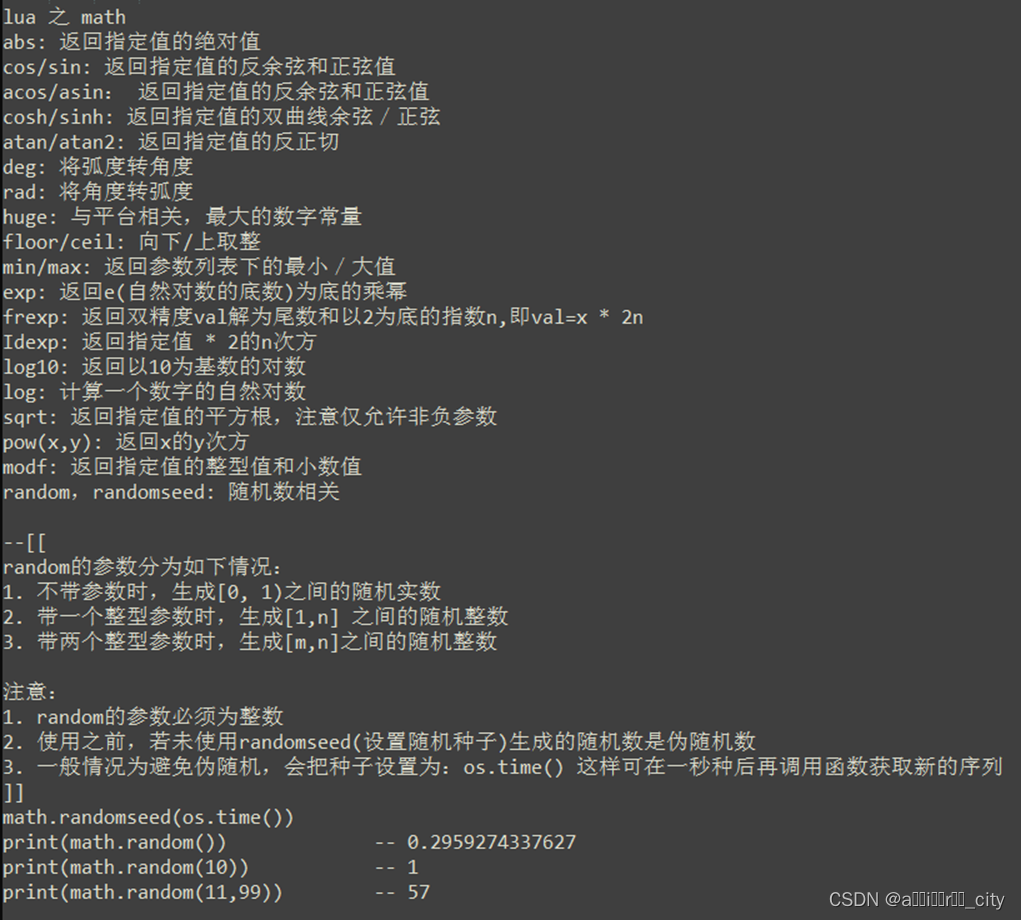
1.Lua之math的用法
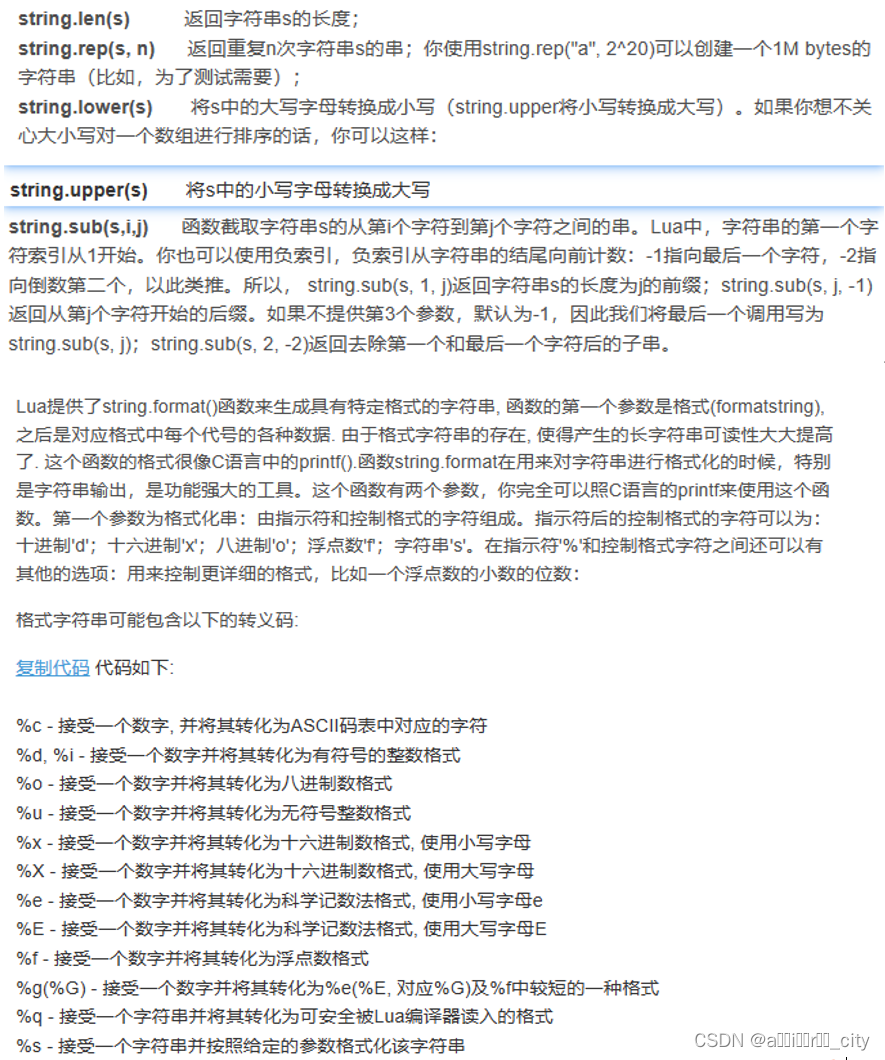
2.Lua之String的用法

3.对数据进行位处理和判断
-- 位处理和判断示例

-- 获取整数的二进制表示
function getBinary(num)
    local binary = ""
    while num > 0 do
        binary = tostring(num % 2) .. binary
        num = math.floor(num / 2)
    end
    return binary
end

-- 判断整数的某一位是否为1
function isBitSet(num, bit)
    local binary = getBinary(num)
    local bitValue = string.sub(binary, -bit, -bit)
    return bitValue == "1"
end

-- 示例使用
local num = 10
local bit = 2

print("二进制表示:", getBinary(num))
print("第", bit, "位是否为1:", isBitSet(num, 1))
4.多层函数调用技巧
参数根据根据具体情况进行设定,没有限制
Data_Analysis[index](tvb, subtree, cmd)

Data_Analysis = {

    [0x00] =
        function(tvb, subtree, cmd)

        end,
    [0x01] =
        function(tvb, subtree, cmd)

        end,
    [0x02] =
        function(tvb, subtree, cmd)
            Needle_Bed[cmd](tvb, subtree)
        end,

}

Needle_Bed = {
    [0x00] =
        function(tvb, subtree)
        end,
    [0x07] =
        function(tvb, subtree)
        end,
    [0x30] =
        function(tvb, subtree)
        end,
    [0x50] =
        function(tvb, subtree)
        end,
    [0x51] =
        function(tvb, subtree)
        end,
}
瓜分20万奖金 获得内推名额 丰厚实物奖励 易参与易上手
更多推荐

 19
19 0
0- 0


 已为社区贡献1条内容

所有评论(0)