

centos 7 安装 zabbix4.0
centos 7 安装 zabbix4.01.下载 rpm 包# 从清华的开源镜像下载wget https://mirrors.tuna.tsinghua.edu.cn/zabbix/zabbix/4.0/rhel/7/x86_64/zabbix-release-4.0-2.el7.noarch.rpm地址:https://mirrors.tuna.tsinghua.edu.cn/zabbix/z
·
centos 7 安装 zabbix4.0
1.下载 rpm 包
# 从清华的开源镜像下载
wget https://mirrors.tuna.tsinghua.edu.cn/zabbix/zabbix/4.0/rhel/7/x86_64/zabbix-release-4.0-2.el7.noarch.rpm
地址:https://mirrors.tuna.tsinghua.edu.cn/zabbix/zabbix/4.0/rhel/7/x86_64/

2.安装 zabbix 包
rpm -ivh zabbix-release-4.0-2.el7.noarch.rpm
# rpm 参数解释:
# i 安装软件包
# v 显示附加信息
# h 安装时输出哈希标记(``#'')

2.1.查看安装文件路径
rpm -ql zabbix-release

2.2.查看下载地址
vim /etc/yum.repos.d/zabbix.repo

[zabbix]
name=Zabbix Official Repository - $basearch
baseurl=http://repo.zabbix.com/zabbix/4.0/rhel/7/$basearch/
enabled=1
gpgcheck=1
gpgkey=file:///etc/pki/rpm-gpg/RPM-GPG-KEY-ZABBIX-A14FE591

[zabbix-debuginfo]
name=Zabbix Official Repository debuginfo - $basearch
baseurl=http://repo.zabbix.com/zabbix/4.0/rhel/7/$basearch/debuginfo/
enabled=0
gpgkey=file:///etc/pki/rpm-gpg/RPM-GPG-KEY-ZABBIX-A14FE591
gpgcheck=1

[zabbix-non-supported]
name=Zabbix Official Repository non-supported - $basearch
baseurl=http://repo.zabbix.com/non-supported/rhel/7/$basearch/
enabled=1
gpgkey=file:///etc/pki/rpm-gpg/RPM-GPG-KEY-ZABBIX
gpgcheck=1
官方下载地址:http://repo.zabbix.com/zabbix/4.0/rhel/7/$basearch/
缺点:外网下载缓慢
解决方案:将下载地址修改为国内镜像源地址,这是使用清华的开源地址 https://mirrors.tuna.tsinghua.edu.cn/zabbix
# 在文件中修改下载地址
:%s#http://repo.zabbix.com#https://mirrors.tuna.tsinghua.edu.cn/zabbix#g
# 修改校验
:%s#gpgcheck=1#gpgcheck=0#g


[zabbix]
name=Zabbix Official Repository - $basearch
baseurl=https://mirrors.tuna.tsinghua.edu.cn/zabbix/zabbix/4.0/rhel/7/$basearch/
enabled=1
gpgcheck=0
gpgkey=file:///etc/pki/rpm-gpg/RPM-GPG-KEY-ZABBIX-A14FE591

[zabbix-debuginfo]
name=Zabbix Official Repository debuginfo - $basearch
baseurl=https://mirrors.tuna.tsinghua.edu.cn/zabbix/zabbix/4.0/rhel/7/$basearch/debuginfo/
enabled=0
gpgkey=file:///etc/pki/rpm-gpg/RPM-GPG-KEY-ZABBIX-A14FE591
gpgcheck=0

[zabbix-non-supported]
name=Zabbix Official Repository non-supported - $basearch
baseurl=http://repo.zabbix.com/non-supported/rhel/7/$basearch/
enabled=1
gpgkey=file:///etc/pki/rpm-gpg/RPM-GPG-KEY-ZABBIX
gpgcheck=0
2.3.安装 zabbix
yum install zabbix-server-mysql zabbix-web-mysql -y
3.安装 mysql 数据库
3.1.安装 mysql 并启动
yum install mariadb-server -y

# 启动数据库并设置开机自启
systemctl start mariadb.service
systemctl enable mariadb.service
3.2.优化 mysql 数据库
# 对数据库进行安全初始化
mysql_secure_installation

[root@zabbix ~]# mysql_secure_installation

NOTE: RUNNING ALL PARTS OF THIS SCRIPT IS RECOMMENDED FOR ALL MariaDB
      SERVERS IN PRODUCTION USE!  PLEASE READ EACH STEP CAREFULLY!

In order to log into MariaDB to secure it, we'll need the current
password for the root user.  If you've just installed MariaDB, and
you haven't set the root password yet, the password will be blank,
so you should just press enter here.
# 输入数据库登陆账户 root 的密码,默认初始化没有密码,直接回车
Enter current password for root (enter for none):
OK, successfully used password, moving on...

Setting the root password ensures that nobody can log into the MariaDB
root user without the proper authorisation.
# 是否设置 root 密码,可以先不设置
Set root password? [Y/n] n
 ... skipping.

By default, a MariaDB installation has an anonymous user, allowing anyone
to log into MariaDB without having to have a user account created for
them.  This is intended only for testing, and to make the installation
go a bit smoother.  You should remove them before moving into a
production environment.
# 是否移除 anonymous 这个用户(匿名用户)
Remove anonymous users? [Y/n] y
 ... Success!

Normally, root should only be allowed to connect from 'localhost'.  This
ensures that someone cannot guess at the root password from the network.
# 是够禁止 root 远程登陆
Disallow root login remotely? [Y/n] y
 ... Success!

By default, MariaDB comes with a database named 'test' that anyone can
access.  This is also intended only for testing, and should be removed
before moving into a production environment.
# 是否删除 test 数据库
Remove test database and access to it? [Y/n] y
 - Dropping test database...
 ... Success!
 - Removing privileges on test database...
 ... Success!

Reloading the privilege tables will ensure that all changes made so far
will take effect immediately.
# 重新加载
Reload privilege tables now? [Y/n] y
 ... Success!

Cleaning up...

All done!  If you've completed all of the above steps, your MariaDB
installation should now be secure.

Thanks for using MariaDB!
3.3.查看 mysql 优化结果
[root@zabbix ~]# mysql
Welcome to the MariaDB monitor.  Commands end with ; or \g.
Your MariaDB connection id is 8
Server version: 5.5.68-MariaDB MariaDB Server

Copyright (c) 2000, 2018, Oracle, MariaDB Corporation Ab and others.

Type 'help;' or '\h' for help. Type '\c' to clear the current input statement.

MariaDB [(none)]> show databases;
+--------------------+
| Database           |
+--------------------+
| information_schema |
| mysql              |
| performance_schema |
+--------------------+
3 rows in set (0.00 sec)

MariaDB [(none)]> select user,host from mysql.user;
+------+-----------+
| user | host      |
+------+-----------+
| root | 127.0.0.1 |
| root | ::1       |
| root | localhost |
+------+-----------+
3 rows in set (0.00 sec)

MariaDB [(none)]>
4.创建 zabbix 数据库
4.1.创建 zabbix 数据库
[root@zabbix ~]# mysql
Welcome to the MariaDB monitor.  Commands end with ; or \g.
Your MariaDB connection id is 9
Server version: 5.5.68-MariaDB MariaDB Server

Copyright (c) 2000, 2018, Oracle, MariaDB Corporation Ab and others.

Type 'help;' or '\h' for help. Type '\c' to clear the current input statement.

# 创建 zabbix 数据库
MariaDB [(none)]> create database zabbix character set utf8 collate utf8_bin;
Query OK, 1 row affected (0.00 sec)

# 数据库授权
MariaDB [(none)]> grant all privileges on zabbix.* to zabbix@localhost identified by '123456';
Query OK, 0 rows affected (0.00 sec)

MariaDB [(none)]>
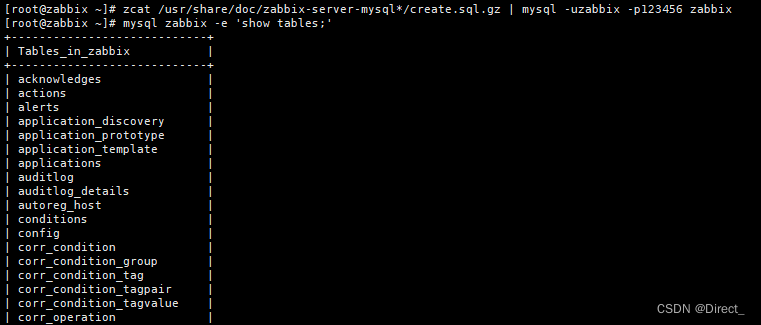
4.2.导入数据
zcat /usr/share/doc/zabbix-server-mysql*/create.sql.gz | mysql -uzabbix -p123456 zabbix
确认数据是否导入成功
mysql zabbix -e 'show tables;'
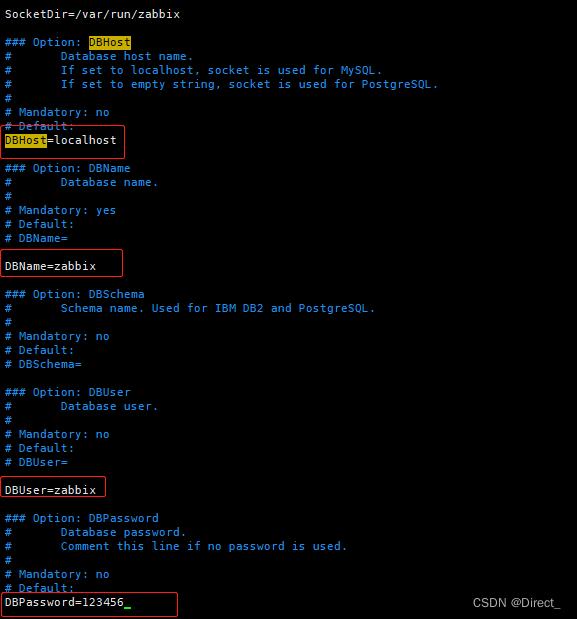
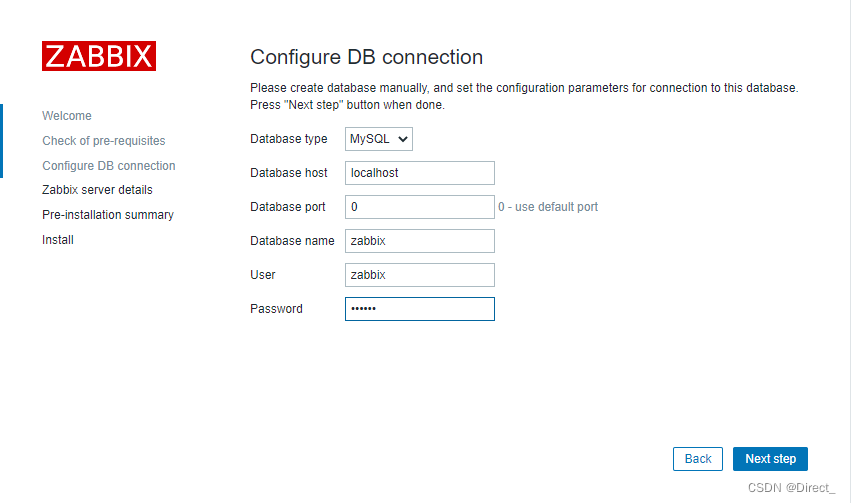
5.配置 zabbix-server
5.1.修改 zabbix-server.conf 配置文件
vim /etc/zabbix/zabbix_server.conf
DBHost=localhost
DBName=zabbix
DBUser=zabbix
DBPassword=<password>
6.启动 zabbix-server
6.1.启动 zabbix-server
systemctl start zabbix-server
systemctl enable zabbix-server
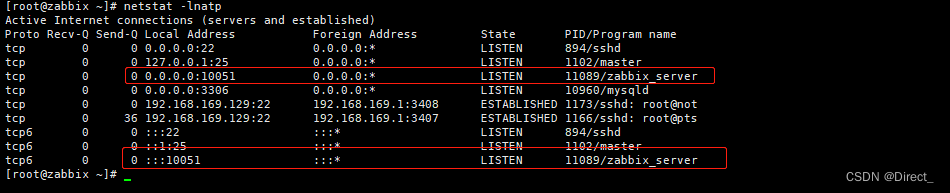
6.2.查看监听端口
[root@zabbix ~]# netstat -lnatp
Active Internet connections (servers and established)
Proto Recv-Q Send-Q Local Address Foreign Address State PID/Program name
tcp 0 0 0.0.0.0:22 0.0.0.0:* LISTEN 894/sshd
tcp 0 0 127.0.0.1:25 0.0.0.0:* LISTEN 1102/master
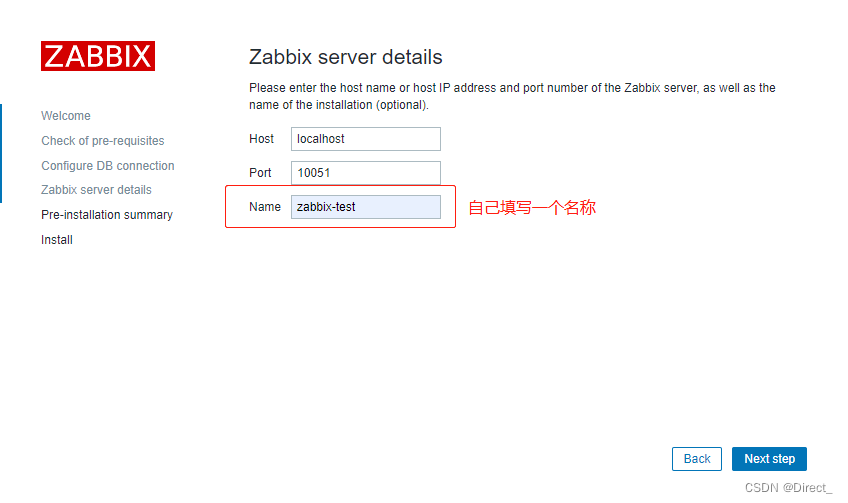
tcp 0 0 0.0.0.0:10051 0.0.0.0:* LISTEN 11089/zabbix_server
tcp 0 0 0.0.0.0:3306 0.0.0.0:* LISTEN 10960/mysqld
tcp 0 0 192.168.169.129:22 192.168.169.1:3408 ESTABLISHED 1173/sshd: root@not
tcp 0 36 192.168.169.129:22 192.168.169.1:3407 ESTABLISHED 1166/sshd: root@pts
tcp6 0 0 :::22 :::* LISTEN 894/sshd
tcp6 0 0 ::1:25 :::* LISTEN 1102/master
tcp6 0 0 :::10051 :::* LISTEN 11089/zabbix_server
7.修改 httpd 启动文件
vim /etc/httpd/conf.d/zabbix.conf
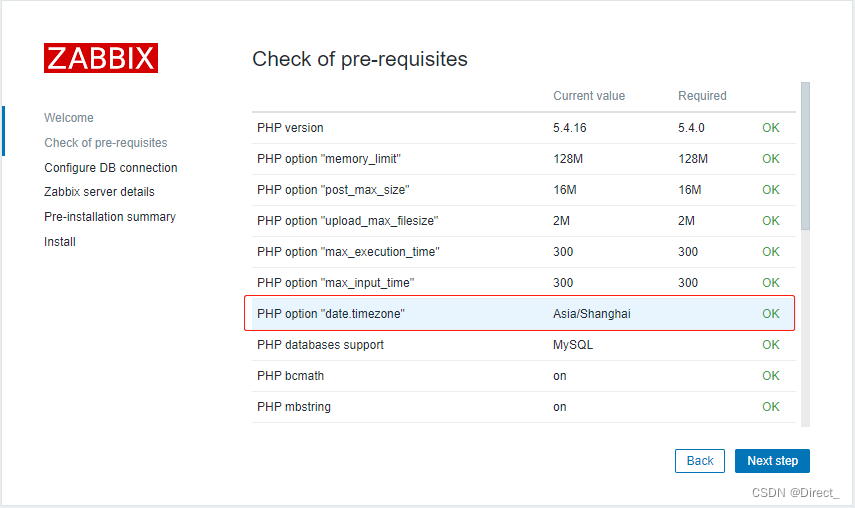
# 将文件中的时区修改为上海
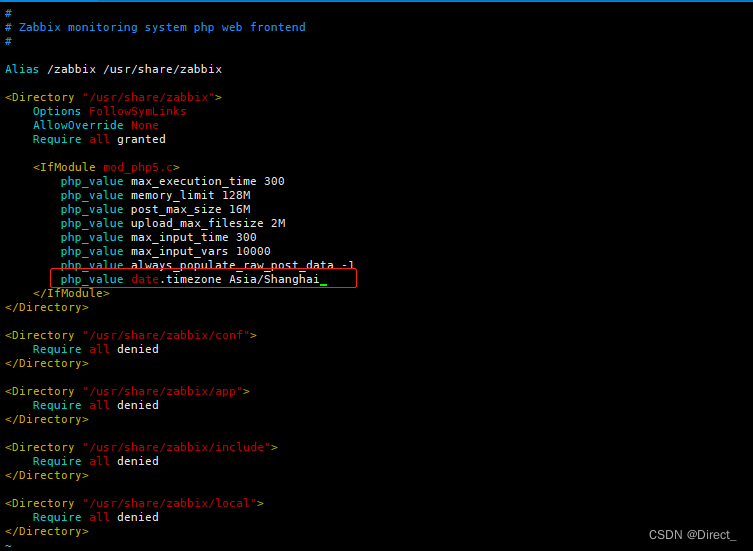
8.启动 httpd
systemctl start httpd
systemctl enable httpd
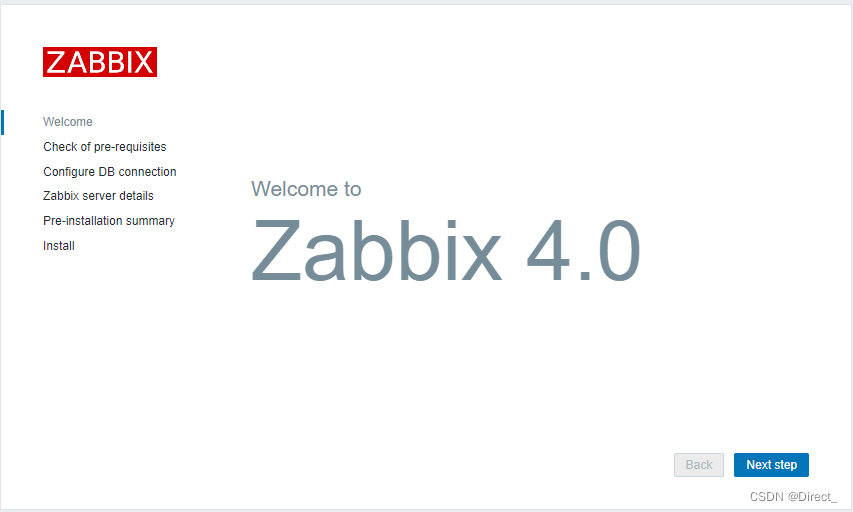
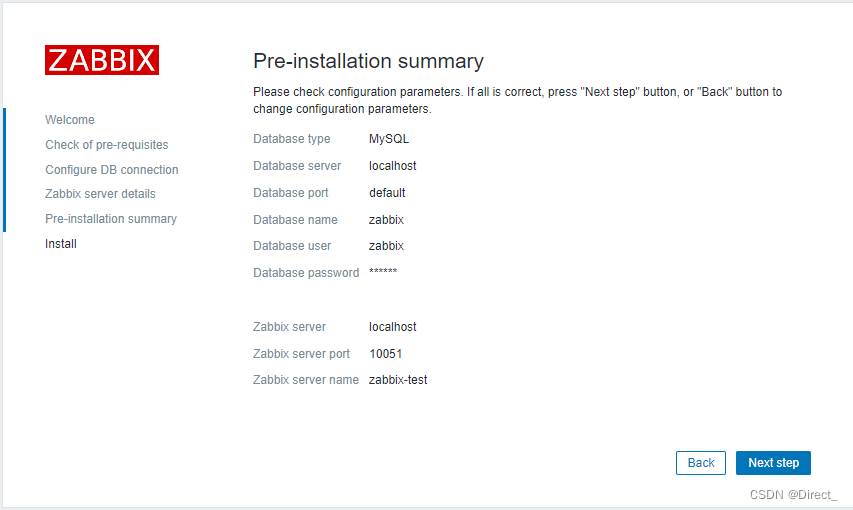
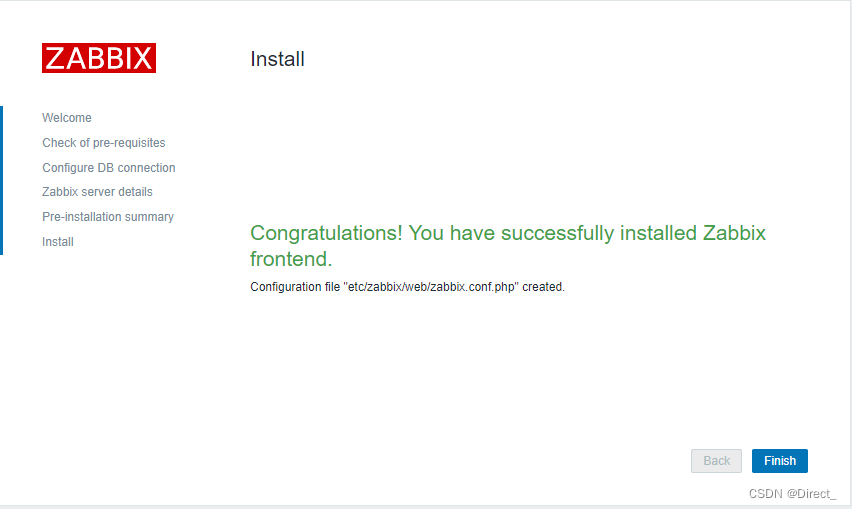
9.浏览器访问
这里的上海时间就是上面修改后的结果,如果没有修改则会提示报错
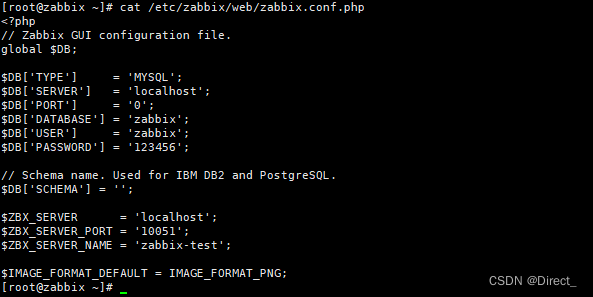
cat /etc/zabbix/web/zabbix.conf.php
# 这个配置文件保存了 zabbix 的基本配置信息
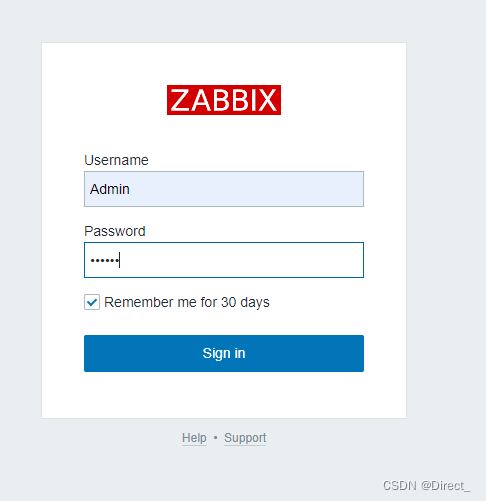
输入用户名 Admin 以及密码 zabbix 以作为 Zabbix超级用户登陆
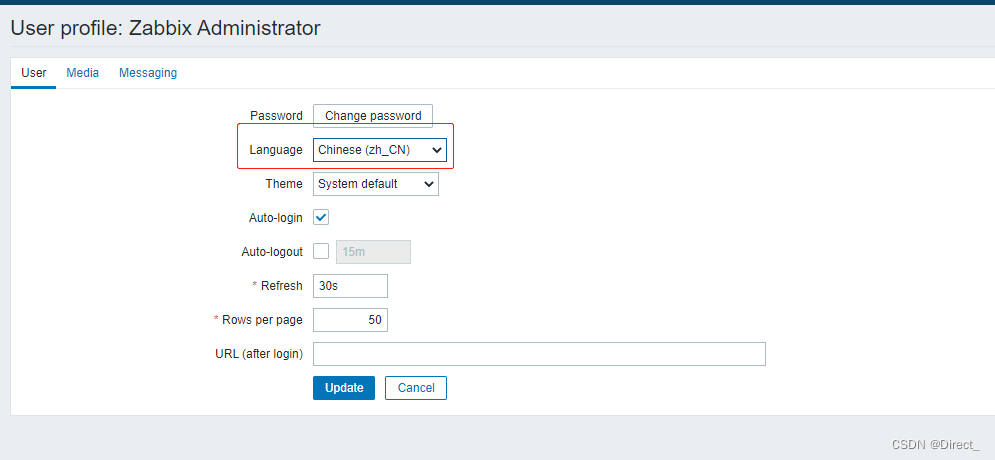
10.修改为中文

11.详细配置
**参考官网:**https://www.zabbix.com/documentation/4.0/zh/manual/quickstart/login

瓜分20万奖金 获得内推名额 丰厚实物奖励 易参与易上手
更多推荐


 0
0 0
0- 0


 已为社区贡献4条内容

所有评论(0)