
MyBatis入门
下载地址:https://github.com/mybatis/mybatis-3打开地址后选择 zip 文件下载添加mybatis配置文件新建 mybatis-config.xml ,名称自定义,内容直接复制将该文件放在 resources 文件下中创建mapper接口首先数据库中新建 t_user 表创建对应的实体类创建 UserMapper 接口创建MyBatis映射文件相关概念:ORM(O
MyBatis入门
MyBatis历史
- MyBatis最初是Apache的一个开源项目iBatis, 2010年6月这个项目由Apache Software Foundation迁移到了Google Code。随着开发团队转投Google Code旗下,iBatis3.x正式更名为MyBatis。代码于2013年11月迁移到Github
- iBatis一词来源于“internet”和“abatis”的组合,是一个基于Java的持久层框架。iBatis提供的持久层框架包括SQL Maps和Data Access Objects(DAO)
MyBatis特性
- MyBatis 是支持定制化 SQL、存储过程以及高级映射的优秀的持久层框架
- MyBatis 避免了几乎所有的 JDBC 代码和手动设置参数以及获取结果集
- MyBatis可以使用简单的XML或注解用于配置和原始映射,将接口和Java的POJO(Plain Old Java Objects,普通的Java对象)映射成数据库中的记录
- MyBatis 是一个 半自动的ORM(Object Relation Mapping)框架
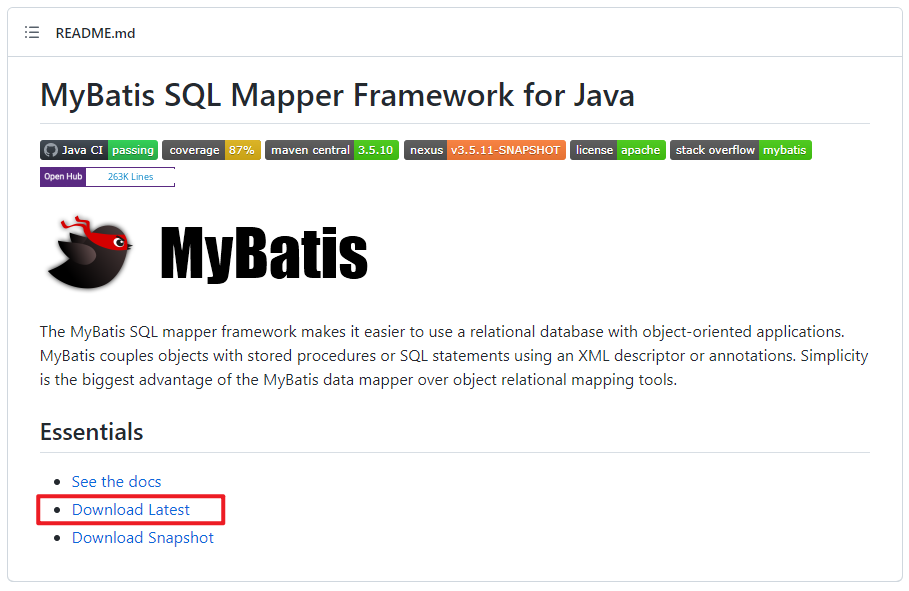
MyBatis下载
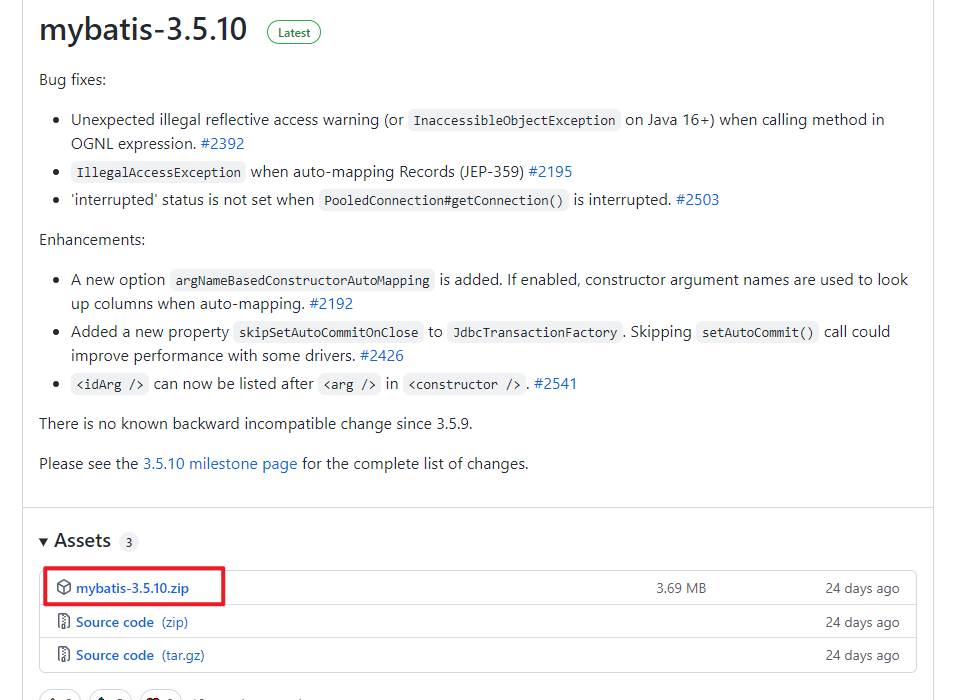
下载地址:https://github.com/mybatis/mybatis-3
打开地址后选择 zip 文件下载
和其它持久化层技术对比
- JDBC
- SQL 夹杂在Java代码中耦合度高,导致硬编码内伤
- 维护不易且实际开发需求中 SQL 有变化,频繁修改的情况多见
- 代码冗长,开发效率低
- Hibernate 和 JPA
- 操作简便,开发效率高
- 程序中的长难复杂 SQL 需要绕过框架
- 内部自动生产的 SQL,不容易做特殊优化
- 基于全映射的全自动框架,大量字段的 POJO 进行部分映射时比较困难。
- 反射操作太多,导致数据库性能下降
- MyBatis
- 轻量级,性能出色
- SQL 和 Java 编码分开,功能边界清晰。Java代码专注业务、SQL语句专注数据
- 开发效率稍逊于HIbernate,但是完全能够接受
搭建MyBatis
创建maven工程
<dependencies>
	<!-- Mybatis核心 -->
	<dependency>
		<groupId>org.mybatis</groupId>
		<artifactId>mybatis</artifactId>
		<version>3.5.7</version>
	</dependency>
	<!-- junit测试 -->
	<dependency>
		<groupId>junit</groupId>
		<artifactId>junit</artifactId>
		<version>4.12</version>
		<scope>test</scope>
	</dependency>
	<!-- MySQL驱动 -->
	<dependency>
        <groupId>mysql</groupId>
        <artifactId>mysql-connector-java</artifactId>
        <version>8.0.29</version>
    </dependency>
    <!--log日志-->
    <dependency>
        <groupId>log4j</groupId>
        <artifactId>log4j</artifactId>
        <version>1.2.17</version>
    </dependency>
</dependencies>
添加mybatis配置文件
新建 mybatis-config.xml ,名称自定义,内容直接复制
将该文件放在 resources 文件下中
<?xml version="1.0" encoding="UTF-8" ?>
<!DOCTYPE configuration
        PUBLIC "-//mybatis.org//DTD Config 3.0//EN"
        "http://mybatis.org/dtd/mybatis-3-config.dtd">
<configuration>
    <!--设置连接数据库的环境-->
    <environments default="development">
        <environment id="development">
            <transactionManager type="JDBC"/>
            <dataSource type="POOLED">
                <property name="driver" value="com.mysql.cj.jdbc.Driver"/>
                <property name="url" value="jdbc:mysql://localhost:3306/mybatis"/>
                <property name="username" value="root"/>
                <property name="password" value="abc123"/>
            </dataSource>
        </environment>
    </environments>
    <!--引入映射文件-->
    <mappers>
        <mapper resource="mappers/UserMapper.xml"/>
    </mappers>
</configuration>
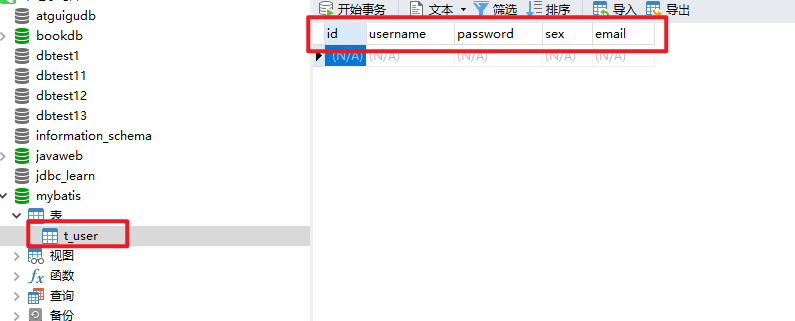
创建mapper接口
首先数据库中新建 t_user 表
创建对应的实体类
package com.szx.mybatis.pojo;

/**
 * @author songzx
 * @create 2022-06-17 16:30
 */
public class User {
    Integer id;
    String username;
    String password;
    String sex;
    String email;

    public User() {
    }

    public User(Integer id, String username, String password, String sex, String email) {
        this.id = id;
        this.username = username;
        this.password = password;
        this.sex = sex;
        this.email = email;
    }

    public Integer getId() {
        return id;
    }

    public void setId(Integer id) {
        this.id = id;
    }

    public String getUsername() {
        return username;
    }

    public void setUsername(String username) {
        this.username = username;
    }

    public String getPassword() {
        return password;
    }

    public void setPassword(String password) {
        this.password = password;
    }

    public String getSex() {
        return sex;
    }

    public void setSex(String sex) {
        this.sex = sex;
    }

    public String getEmail() {
        return email;
    }

    public void setEmail(String email) {
        this.email = email;
    }

    @Override
    public String toString() {
        return "User{" +
                "id=" + id +
                ", username='" + username + '\'' +
                ", password='" + password + '\'' +
                ", sex='" + sex + '\'' +
                ", email='" + email + '\'' +
                '}';
    }
}
创建 UserMapper 接口
package com.szx.mybatis.mapper;

/**
 * @author songzx
 * @create 2022-06-17 16:31
 */
public interface UserMapper {

}
创建MyBatis映射文件
- 相关概念:ORM(Object Relationship Mapping)对象关系映射。
- 对象:Java的实体类对象
- 关系:关系型数据库
- 映射:二者之间的对应关系
| Java概念 | 数据库概念 |
|---|---|
| 类 | 表 |
| 属性 | 字段/列 |
| 对象 | 记录/行 |
- 映射文件的命名规则
- 表所对应的实体类的类名+Mapper.xml
- 例如:表t_user,映射的实体类为User,所对应的映射文件为UserMapper.xml
- 因此一个映射文件对应一个实体类,对应一张表的操作
- MyBatis映射文件用于编写SQL,访问以及操作表中的数据
- MyBatis映射文件存放的位置是src/main/resources/mappers目录下
- MyBatis中可以面向接口操作数据,要保证两个一致
- mapper接口的全类名和映射文件的命名空间(namespace)保持一致
- mapper接口中方法的方法名和映射文件中编写SQL的标签的id属性保持一致
UserMapper.xml 配置文件添加代码如下
<?xml version="1.0" encoding="UTF-8" ?>
<!DOCTYPE mapper
        PUBLIC "-//mybatis.org//DTD Mapper 3.0//EN"
        "http://mybatis.org/dtd/mybatis-3-mapper.dtd">
<mapper namespace="com.szx.mybatis.mapper.UserMapper">

    <!--int insertUser();-->
    <!--新增用户方法-->
    <insert id="insertUser">
        insert into t_user values(null,'张三','123','女','zhagnsan@123.com')
    </insert>
</mapper>
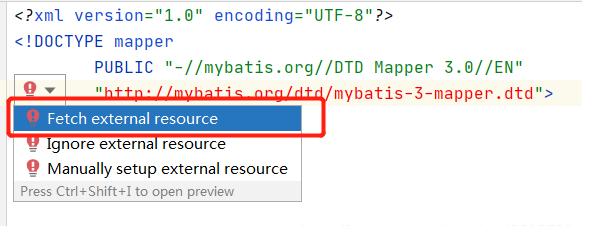
解决http地址飘红问题
测试新增方法
package com.szx.test;
import com.szx.mybatis.mapper.UserMapper;
import org.apache.ibatis.io.Resources;
import org.apache.ibatis.session.SqlSession;
import org.apache.ibatis.session.SqlSessionFactory;
import org.apache.ibatis.session.SqlSessionFactoryBuilder;
import org.junit.Test;
import java.io.IOException;
import java.io.Reader;
/**
* @author songzx
* @create 2022-06-17 20:23
*/
public class UserTest {
@Test
public void testInsert() throws IOException {
// 加载核心配置文件
Reader is = Resources.getResourceAsReader("mybatis-config.xml");
// 获取SqlSessionFactoryBuilder
SqlSessionFactoryBuilder sqlSessionFactoryBuilder = new SqlSessionFactoryBuilder();
// 获取sqlSessionFactory
SqlSessionFactory sqlSessionFactory = sqlSessionFactoryBuilder.build(is);
// 获取SQLSession
SqlSession sqlSession = sqlSessionFactory.openSession();
// 获取userMapper
UserMapper userMapper = sqlSession.getMapper(UserMapper.class);
// 测试功能
int i = userMapper.insertUser();
// 提交
sqlSession.commit();
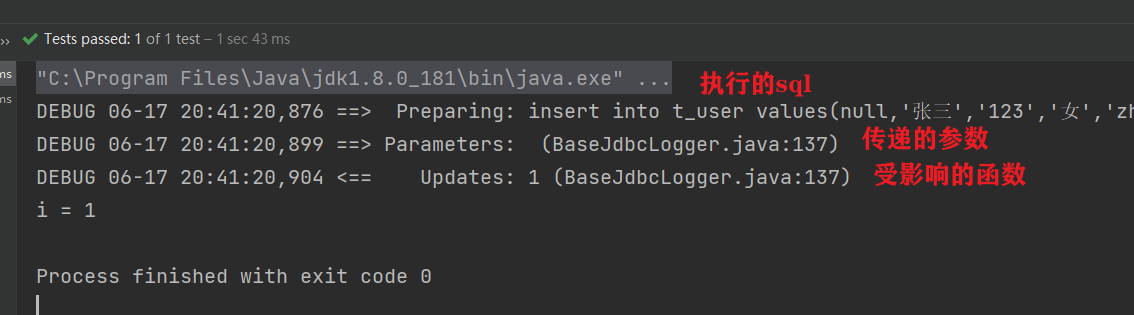
System.out.println("i = " + i);
}
}
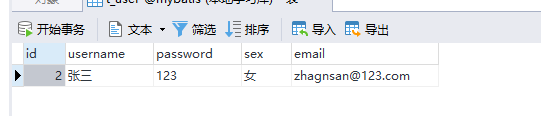
运行测试方法后数据库中成功插入一条数据
设置自动提交和添加日志打印
上面的代码中需要我们手动调用 sqlSession.commit(); 方法来提交。可以给 openSession 传入 true 表示设置自动提交
// 获取SQLSession
SqlSession sqlSession = sqlSessionFactory.openSession(true);
添加日志打印信息,首先添加依赖
<!-- log4j日志 -->
<dependency>
    <groupId>log4j</groupId>
    <artifactId>log4j</artifactId>
    <version>1.2.17</version>
</dependency>
加入log4j的配置文件
- log4j的配置文件名为log4j.xml,存放的位置是src/main/resources目录下
- 日志的级别:FATAL(致命)>ERROR(错误)>WARN(警告)>INFO(信息)>DEBUG(调试) 从左到右打印的内容越来越详细
<?xml version="1.0" encoding="UTF-8" ?>
<!DOCTYPE log4j:configuration SYSTEM "log4j.dtd">
<log4j:configuration xmlns:log4j="http://jakarta.apache.org/log4j/">
    <appender name="STDOUT" class="org.apache.log4j.ConsoleAppender">
        <param name="Encoding" value="UTF-8" />
        <layout class="org.apache.log4j.PatternLayout">
            <param name="ConversionPattern" value="%-5p %d{MM-dd HH:mm:ss,SSS} %m (%F:%L) \n" />
        </layout>
    </appender>
    <logger name="java.sql">
        <level value="debug" />
    </logger>
    <logger name="org.apache.ibatis">
        <level value="info" />
    </logger>
    <root>
        <level value="debug" />
        <appender-ref ref="STDOUT" />
    </root>
</log4j:configuration>
添加日志后的方法执行输出
测试更新和删除功能
UserMapper 接口中增加更新和删除两个接口
public interface UserMapper {
    // 添加一个增加user的方法
    int insertUser();

    // 更新方法
    void updateUser();

    // 删除方法
    void deleteUser();
}
UserMapper.xml 中添加两个方法的映射
<!--void updateUser();-->
<update id="updateUser">
    update t_user set sex = "男" where id = 4
</update>

<!--void deleteUser();-->
<delete id="deleteUser">
    delete from t_user where id = 4
</delete>
测试调用
@Test
public void testUpdate() throws IOException {
    Reader is = Resources.getResourceAsReader("mybatis-config.xml");
    SqlSessionFactoryBuilder sqlSessionFactoryBuilder = new SqlSessionFactoryBuilder();
    SqlSessionFactory sqlSessionFactory = sqlSessionFactoryBuilder.build(is);
    SqlSession sqlSession = sqlSessionFactory.openSession(true);
    UserMapper mapper = sqlSession.getMapper(UserMapper.class);
    //mapper.updateUser();
    mapper.deleteUser();
}
使用MyBatis实现查询功能
单条查询
添加查询方法
// 查询单条数据
User getUserById();
添加查询映射,注意需要添加 resultType 来告诉 MyBatis 返回对应的类
<!--User getUserById();-->
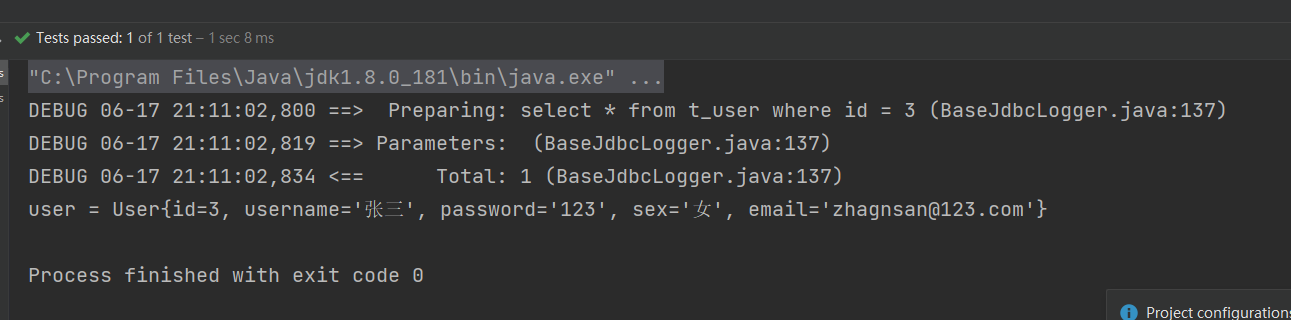
<select id="getUserById" resultType="com.szx.mybatis.pojo.User">
select * from t_user where id = 3
</select>
查询返回结果
多条查询
添加返回userList的方法
// 查询所有的user
List<User> getAllUser();
添加方法映射
<!--List<User> getAllUser();-->
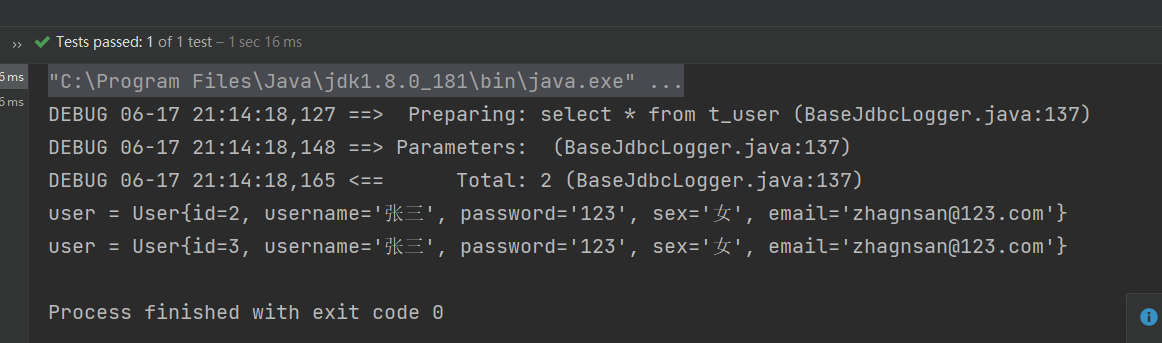
<select id="getAllUser" resultType="com.szx.mybatis.pojo.User">
select * from t_user
</select>
添加方法调用
@Test
public void testUpdate() throws IOException {
    Reader is = Resources.getResourceAsReader("mybatis-config.xml");
    SqlSessionFactoryBuilder sqlSessionFactoryBuilder = new SqlSessionFactoryBuilder();
    SqlSessionFactory sqlSessionFactory = sqlSessionFactoryBuilder.build(is);
    SqlSession sqlSession = sqlSessionFactory.openSession(true);
    UserMapper mapper = sqlSession.getMapper(UserMapper.class);
    //mapper.updateUser();
    //mapper.deleteUser();
    //User user = mapper.getUserById();
    //System.out.println("user = " + user);
    List<User> allUser = mapper.getAllUser();
    allUser.forEach(user-> System.out.println("user = " + user));
}
查询返回结果
配置文件详解
<?xml version="1.0" encoding="UTF-8" ?>
<!DOCTYPE configuration
        PUBLIC "-//mybatis.org//DTD Config 3.0//EN"
        "http://mybatis.org/dtd/mybatis-3-config.dtd">
<configuration>

    <!--
        配置文件的摆放顺序一定要按照这个顺序
        properties?,settings?,typeAliases?,typeHandlers?,objectFactory?,
        objectWrapperFactory?,reflectorFactory?,plugins?,environments?,
        databaseIdProvider?,mappers?
    -->

    <!--引入jdbc.properties-->
    <properties resource="jdbc.properties"></properties>

    <!--设置某个具体的类型的别名-->
    <typeAliases>
        <!--
        typeAlias:设置某个具体的类型的别名
        属性:
        type:需要设置别名的类型的全类名
        alias:设置此类型的别名,且别名不区分大小写。若不设置此属性,该类型拥有默认的别名,即类名
        -->
        <!--<typeAlias type="com.szx.mybatis.pojo.User"></typeAlias>-->
        <!--<typeAlias type="com.szx.mybatis.pojo.User" alias="user">
        </typeAlias>-->
        <!--以包为单位,设置改包下所有的类型都拥有默认的别名,即类名且不区分大小写-->
        <package name="com.szx.mybatis.pojo"/>
    </typeAliases>


    <!--设置连接数据库的环境-->
    <!--
        environments 设置多个数据库环境
            default 默认使用的数据库环境
    -->
    <environments default="development">
        <!--id 设置环境唯一标识-->
        <environment id="development">
            <!--
                transactionManager 设置事务管理方式
                属性:
               type:设置事务管理方式,type="JDBC|MANAGED"
               type="JDBC":设置当前环境的事务管理都必须手动处理
               type="MANAGED":设置事务被管理,例如spring中的AOP
            -->
            <transactionManager type="JDBC"/>
            <!--
               dataSource:设置数据源
               属性:
                   type:设置数据源的类型,type="POOLED|UNPOOLED|JNDI"
                   type="POOLED":使用数据库连接池,即会将创建的连接进行缓存,下次使用可以从缓存中直接获取,不需要重新创建
                   type="UNPOOLED":不使用数据库连接池,即每次使用连接都需要重新创建
                   type="JNDI":调用上下文中的数据源
             -->
            <dataSource type="POOLED">
                <!--设置驱动类的全类名-->
                <property name="driver" value="${jdbc.driver}"/>
                <!--设置连接数据库的连接地址-->
                <property name="url" value="${jdbc.url}"/>
                <!--设置连接数据库的用户名-->
                <property name="username" value="${jdbc.name}"/>
                <!--设置连接数据库的密码-->
                <property name="password" value="${jdbc.password}"/>
            </dataSource>
        </environment>
    </environments>
    <!--引入映射文件-->
    <mappers>
        <mapper resource="mappers/UserMapper.xml"/>
    </mappers>
</configuration>
配置文件之mappers
使用 MyBatis 开发时,一个数据库表对应一个pojo实体类,一个实体类对应一个 mapper 接口,一个mapper接口又对应一个 mapper.xml
所以我们可能会配置对个 mapper,为了避免出现多哥 mapper 的问题,我们也可以使用 package 来导入一个包下面的所有 mapper
在 resources 下创建包的方式:使用斜杠作为分隔符

然后将原来的 UserMapper.xml 文件放在这个包下
修改 mybatis-config.xml 核心配置文件的 mappers
<!--引入映射文件-->
<mappers>
    <!--<mapper resource="mappers/UserMapper.xml"/>-->

    <!--
        使用package导入包下面所有的mapper注意事项
        1.mapper配置文件所在的包要和mapper接口所在包名称要一致
        2.mapper的名称要一致,也就是说接口的名称为 UserMapper,则配置文件的名称也要为 UserMapper.xml
    -->
    <package name="com.szx.mybatis.mapper"/>
</mappers>
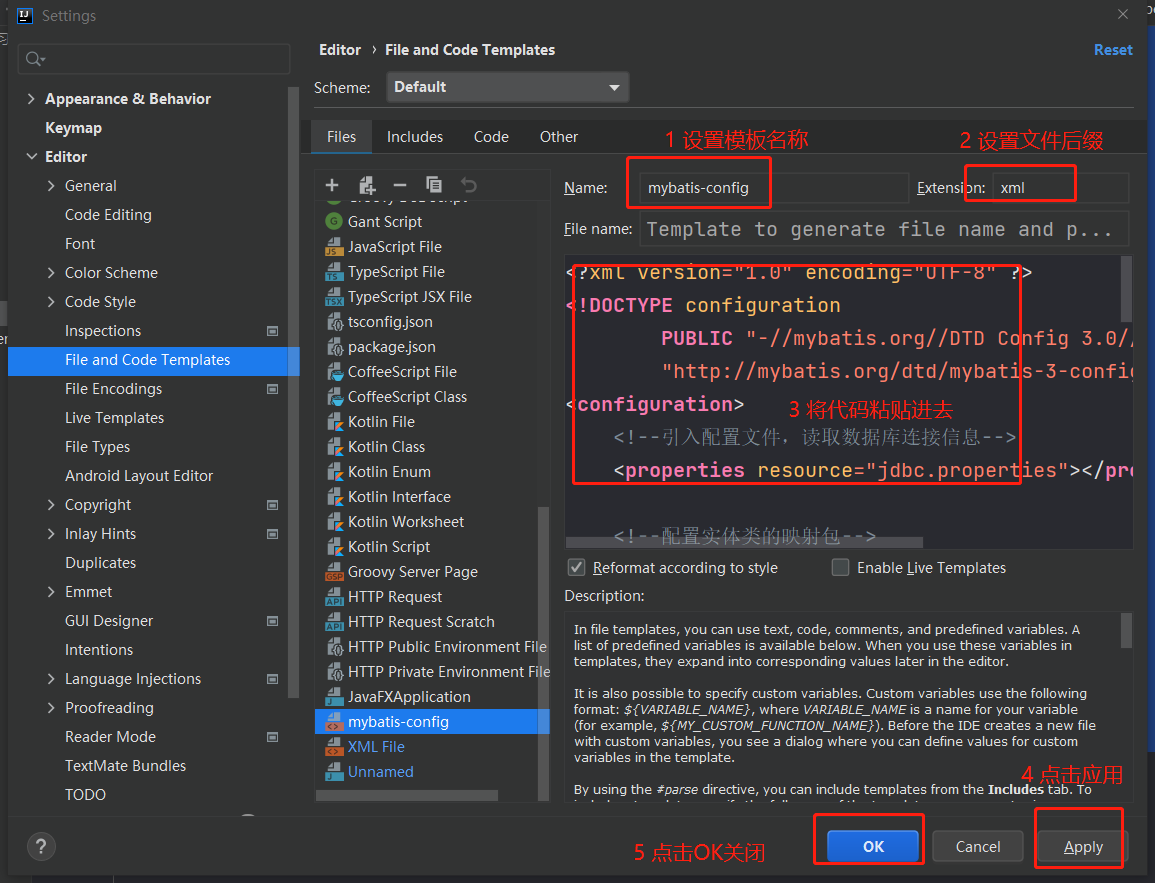
设置核心文件配置模板
首先编写基本配置代码
<?xml version="1.0" encoding="UTF-8" ?>
<!DOCTYPE configuration
        PUBLIC "-//mybatis.org//DTD Config 3.0//EN"
        "http://mybatis.org/dtd/mybatis-3-config.dtd">
<configuration>
    <!--引入配置文件,读取数据库连接信息-->
    <properties resource="jdbc.properties"></properties>

    <!--配置实体类的映射包-->
    <typeAliases>
        <package name="com.szx.mybatis.pojo"/>
    </typeAliases>

    <!--设置连接数据库的环境-->
    <environments default="development">
        <environment id="development">
            <transactionManager type="JDBC"/>
            <dataSource type="POOLED">
                <!--设置驱动类的全类名-->
                <property name="driver" value="${jdbc.driver}"/>
                <!--设置连接数据库的连接地址-->
                <property name="url" value="${jdbc.url}"/>
                <!--设置连接数据库的用户名-->
                <property name="username" value="${jdbc.name}"/>
                <!--设置连接数据库的密码-->
                <property name="password" value="${jdbc.password}"/>
            </dataSource>
        </environment>
    </environments>

    <!--引入映射文件-->
    <mappers>
        <package name="com.szx.mybatis.mapper"/>
    </mappers>
</configuration>
然后点击 File -> Settings
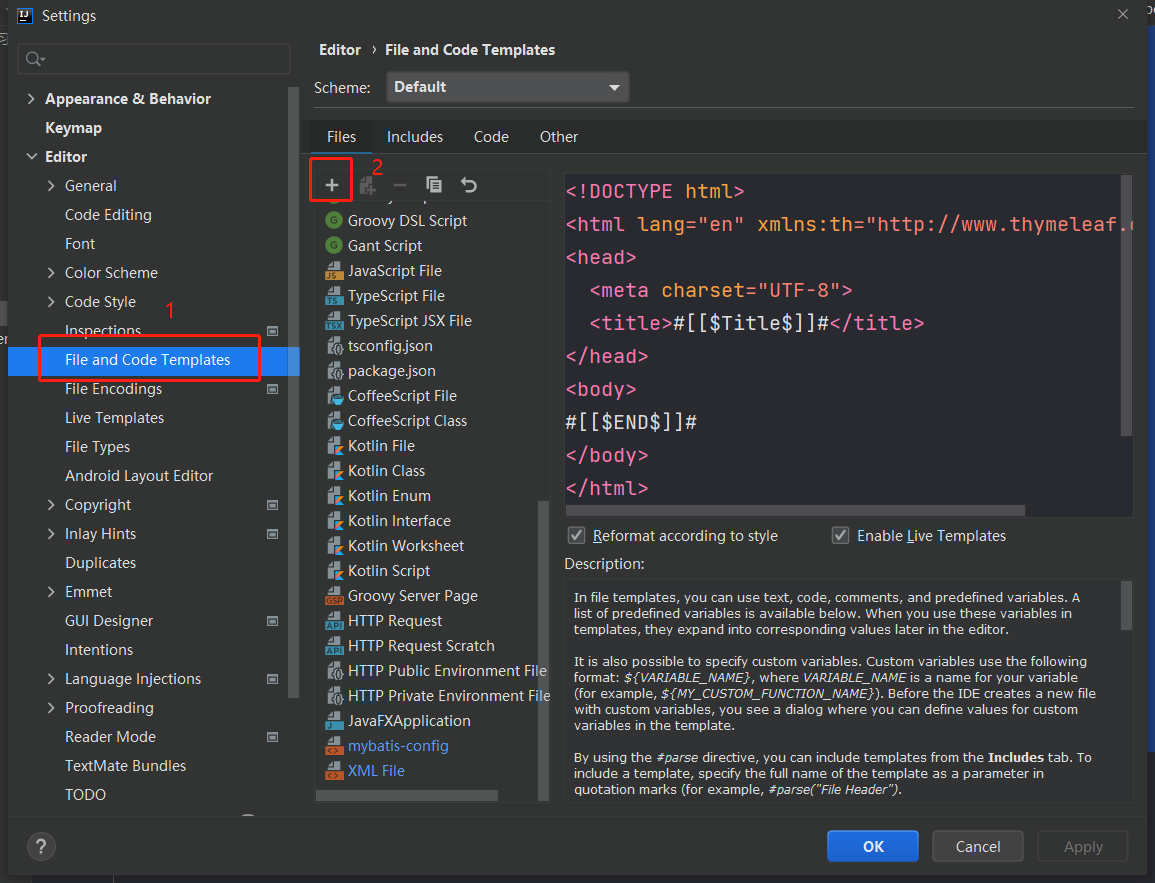
然后新建文件时就可以看到我们创建的这个模板文件

设置mapper模板
模板代码
<?xml version="1.0" encoding="UTF-8" ?>
<!DOCTYPE mapper
        PUBLIC "-//mybatis.org//DTD Mapper 3.0//EN"
        "http://mybatis.org/dtd/mybatis-3-mapper.dtd">
<mapper namespace="com.szx.mybatis.mapper.UserMapper">


</mapper>
封装SqlSessionUtils
package com.szx.mybatis.utils;

import org.apache.ibatis.io.Resources;
import org.apache.ibatis.session.SqlSession;
import org.apache.ibatis.session.SqlSessionFactory;
import org.apache.ibatis.session.SqlSessionFactoryBuilder;

import java.io.IOException;
import java.io.Reader;

/**
 * @author songzx
 * @create 2022-06-19 11:26
 */
public class SqlSessionUtils {

    /**
     * 封装getSqlSession方法
     * @return
     */
    public static SqlSession getSqlSession(){
        SqlSession sqlSession = null;
        try {
            Reader is = Resources.getResourceAsReader("mybatis-config.xml");
            SqlSessionFactory sqlSessionFactory = new SqlSessionFactoryBuilder().build(is);
            sqlSession = sqlSessionFactory.openSession(true);
        } catch (IOException e) {
            e.printStackTrace();
        }
        return sqlSession;
    }
}
使用方法
SqlSession sqlSession = SqlSessionUtils.getSqlSession();
UserMapper mapper = sqlSession.getMapper(UserMapper.class);
MyBatis获取参数值
获取参数值的两种方式
${}本质是字符串拼接#{}本质是占位符
单个字面量形式的参数获取
增加接口,根据名称查询用户
public interface UserMapper {
    // 根据名称查询user
    User getUserByName(String username);
}
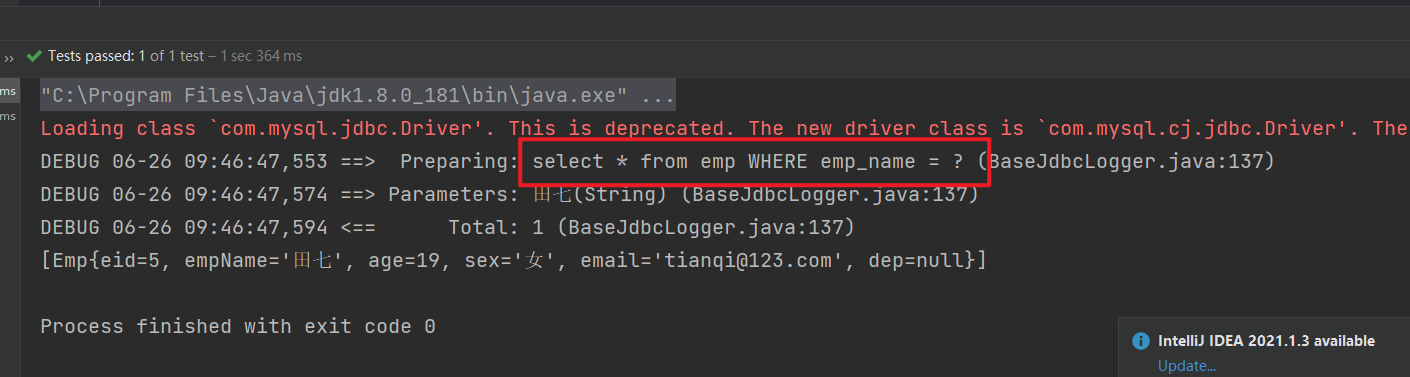
添加接口映射,首先使用 #{username} 的方式来获取参数
<!--User getUserByName(String username);-->
<select id="getUserByName" resultType="User">
    select * from t_user where username = #{username}
</select>
日志打印的 SQL 语句
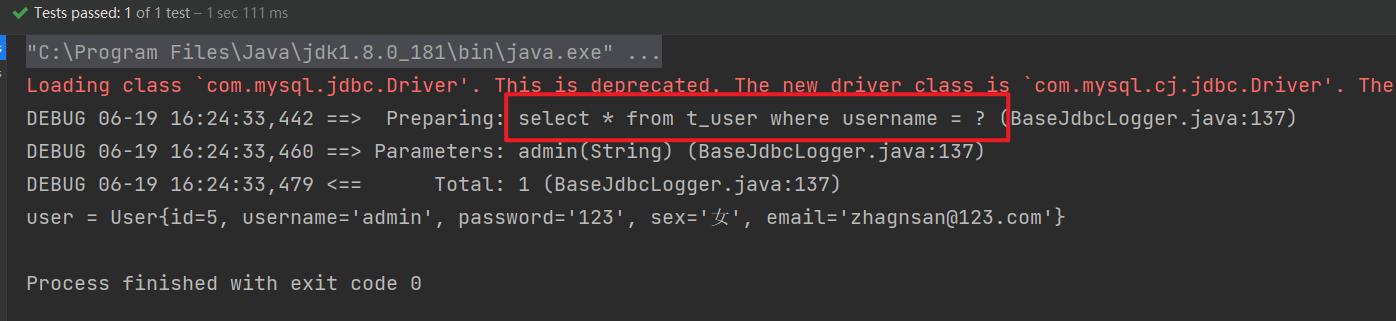
可以看到直接是通过问号占位符的方式
然后使用 ${username} 的方式来获取参数
<!--User getUserByName(String username);-->
<select id="getUserByName" resultType="User">
    select * from t_user where username = ${username}
</select>
执行测试方式会出现如下错误
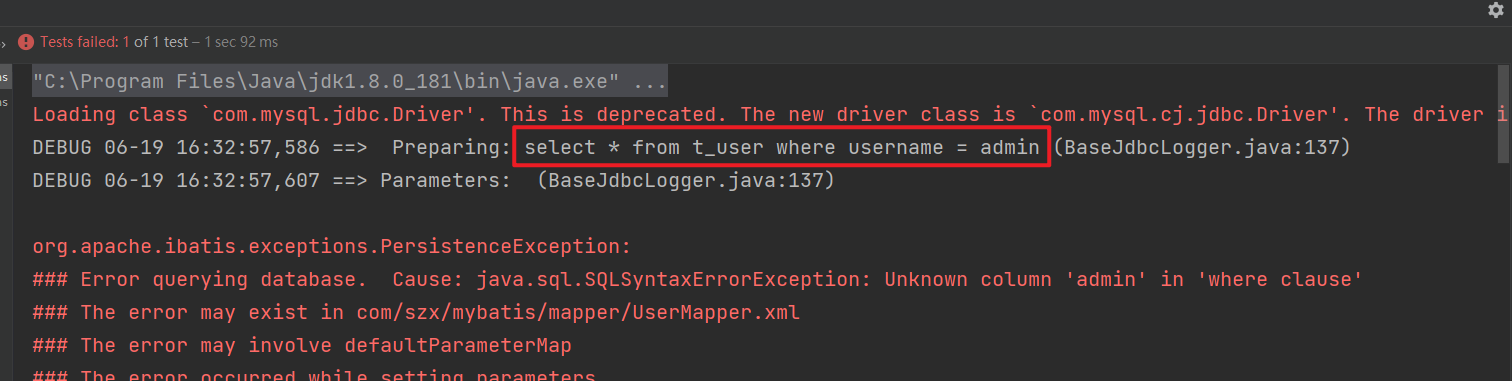
观察SQL语句,发现admin参数没有使用单引号包裹,所以导致错误产生,只需要在${username}两边使用单引号包裹即可
修改后再次调用测试方式

总结:
- 不管使用
#{}或者${}方式接收参数,大括号中的名称可以自定义,但是为了方便,我们通常使用参数名称作为名称 - 使用
${}方式接收参数时需要注意单引号问题
多个参数获取
添加验证登录的方法,传递username和password来获取用户信息
// 验证登录
User checkLogin(String username,String password);
编写映射
<!--User checkLogin(String username,String password);-->
<select id="checkLogin" resultType="User">
    select * from t_user where username = #{arg0} and password = #{arg1}
</select>
在MyBatis中,当sql语句接收多个参数时,会把参数放在map集合中,通过两种方式来获取参数
- 通过使用 arg0,arg1,…为键,参数为值来获取
- 通过使用 param0,param1,… 为键,参数为值来获取
调用测试方式查看返回
map集合型的参数
定义接口方法
// map集合型的参数
User checkLoginByMap(Map<String,Object> map);
编写映射文件,此时SQL语句中占位符的名称要和我们传递捡来的map中的键名称保持一致
<!--User checkLoginByMap(Map<String,Object> map);-->
<select id="checkLoginByMap" resultType="User">
    select * from t_user where username = #{username} and password = #{password}
</select>
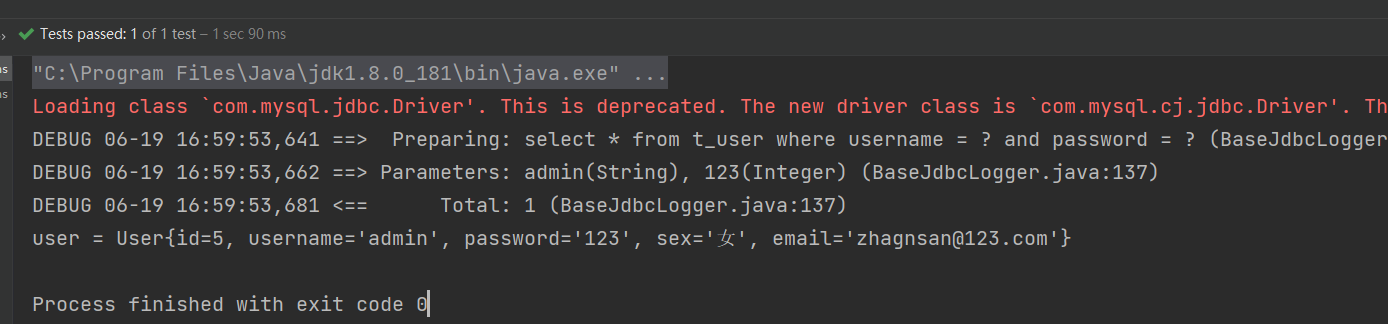
测试方法
@Test
public void testUser() {
    SqlSession sqlSession = SqlSessionUtils.getSqlSession();
    UserMapper mapper = sqlSession.getMapper(UserMapper.class);
    HashMap<String, Object> map = new HashMap<>();
    map.put("username","admin");
    map.put("password",123);
    User user = mapper.checkLoginByMap(map);
    System.out.println("user = " + user);
}
运行结果
实体类类型的参数
如果参数是一个实体类,则通过使用实体类中属性名称来获取参数
添加新增用户接口方法
// 添加用户信息
int insertUser(User user);
添加映射文件
<!--int insertUser(User user);-->
<insert id="insertUser">
    insert into t_user values (null,#{username},#{password},#{sex},#{email})
</insert>
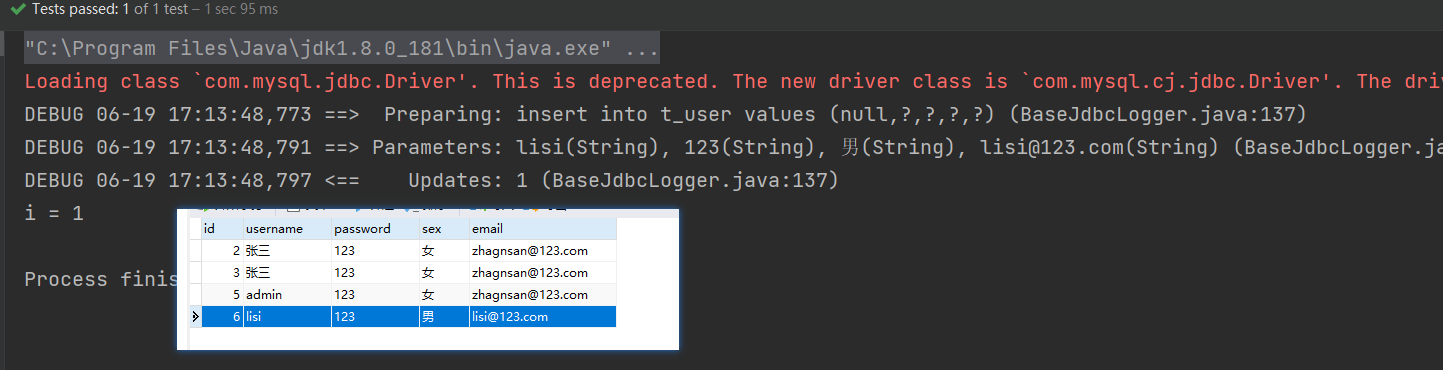
编写测试方式
@Test
public void testUser() {
    SqlSession sqlSession = SqlSessionUtils.getSqlSession();
    UserMapper mapper = sqlSession.getMapper(UserMapper.class);
    User user = new User(null, "lisi", "123", "男", "lisi@123.com");
    int i = mapper.insertUser(user);
    System.out.println("i = " + i);
}
运行测试方式查看执行效果
命名参数
使用 @Param 注解自定义 MyBatis 中 map 集合的键名称
添加接口
// 命名参数
User getUserByparam(@Param("username") String username, @Param("password") String password);
添加映射文件,此时SQL中的参数名称只能是我们param注解中的名称
<!--User getUserByparam(@Param("username") String username, @Param("password") String password);-->
<select id="getUserByparam" resultType="User">
    select * from t_user where username = #{username} and password = #{password}
</select>
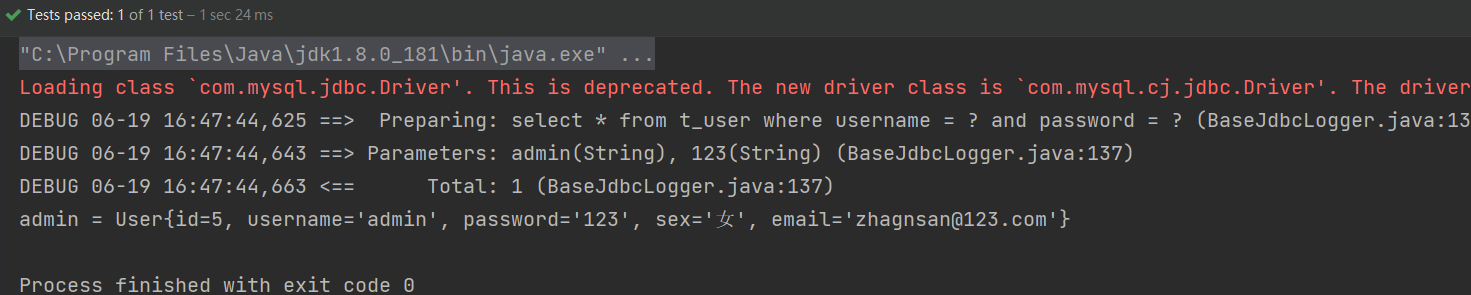
调用测试方法
User lisi = mapper.getUserByparam("lisi", "123");
System.out.println("lisi = " + lisi);
运行结果

Mybatis中的各种查询情况
查询单条信息和多条信息
当查询单条信息时:
- 可以使用一个实体类来接收
- 可以使用一个List集合来接收
当查询多条信息时:
- 可以使用List接收
- 注意:不能使用实体类接收,否则会报错
查询单行单列值
例如查询表中数据总数
首先添加接口
Integer getUserTotal();
添加接口映射文件
<!--Integer getUserTotal();-->
<select id="getUserTotal" resultType="integer">
    select count(*) from t_user
</select>
编写测试方法
@Test
public void test1(){
    UserMapper mapper = SqlSessionUtil.getSqlSession().getMapper(UserMapper.class);
    Integer userTotal = mapper.getUserTotal();
    System.out.println("userTotal = " + userTotal);
}
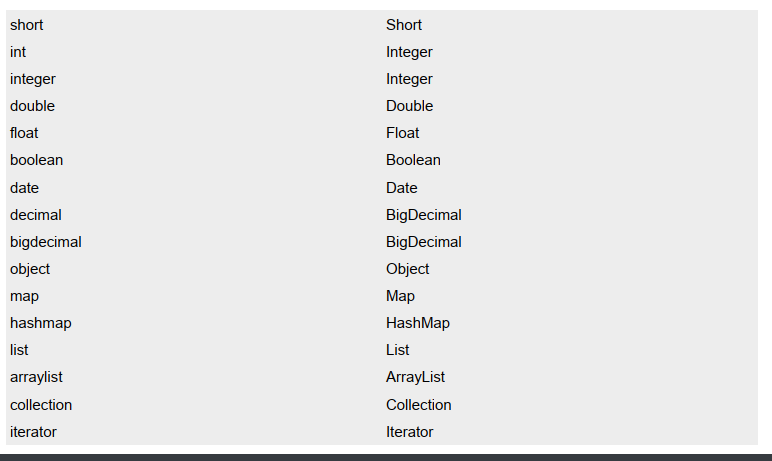
这里我们在映射文件中写的resultType返回类型是integer,但是我们并没有写这个类,但是仍然成功的返回了integer类型,这是因为在 mybatis 中有默认的类型别名,更多的类型别名如下:

查询数据为一个map集合
添加接口方法
HashMap<String,Object> getUserByIdToMap(@Param("id") Integer id);
添加接口映射文件
<!--HashMap<String,Object> getUserByIdToMap(@Param("id") Integer id);-->
<select id="getUserByIdToMap" resultType="map">
    select * from t_user where id = #{id}
</select>
添加测试方法
@Test
public void test2(){
    UserMapper mapper = SqlSessionUtil.getSqlSession().getMapper(UserMapper.class);
    HashMap<String, Object> usermap = mapper.getUserByIdToMap(3);
    System.out.println(usermap);
}
调用后接口返回为一个map集合
[外链图片转存失败,源站可能有防盗链机制,建议将图片保存下来直接上传(img-lOVH30SQ-1656343355268)(https://cdn.jsdelivr.net/gh/SongZX0106/pictures/images/Snipaste_2022-06-20_22-29-18.png)]
查询返回多个map集合
例如我们把查询到的所有用户都放在map集合中
方式一:List<Map<String,Object>>
添加接口方法
List<Map<String,Object>> listMap();
添加接口映射文件
<!--List<Map<String,Object>> listMap();-->
<select id="listMap" resultType="map">
    select * from t_user
</select>
测试方法返回
@Test
public void test3(){
    UserMapper mapper = SqlSessionUtil.getSqlSession().getMapper(UserMapper.class);
    List<Map<String, Object>> maps = mapper.listMap();
    System.out.println(maps);
}
运行结果
[{password=123, sex=男, id=3, email=admin@123.com, username=admin}, {password=123, sex=女, id=4, email=lisi@123.com, username=lisi}]
方式二:使用 @MapKey("id") 注解将所有内容放在一个map集合中
MapKey("id") 注解中的id用来当做键名,id的值作为键值。所以这就要求作为键名的字段值不能重复
添加接口方法
@MapKey("id")
Map<String,Object> mapKey();
添加接口映射文件
<!--List<Map<String,Object>> mapKey();-->
<select id="mapKey" resultType="map">
    select * from t_user
</select>
测试方法
@Test
public void test4(){
    UserMapper mapper = SqlSessionUtil.getSqlSession().getMapper(UserMapper.class);
    Map<String, Object> maps = mapper.mapKey();
    System.out.println(maps);
}
返回的数据格式
{3={password=123, sex=男, id=3, email=admin@123.com, username=admin}, 4={password=123, sex=女, id=4, email=lisi@123.com, username=lisi}}
Mybatis处理特殊SQL
处理模糊查询
添加查询接口
// 模糊查询用户
List<User> searchUser(@Param("username") String username);
添加接口映射文件,其中方式二用的最多
<!--List<User> searchUser(@Param("username") String username);-->
<select id="searchUser" resultType="User">
    /*方式一*/
    /*select * from t_user where username like '%${username}%'*/

    /*方式二*/
    select * from t_user where username like "%"#{username}"%"
</select>
处理批量删除
添加查询接口
// 处理批量删除
int deleteAllUser(@Param("ids") String ids);
添加接口映射文件,在批量删除的时候不能使用 #{},因为使用了#{} 会在两边添加单引号,导致sql解析失败
<!--int deleteAllUser(@Param("ids") String ids);-->
<delete id="deleteAllUser">
    delete from t_user where id in (${ids})
</delete>
编写测试方法
@Test
public void test1(){
    UserMapper mapper = SqlSessionUtil.getSqlSession().getMapper(UserMapper.class);
    int i = mapper.deleteAllUser("1,2,3");
    System.out.println(i);
}
动态设置表名
添加查询接口
// 根据表名获取数据
List<User> getUserByTable(@Param("tabname") String tablename);
添加接口映射文件,SQL语句中的表名不能带单引号,所以这里也只能使用 ${} 来获取表名
<!--User getUserByTable(@Param("tabname") String tablename);-->
<select id="getUserByTable" resultType="User">
    select * from ${tabname}
</select>
编写测试方法
@Test
public void test2(){
    UserMapper mapper = SqlSessionUtil.getSqlSession().getMapper(UserMapper.class);
    List<User> t_user = mapper.getUserByTable("t_user");
    System.out.println("t_user = " + t_user);
}
添加功能获取主键
添加接口
// 添加功能获取主键
int addUserGetId(User user);
添加接口映射文件
<!--
    int addUserGetId(User user);
    useGeneratedKeys 标识当前的SQL中有自增主键
    keyProperty 将添加数据后的主键值赋值给传递进来的对象id属性
-->
<insert id="addUserGetId" useGeneratedKeys="true" keyProperty="id">
    insert into t_user values (null ,#{username},#{password},#{sex},#{email})
</insert>
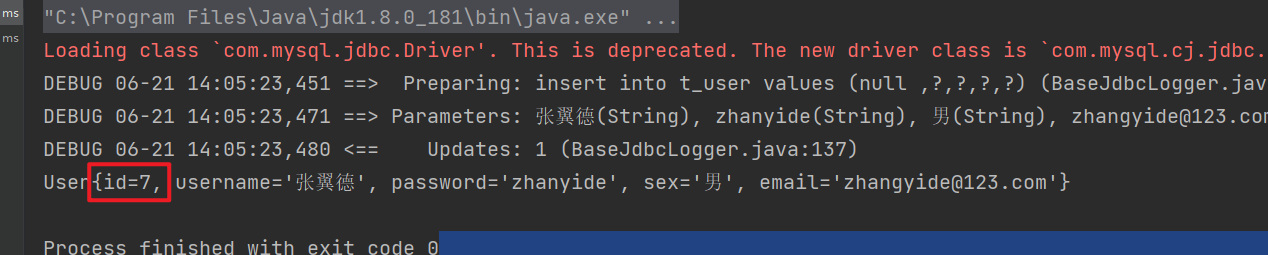
编写测试方法
@Test
public void test3(){
    UserMapper mapper = SqlSessionUtil.getSqlSession().getMapper(UserMapper.class);
    // 添加之前的user的id值为null
    User user = new User(null, "张翼德", "zhanyide", "男", "zhangyide@123.com");
    // 调用添加方法
    mapper.addUserGetId(user);
    // 打印user对象信息,id的值为新增后的主键值
    System.out.println(user);
}
运行结果
自定义映射resultMap
搭建Mybatis框架
首先新建数据库表
创建emp员工表
/*
 Navicat Premium Data Transfer

 Source Server         : 本地学习库
 Source Server Type    : MySQL
 Source Server Version : 80027
 Source Host           : localhost:3306
 Source Schema         : mybatis

 Target Server Type    : MySQL
 Target Server Version : 80027
 File Encoding         : 65001

 Date: 21/06/2022 15:01:28
*/

SET NAMES utf8mb4;
SET FOREIGN_KEY_CHECKS = 0;

-- ----------------------------
-- Table structure for emp
-- ----------------------------
DROP TABLE IF EXISTS `emp`;
CREATE TABLE `emp`  (
  `eid` int(0) NOT NULL AUTO_INCREMENT,
  `emp_name` varchar(20) CHARACTER SET utf8 COLLATE utf8_general_ci NULL DEFAULT NULL,
  `age` int(0) NULL DEFAULT NULL,
  `sex` char(1) CHARACTER SET utf8 COLLATE utf8_general_ci NULL DEFAULT NULL,
  `email` varchar(20) CHARACTER SET utf8 COLLATE utf8_general_ci NULL DEFAULT NULL,
  `did` int(0) NULL DEFAULT NULL,
  PRIMARY KEY (`eid`) USING BTREE
) ENGINE = InnoDB CHARACTER SET = utf8 COLLATE = utf8_general_ci ROW_FORMAT = Dynamic;

-- ----------------------------
-- Records of emp
-- ----------------------------
INSERT INTO `emp` VALUES (1, '张三', 15, '男', 'zhangsan@123.com', 1);
INSERT INTO `emp` VALUES (2, '李四', 18, '女', 'lisi@123com', 2);
INSERT INTO `emp` VALUES (3, '王五', 21, '男', 'wangwu@123.com', 3);
INSERT INTO `emp` VALUES (4, '赵六', 19, '男', 'zhaoliu@123.com', 1);
INSERT INTO `emp` VALUES (5, '田七', 19, '女', 'tianqi@123.com', 2);

SET FOREIGN_KEY_CHECKS = 1;

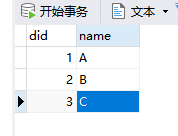
创建dep部门表
/*
 Navicat Premium Data Transfer

 Source Server         : 本地学习库
 Source Server Type    : MySQL
 Source Server Version : 80027
 Source Host           : localhost:3306
 Source Schema         : mybatis

 Target Server Type    : MySQL
 Target Server Version : 80027
 File Encoding         : 65001

 Date: 21/06/2022 15:03:34
*/

SET NAMES utf8mb4;
SET FOREIGN_KEY_CHECKS = 0;

-- ----------------------------
-- Table structure for dep
-- ----------------------------
DROP TABLE IF EXISTS `dep`;
CREATE TABLE `dep`  (
  `did` int(0) NOT NULL AUTO_INCREMENT,
  `name` varchar(20) CHARACTER SET utf8 COLLATE utf8_general_ci NULL DEFAULT NULL,
  PRIMARY KEY (`did`) USING BTREE
) ENGINE = InnoDB CHARACTER SET = utf8 COLLATE = utf8_general_ci ROW_FORMAT = Dynamic;

-- ----------------------------
-- Records of dep
-- ----------------------------
INSERT INTO `dep` VALUES (1, 'A');
INSERT INTO `dep` VALUES (2, 'B');
INSERT INTO `dep` VALUES (3, 'C');

SET FOREIGN_KEY_CHECKS = 1;
创建Emp映射类
package com.szx.mybatis.pojo;

/**
 * @author songzx
 * @create 2022-06-21 14:28
 */
public class Emp {
    Integer eid;
    String empName;
    Integer age;
    String sex;
    String email;
    Integer did;

    public Emp() {
    }

    public Emp(Integer eid, String empName, Integer age, String sex, String email, Integer did) {
        this.eid = eid;
        this.empName = empName;
        this.age = age;
        this.sex = sex;
        this.email = email;
        this.did = did;
    }

    public Integer getEid() {
        return eid;
    }

    public void setEid(Integer eid) {
        this.eid = eid;
    }

    public String getEmpName() {
        return empName;
    }

    public void setEmpName(String empName) {
        this.empName = empName;
    }

    public Integer getAge() {
        return age;
    }

    public void setAge(Integer age) {
        this.age = age;
    }

    public String getSex() {
        return sex;
    }

    public void setSex(String sex) {
        this.sex = sex;
    }

    public String getEmail() {
        return email;
    }

    public void setEmail(String email) {
        this.email = email;
    }

    public Integer getDid() {
        return did;
    }

    public void setDid(Integer did) {
        this.did = did;
    }

    @Override
    public String toString() {
        return "Emp{" +
                "eid=" + eid +
                ", empName='" + empName + '\'' +
                ", age=" + age +
                ", sex='" + sex + '\'' +
                ", email='" + email + '\'' +
                ", did=" + did +
                '}';
    }
}
创建Dep实体类
package com.szx.mybatis.pojo;

/**
 * @author songzx
 * @create 2022-06-21 14:32
 */
public class Dep {
    Integer did;
    String name;

    public Dep() {
    }

    public Dep(Integer did, String name) {
        this.did = did;
        this.name = name;
    }

    public Integer getDid() {
        return did;
    }

    public void setDid(Integer did) {
        this.did = did;
    }

    public String getName() {
        return name;
    }

    public void setName(String name) {
        this.name = name;
    }

    @Override
    public String toString() {
        return "Dep{" +
                "did=" + did +
                ", name='" + name + '\'' +
                '}';
    }
}
处理字段别名问题
在数据库中,列名如果是多个单词组成的,则单词之间用下划线的方式分隔。而对应的java实体类属性则要用驼峰命名。这种情况下会出现查询SQL语句后无法为别名赋值的问题
通过如下代码查看问题
添加查询所有员工的接口
// 获取所有的员工信息
List<Emp> getAllEmp();
添加映射文件
<!--List<Emp> getAllEmp();-->
<select id="getAllEmp" resultType="Emp">
    select * from emp;
</select>
编写测试方法
@Test
public void test1(){
empMapper mapper = SqlSessionUtil.getSqlSession().getMapper(empMapper.class);
List<Emp> allEmp = mapper.getAllEmp();
allEmp.forEach(emp -> System.out.println(emp));
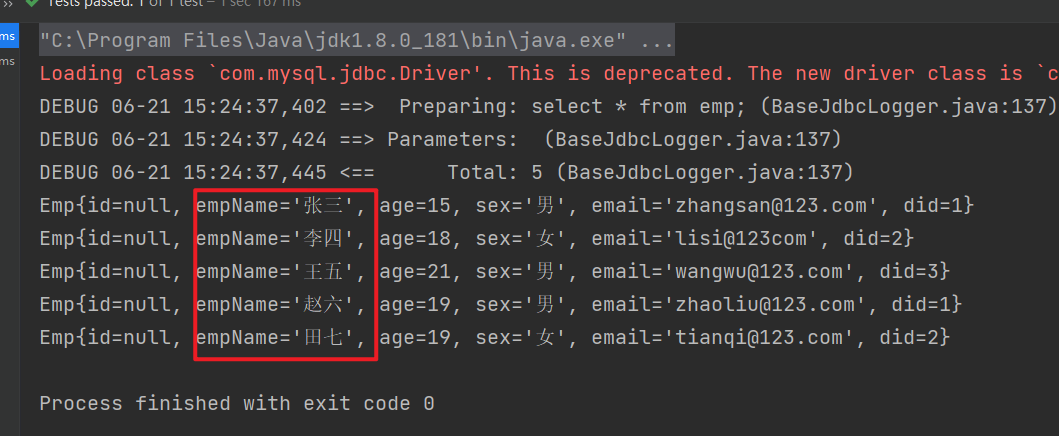
}
运行查看效果
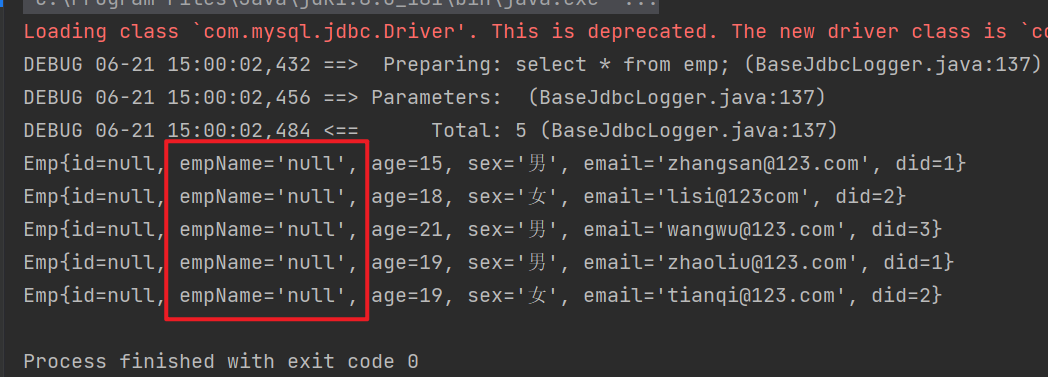
从打印的结果中看到empName的值都是null
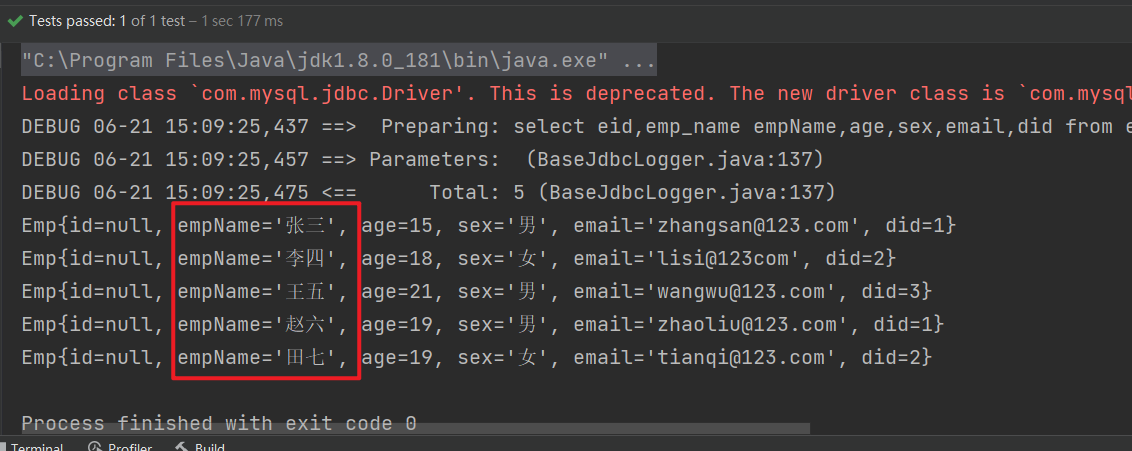
解决方法一:在SQL语句中添加别名
修改SQL语句
<!--List<Emp> getAllEmp();-->
<select id="getAllEmp" resultType="Emp">
    select eid,emp_name empName,age,sex,email,did from emp;
</select>
再次调用查看返回值
添加全局配置处理驼峰命名
解决字段驼峰命名的问题,除了采用上面的写法外,mybatis提供了全局配置的方式。
在 mybatis-config.xml 文件中添加如下配置代码,位置放在properties标签之后
<settings>
    <!--驼峰式命名-->
    <setting name="mapUnderscoreToCamelCase" value="true"/>
</settings>
添加之后查询SQL就可以使用*来查询所有了
<!--List<Emp> getAllEmp();-->
<select id="getAllEmp" resultType="Emp">
select * from emp;
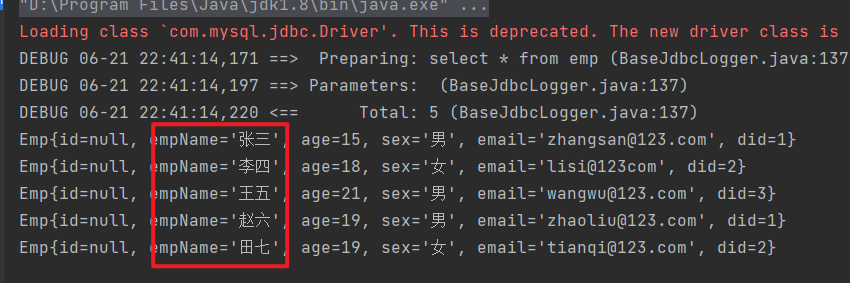
</select>
运行结果,员工名称可以正常显示
使用ressultMap来处理字段别名问题
修改接口映射文件
<resultMap id="userResultMap" type="Emp">
    <id property="eid" column="eid"></id>
    <result property="empName" column="emp_name"></result>
    <result property="age" column="age"></result>
    <result property="sex" column="sex"></result>
    <result property="email" column="email"></result>
    <result property="did" column="did"></result>
</resultMap>
<select id="getAllEmp" resultMap="userResultMap">
    select * from emp
</select>
其中 resultMap 的id表示自动以映射map名称,type为要映射的实体类名称
- id 标签表示实体类中对应数据库表的主键
- result 标签表示普通列
- property 对应实体类中的属性名称
- column 对应数据库中列的名称
调用测试方法
@Test
public void test1(){
    empMapper mapper = SqlSessionUtil.getSqlSession().getMapper(empMapper.class);
    List<Emp> allEmp = mapper.getAllEmp();
    allEmp.forEach(emp -> System.out.println(emp));
}
运行效果
使用级联属性赋值处理多对一映射关系
首先多个员工会对应同一个部门,所以员工对部门是多对一的关系。
修改Emp实体类,添加部门属性
public class Emp {
    Integer eid;
    String empName;
    Integer age;
    String sex;
    String email;
    Dep dep;
}
增加接口,根据员工id获取员工信息和对应的部门信息
// 获取员工对应的部门信息
Emp getEmpDepInfo(@Param("eid") Integer eid);
添加接口文件映射
<!--Emp getEmpDepInfo(@Param("eid") Integer eid);-->
<resultMap id="empAndDepMap" type="Emp">
    <id property="eid" column="eid"></id>
    <result property="empName" column="emp_name"></result>
    <result property="age" column="age"></result>
    <result property="sex" column="sex"></result>
    <result property="email" column="email"></result>
    <!--使用级联赋值-->
    <result property="dep.did" column="did"></result>
    <result property="dep.name" column="name"></result>
</resultMap>

<select id="getEmpDepInfo" resultMap="empAndDepMap">
    SELECT * FROM emp JOIN dep ON emp.did = dep.did WHERE emp.eid = #{eid}
</select>
添加测试方法
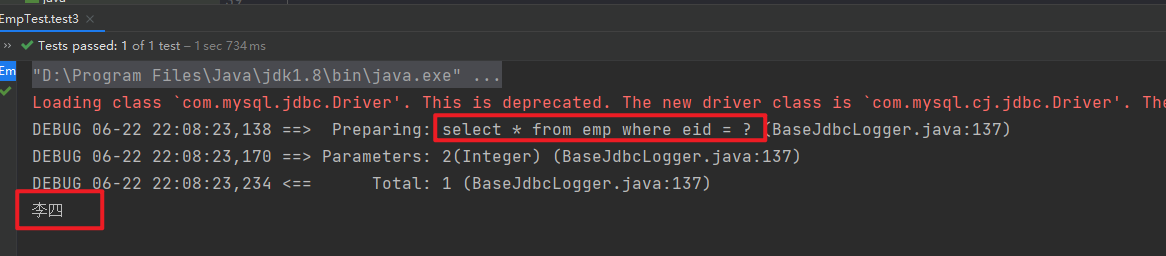
@Test
public void test2(){
    empMapper mapper = SqlSessionUtil.getSqlSession().getMapper(empMapper.class);
    Emp empDepInfo = mapper.getEmpDepInfo(2);
    System.out.println(empDepInfo);
}
运行结果
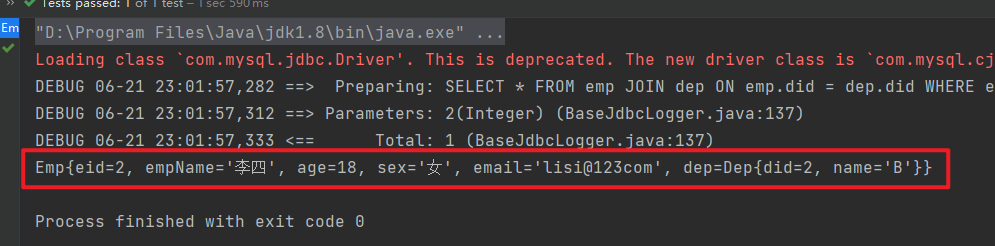
然而这种方法不常用
使用association处理多对一的映射关系
<!--
        使用association处理多对一的映射关系
        property 对应实体类中引用另外一个实体类名称
        javaType 对应具体的实体类
    -->
<resultMap id="empAndDepMapTwo" type="Emp">
    <id property="eid" column="eid"></id>
    <result property="empName" column="emp_name"></result>
    <result property="age" column="age"></result>
    <result property="sex" column="sex"></result>
    <result property="email" column="email"></result>
    <association property="dep" javaType="Dep">
        <id property="did" column="did"></id>
        <result property="name" column="name"></result>
    </association>
</resultMap>
<select id="getEmpDepInfo" resultMap="empAndDepMapTwo">
    SELECT * FROM emp JOIN dep ON emp.did = dep.did WHERE emp.eid = #{eid}
</select>
分布式查询多对一数据
首先在 empMapper 接口中添加方法
Emp getEmpByStepOne(@Param("eid") Integer eid);
然后在 depMapper 中添加根据did查询部门接口
Dep getDepByStepTwo(@Param("did") Integer did);
添加 getEmpByStepOne 接口的映射文件
<!--Emp getEmpByStepOne(@Param("eid") Integer eid);-->
<resultMap id="empAndDepByStepMap" type="Emp">
    <id property="eid" column="eid"></id>
    <result property="empName" column="emp_name"></result>
    <result property="age" column="age"></result>
    <result property="sex" column="sex"></result>
    <result property="email" column="email"></result>
    <!--分布查询-->
    <association property="dep"
                 select="com.szx.mybatis.mapper.depMapper.getDepByStepTwo"
                 column="did"/>
</resultMap>
<select id="getEmpByStepOne" resultMap="empAndDepByStepMap">
    select * from emp where eid = #{eid}
</select>
分布查询查询中association的各个属性含义:
- select 属性对应第二步的查询接口唯一标识,所以在 depMapper 中添加接口映射文件
- column 对应查询条件
<!--Dep getDepByStepTwo(@Param("did") Integer did);-->
<select id="getDepByStepTwo" resultType="Dep">
    select * from dep where did = #{did}
</select>
添加测试方法
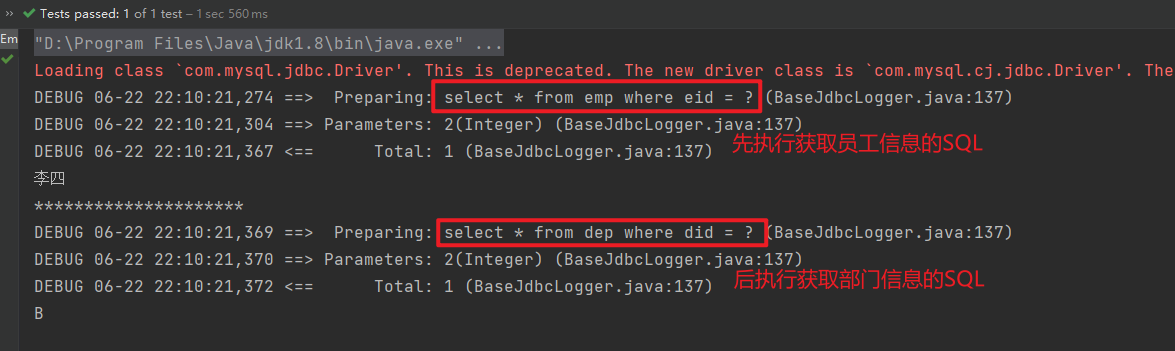
@Test
public void test3(){
empMapper mapper = SqlSessionUtil.getSqlSession().getMapper(empMapper.class);
Emp emp = mapper.getEmpByStepOne(2);
System.out.println(emp);
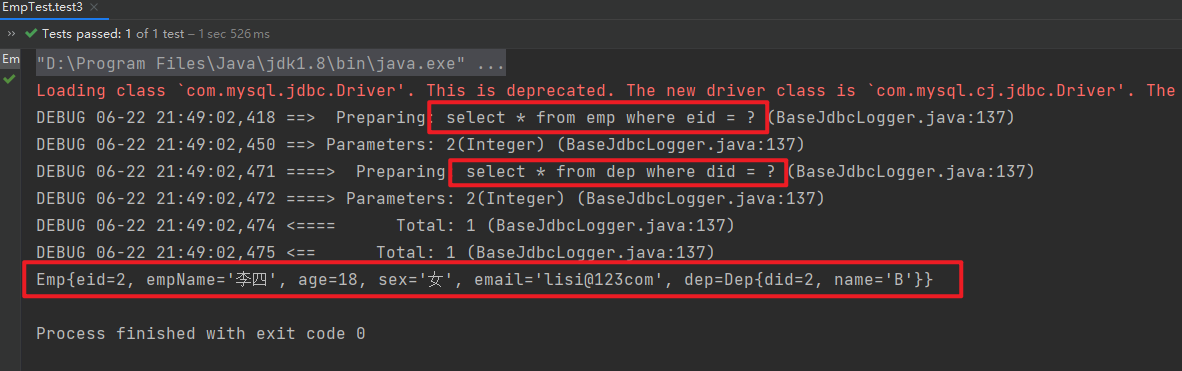
}
运行结果
全局配置延迟加载
开启延迟加载后,所有的分布式查询会变成懒加载模式。设置方法为在 mybatis-config.xml 配置文件中设置 lazyLoadingEnabled 为 true
<settings>
    <!--驼峰式命名-->
    <setting name="mapUnderscoreToCamelCase" value="true"/>
    <!--开启分布式查询延迟加载-->
    <setting name="lazyLoadingEnabled" value="true"/>
</settings>
开启后例如调用获取员工的接口,获取员工的接口是分布式查询的,会根据员工的部门id获取部门信息。但是我只获取员工姓名。观察SQL执行次数
只获取员工姓名
@Test
public void test3(){
    empMapper mapper = SqlSessionUtil.getSqlSession().getMapper(empMapper.class);
    Emp emp = mapper.getEmpByStepOne(2);
    // 只获取员工姓名
    System.out.println(emp.getEmpName());
}
运行结果
根据图中显示,SQL执行了一次并且是执行的查询员工信息的SQL
如果此时有获取了员工信息,那么SQL会分成两次执行,具体效果如下
@Test
public void test3(){
    empMapper mapper = SqlSessionUtil.getSqlSession().getMapper(empMapper.class);
    Emp emp = mapper.getEmpByStepOne(2);
    // 只获取员工姓名
    System.out.println(emp.getEmpName());
    System.out.println("*********************");
    // 获取该员工的部门名称
    System.out.println(emp.getDep().getName());
}
运行结果
单个查询设置延迟加载
我们可以对单个分布查询进行延迟加载或者立即执行配置
在 association 标签中添加 fetchType 属性,fetchType 属性的值有两个,分别如下
- eager 立即执行
- lazy 延迟执行,懒加载
<association property="emps"
             select="com.szx.mybatis.mapper.empMapper.getEmpByDepId"
             column="did"
             fetchType="eager" />
处理一对多映射关系
使用collction处理
添加根据部门id查询部门信息和员工信息的接口
Dep getDepInfo(@Param("did") Integer did);
添加接口映射文件
<!--Dep getDepInfo(@Param("did") Integer did);-->
<resultMap id="getDepByCollection" type="Dep">
    <id property="did" column="did"></id>
    <result property="name" column="name"></result>
    <!--
        collection 专门处理集合类型的属性
        ofType 声明集合中的数据类型
    -->
    <collection property="emps" ofType="Emp">
        <id property="eid" column="eid"></id>
        <result property="empName" column="emp_name"></result>
        <result property="age" column="age"></result>
        <result property="sex" column="sex"></result>
        <result property="email" column="email"></result>
    </collection>
</resultMap>
<select id="getDepInfo" resultMap="getDepByCollection">
    select * from dep join emp on dep.did = emp.did where dep.did = #{did}
</select>
添加测试方法
@Test
public void test4(){
    depMapper mapper = SqlSessionUtil.getSqlSession().getMapper(depMapper.class);
    Dep depInfo = mapper.getDepInfo(1);
    System.out.println("depInfo = " + depInfo);
}
运行结果

使用分布式查询处理一对多映射
添加根据部门id查询部门的接口
// 分布查询部门信息
Dep getDepByStep(@Param("did") Integer did);
添加根据部门id查询员工的接口
// 根据部门id获取员工信息
List<Emp> getEmpByDepId(@Param("did") Integer did);
添加getEmpByDepId接口的映射文件
<!--Emp getEmpByDepId(@Param("did") Integer did);-->
<resultMap id="empByDidMap" type="Emp">
    <id property="eid" column="eid"></id>
    <result property="empName" column="emp_name"></result>
    <result property="age" column="age"></result>
    <result property="sex" column="sex"></result>
    <result property="email" column="email"></result>
</resultMap>
<select id="getEmpByDepId" resultMap="empByDidMap">
    select * from emp where did = #{did}
</select>
添加getDepByStep接口映射文件
<!--getDepByStep-->
<resultMap id="getDepByStepMap" type="Dep">
    <id property="did" column="did"></id>
    <result property="name" column="name"></result>
    <!--分布查询:根据当前的部门id获取所有的员工信息-->
    <association property="emps"
                 select="com.szx.mybatis.mapper.empMapper.getEmpByDepId"
                 column="did"/>
</resultMap>
<select id="getDepByStep" resultMap="getDepByStepMap">
    select * from dep where did = #{did}
</select>
添加测试方法
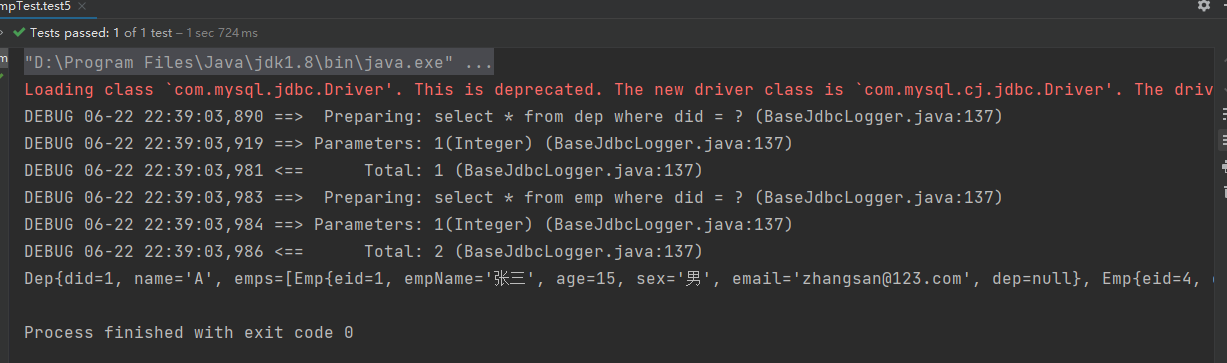
@Test
public void test5(){
    depMapper mapper = SqlSessionUtil.getSqlSession().getMapper(depMapper.class);
    Dep depInfo = mapper.getDepByStep(1);
    System.out.println(depInfo);
}
运行结果
动态SQL
mybatis 框架的动态SQL技术是一种根据特定条件动态拼装SQL语句的功能,他存在的意义是为了解决拼接SQL语句字符串时痛点问题
if
添加接口方法
// 根据多条件查询信息
List<Emp> getEmpByCondition(Emp emp);
添加方法映射,在 where 后面有 1=1 是为了解决当没有查询条件,或者第一个查询条件没有而导致 where 后面直接跟上 and 的问题
<!--List<Emp> getEmpByCondition(Emp emp);-->
<select id="getEmpByCondition" resultType="Emp">
    select * from emp where 1=1
    <if test="eid != null and eid != ''">
        and eid = #{eid}
    </if>
    <if test="empName != null and empName != ''">
        and emp_name = #{empName}
    </if>
    <if test="age != null and age != ''">
        and age = #{age}
    </if>
    <if test="sex != null and sex != ''">
        and sex = #{sex}
    </if>
    <if test="email != null and email != ''">
        and email = #{email}
    </if>
</select>
添加测试方法
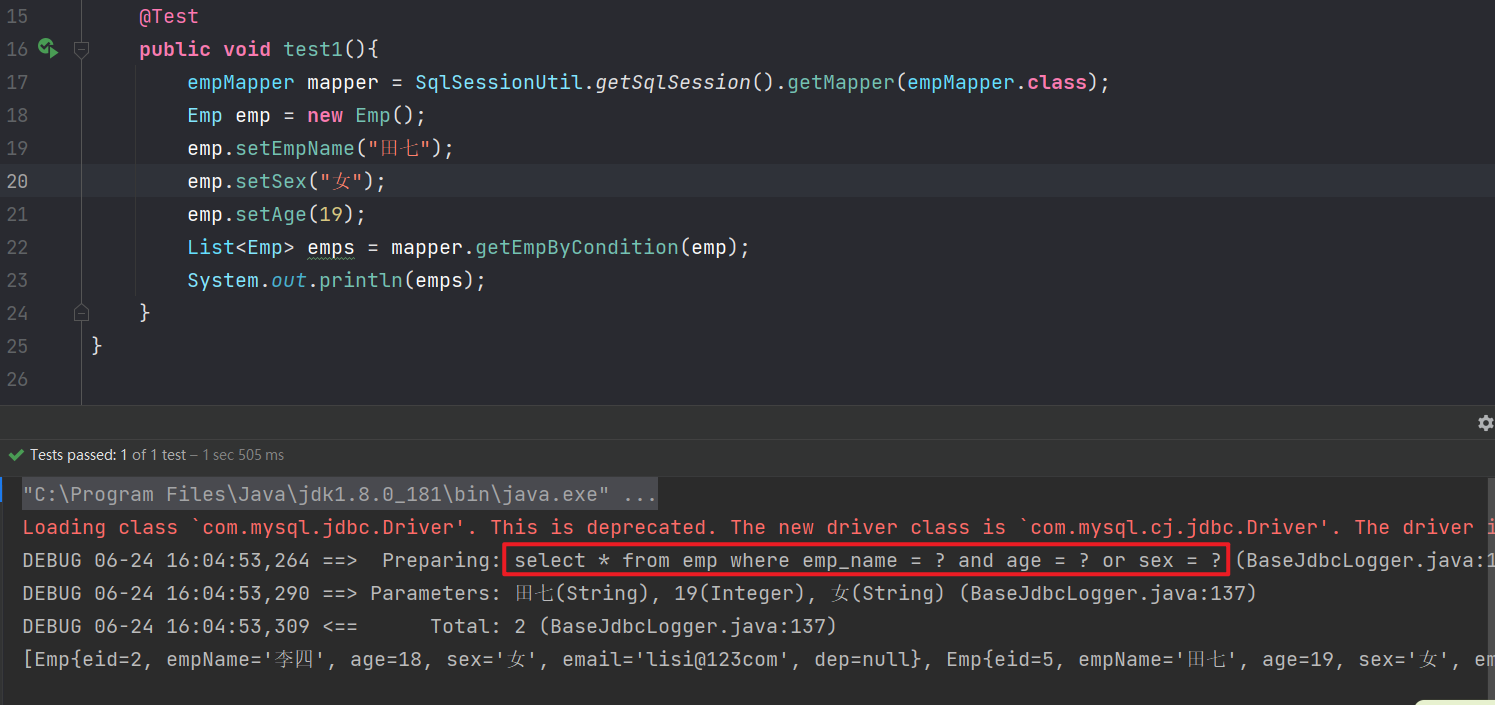
@Test
public void test1(){
    empMapper mapper = SqlSessionUtil.getSqlSession().getMapper(empMapper.class);
    Emp emp = new Emp();
    emp.setEmpName("田七");
    emp.setSex("女");
    List<Emp> emps = mapper.getEmpByCondition(emp);
    System.out.println(emps);
}
此时有两个查询条件,运行效果为

我们修改一下代码,增加为三个条件,SQL会自动拼接为三个

where
上面的代码中 where 后面会跟上一个恒等语句来解决 and 拼接问题。我们可以使用 where 标签来解决
- where 一般和 if 共同使用
- where 会自动去掉多余的 and 和 or 关键字
- 如果and 和 or关键字在查询语句后面则无法去除
- 当一个查询条件都没有时会自动去掉 where 标签
<!--List<Emp> getEmpByCondition(Emp emp);-->
<select id="getEmpByCondition" resultType="Emp">
    select * from emp
    <where>
        <if test="eid != null and eid != ''">
            and eid = #{eid}
        </if>
        <if test="empName != null and empName != ''">
            and emp_name = #{empName}
        </if>
        <if test="age != null and age != ''">
            and age = #{age}
        </if>
        <if test="sex != null and sex != ''">
            and sex = #{sex}
        </if>
        <if test="email != null and email != ''">
            and email = #{email}
        </if>
    </where>
</select>
添加测试方法
@Test
public void test1(){
    empMapper mapper = SqlSessionUtil.getSqlSession().getMapper(empMapper.class);
    Emp emp = new Emp();
    emp.setEmpName("田七");
    emp.setSex("女");
    emp.setAge(19);
    List<Emp> emps = mapper.getEmpByCondition(emp);
    System.out.println(emps);
}
运行效果

trim
- trim 用于去掉或添加标签的内容
- 常用属性
- prefiex:在trim标签中的内容前面添加某些内容
- suffix:在trim标签中的内容的后面添加某些内容
- suffixOverrides:去掉 trim 标签内容后面的某些内容
- prefixOverrides:去掉 trim 标签内容前面的某些内容
- 当trim中的标签都不满足条件时,trim标签没有任何效果,相当于
select * from emp
<!--List<Emp> getEmpByCondition(Emp emp);-->
<select id="getEmpByCondition" resultType="Emp">
    select * from emp
    <trim prefix="where" suffixOverrides="and|or" prefixOverrides="">
        <if test="eid != null and eid != ''">
            eid = #{eid} and
        </if>
        <if test="empName != null and empName != ''">
            emp_name = #{empName} and
        </if>
        <if test="age != null and age != ''">
            age = #{age} or
        </if>
        <if test="sex != null and sex != ''">
            sex = #{sex} and
        </if>
        <if test="email != null and email != ''">
            email = #{email}
        </if>
    </trim>
</select>
测试运行效果
choose when otherwise
choose when otherwise 相当于 if … else if … else,其中 choose 是父标签,when 至少有一个,当有多个条件时只会匹配满足条件的那个拼接到SQL语句中。otherwise 标签最多只能有一个
新增接口方法
List<Emp> getEmpByChoose(Emp emp);
新增接口方法映射文件
<!--List<Emp> getEmpByChoose(Emp emp);-->
<select id="getEmpByChoose" resultType="Emp">
    select * from emp
    <where>
        <choose>
            <when test="empName != '' and empName != null">
                emp_name = #{empName}
            </when>
            <when test="age != '' and age != null">
                age = #{age}
            </when>
            <when test="sex != '' and sex != null">
                sex = #{sex}
            </when>
            <when test="email != '' and email != null">
                email = #{email}
            </when>
            <otherwise>
                did = 1
            </otherwise>
        </choose>
    </where>
</select>
编写测试方法
@Test
public void test2(){
    empMapper mapper = SqlSessionUtil.getSqlSession().getMapper(empMapper.class);
    Emp emp = new Emp();
    emp.setEmpName("田七");
    emp.setSex("女");
    emp.setAge(19);
    List<Emp> empByChoose = mapper.getEmpByChoose(emp);
    System.out.println(empByChoose);
}
运行效果
foreach 批量删除
可以使用 foreach 标签遍历传过来的数组实现批量操作,foreach 标签有几个属性
- collection 要循环遍历的数组
- item 数组中每个元素的别名
- separator 循环语句中的分隔符
- open 循环语句的开始字符串
- close 循环语句的结束字符串
新增批量删除的方法
// 批量删除
int deleteEmpByIds(@Param("ids") Integer[] ids);
添加方法映射文件
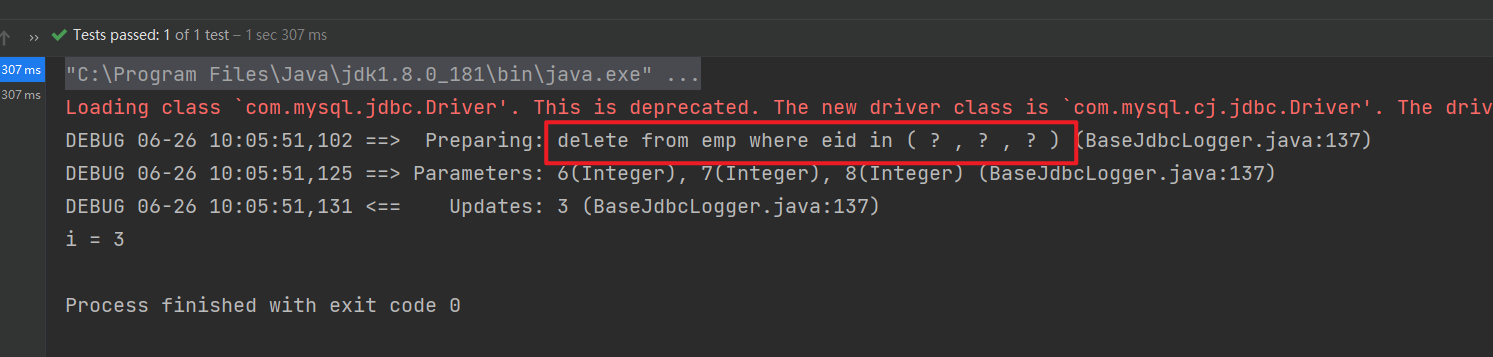
方法一:使用 in 的方式实现批量删除
<!--int deleteEmpByIds(@Param("ids") Integer[] ids);-->
<delete id="deleteEmpByIds">
    delete from emp where eid in
    <foreach collection="ids" item="id" separator="," open="(" close=")">
        #{id}
    </foreach>
</delete>
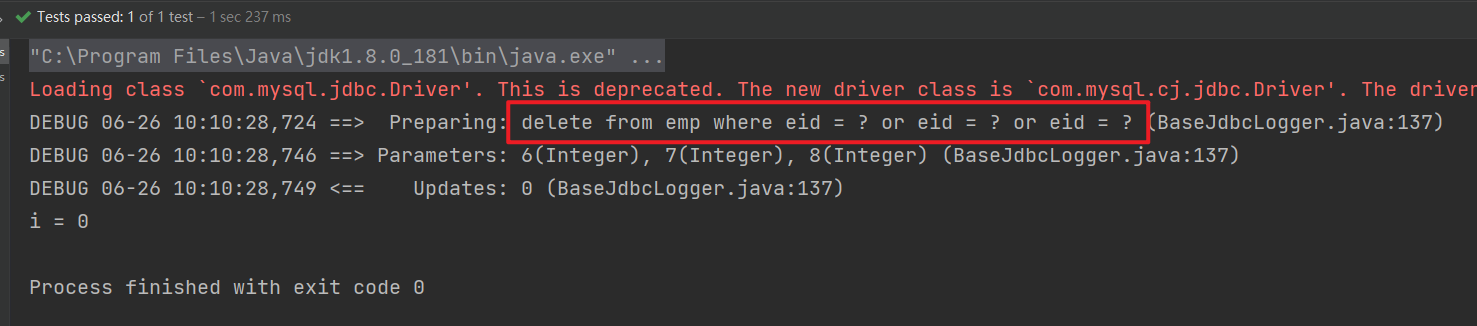
方法二:使用 or 方式实现批量删除
<delete id="deleteEmpByIds">
    delete from emp where
    <foreach collection="ids" item="id" separator="or">
        eid = #{id}
    </foreach>
</delete>
编写测试方法
@Test
public void test3(){
    empMapper mapper = SqlSessionUtil.getSqlSession().getMapper(empMapper.class);
    int i = mapper.deleteEmpByIds(new Integer[]{6, 7, 8});
    System.out.println("i = " + i);
}
方式一运行效果
方式二运行效果
foreach 批量新增
添加新增接口方法
// 批量新增
int addEmpByEmps(@Param("emps") ArrayList<Emp> emps);
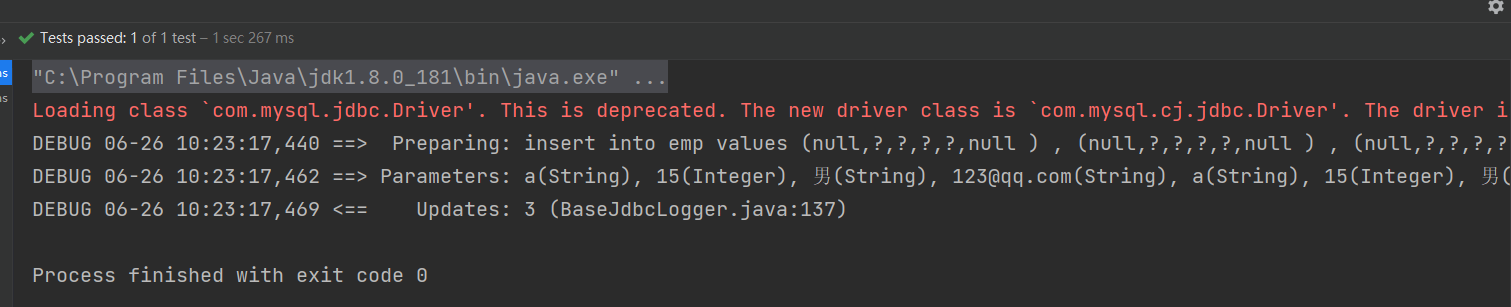
添加方法映射文件
<!--int addEmpByEmps(@Param("emps") ArrayList<Emp>[] emps);-->
<insert id="addEmpByEmps">
    insert into emp values
    <foreach collection="emps" item="emp" separator=",">
        (null,#{emp.empName},#{emp.age},#{emp.sex},#{emp.email},null )
    </foreach>
</insert>
添加测试方法
@Test
public void test4(){
empMapper mapper = SqlSessionUtil.getSqlSession().getMapper(empMapper.class);
ArrayList<Emp> emps = new ArrayList<>();
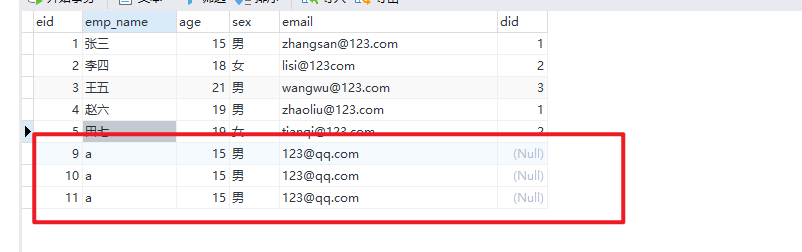
emps.add(new Emp(null, "a", 15, "男", "123@qq.com",null));
emps.add(new Emp(null, "a", 15, "男", "123@qq.com",null));
emps.add(new Emp(null, "a", 15, "男", "123@qq.com",null));
mapper.addEmpByEmps(emps);
}
运行效果
查看数据库中是否有新增的数据
sql
SQL 标签可以表示一个 SQL 片段,在需要的地方可以引用这个片段
<!--设置SQL片段-->
<sql id="empcloums">eid,emp_name,age,sex,email</sql>

<!--使用include标签引用SQL片段-->
<select id="getEmpByStepOne" resultMap="empAndDepByStepMap">
    select <include refid="empcloums"></include> from emp where eid = #{eid}
</select>
Mybatis缓存
mybatis一级缓存
mybatis默认是一级缓存,当查询两次相同得数据时,第二次不会重复触发SQL语句,例如
@Test
public void test1(){
    CacheMapper mapper = SqlSessionUtil.getSqlSession().getMapper(CacheMapper.class);
    Emp emp = mapper.getEmpById(1);
    System.out.println(emp);

    Emp emp2 = mapper.getEmpById(1);
    System.out.println(emp2);
}
在同一个 sqlSession 中调用两次 getEmpById 方法,观察运行效果

输出两次结果,但是只执行一次SQL语句
修改测试方法
@Test
public void test1(){
    CacheMapper mapper = SqlSessionUtil.getSqlSession().getMapper(CacheMapper.class);
    Emp emp = mapper.getEmpById(1);
    System.out.println(emp);

    System.out.println("********");

    CacheMapper mapper1 = SqlSessionUtil.getSqlSession().getMapper(CacheMapper.class);
    Emp emp2 = mapper1.getEmpById(1);
    System.out.println(emp2);
}
在第二次查询时使用另外一个sqlSession ,观察运行效果
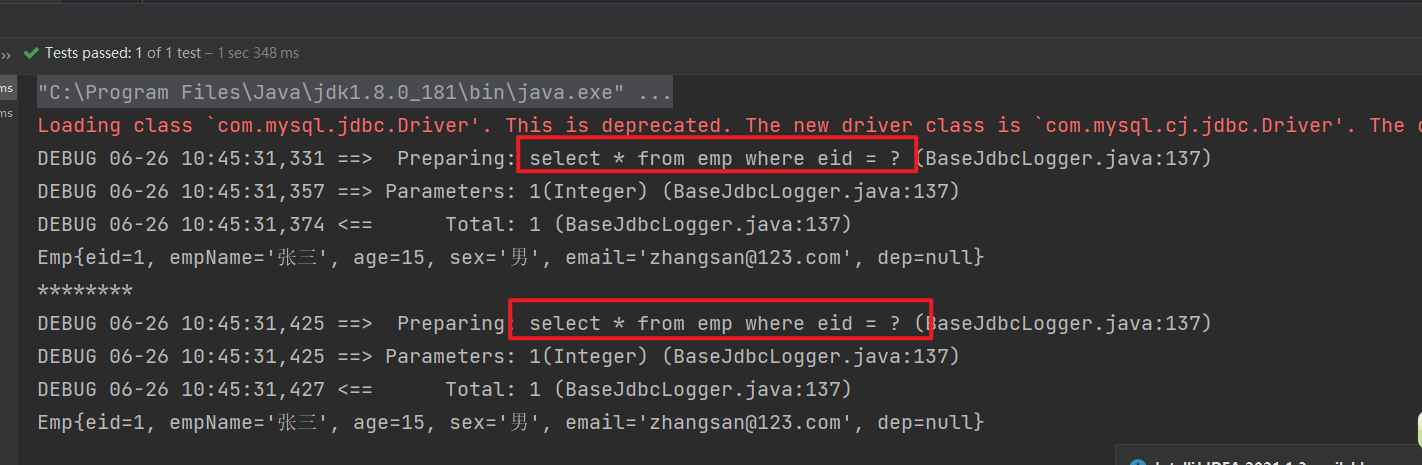
SQL会执行两次。因此mybatis默认有一级缓存
使一级缓存失效的四种方法
- 不同的 sqlsession 对应不同的一级缓存
- 同一个 sqlsession 但是查询条件不同
- 同一个 sqlsession 两次查询期间执行了任何一次增删改操作
- 同一个 sqlsession 两次查询期间执行了清空缓存的操作
以为手动清空缓存为例
@Test
public void test2(){
    SqlSession sqlSession = SqlSessionUtil.getSqlSession();
    CacheMapper mapper = sqlSession.getMapper(CacheMapper.class);
    Emp emp = mapper.getEmpById(2);
    System.out.println(emp);

    // 手动清空缓存的方法
    sqlSession.clearCache();
    System.out.println("********");

    Emp emp1 = mapper.getEmpById(2);
    System.out.println(emp1);
}
运行效果
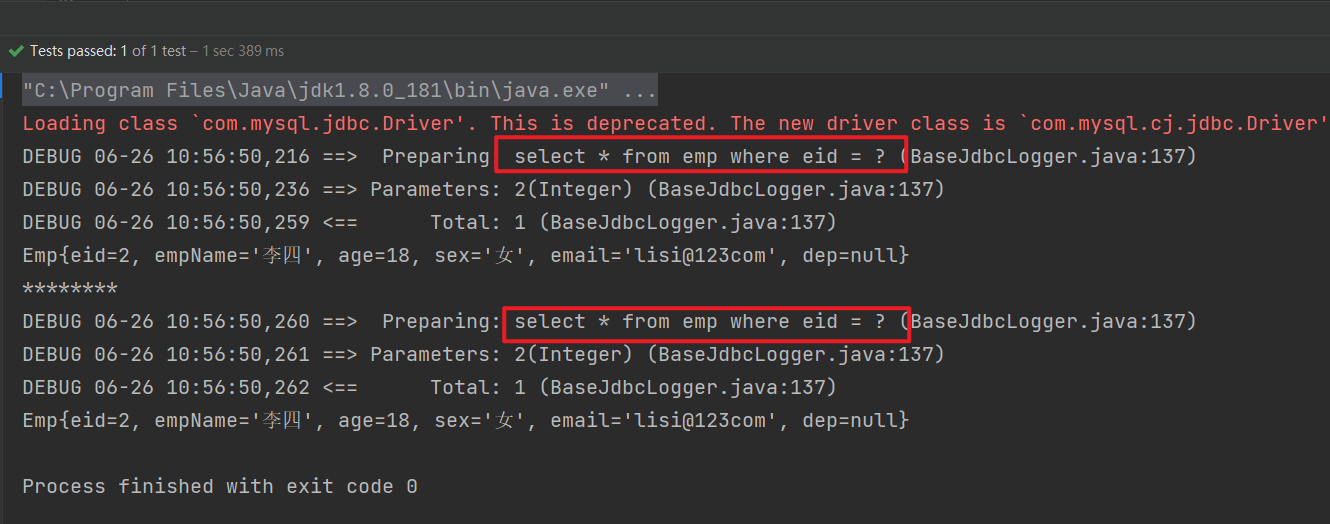
执行了两次SQL语句。
mybatis二级缓存
设置二级缓存的必要条件
- 在核心配置文件中,设置全局配置属性 cacheEnabled = “true”,默认就是 true,不需要设置
- 在映射文件中设置标签
<cache/> - 二级缓存必须在 SqlSession 关闭或者提交之后有效
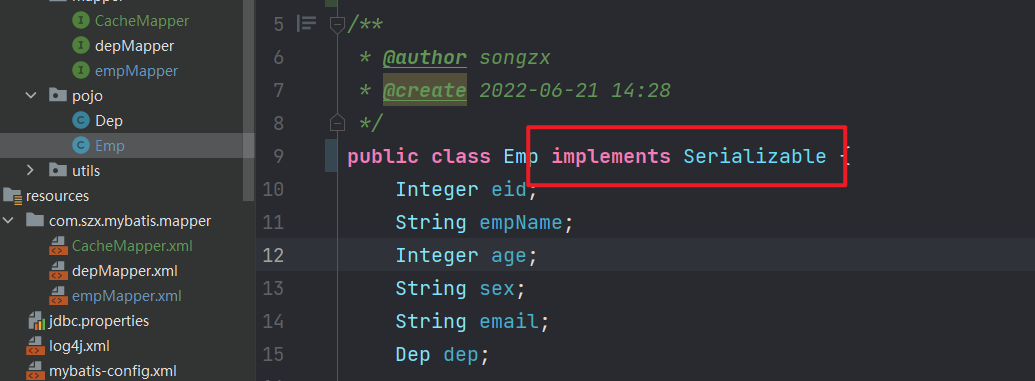
- 查询的数据所转换的实体类类型必须实现序列化接口
使二级缓存失效的方法
- 在两次相同的查询之间执行任何一个增删改方法
首先在映射文件中添加 chache 标签
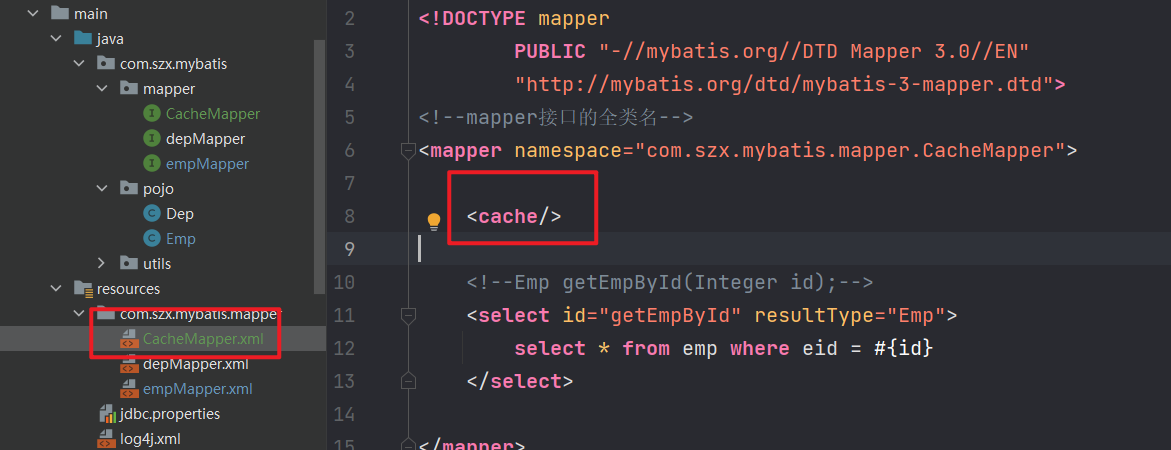
然后再实体类中实现 Serializable 接口
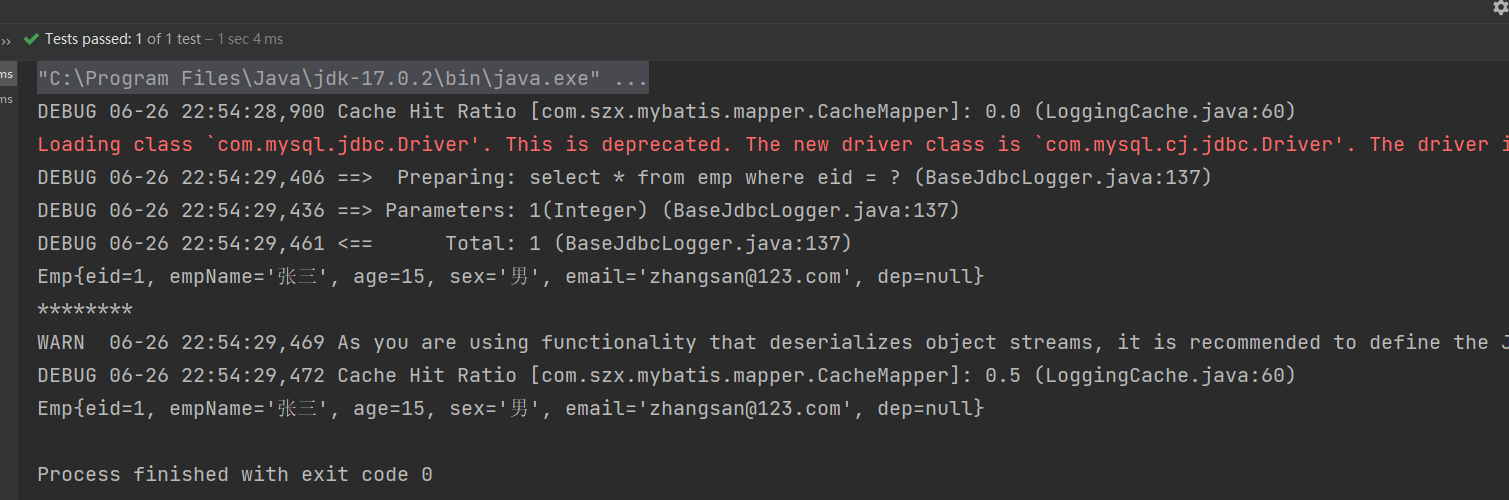
编写测试方法
// 二级缓存
@Test
public void test3() throws IOException {
    Reader is = Resources.getResourceAsReader("mybatis-config.xml");
    SqlSessionFactory sqlSessionFactory = new SqlSessionFactoryBuilder().build(is);

    SqlSession sqlSession = sqlSessionFactory.openSession(true);
    CacheMapper mapper = sqlSession.getMapper(CacheMapper.class);
    Emp emp1 = mapper.getEmpById(1);
    System.out.println(emp1);
    sqlSession.close();

    System.out.println("********");

    SqlSession sqlSession1 = sqlSessionFactory.openSession(true);
    CacheMapper mapper1 = sqlSession1.getMapper(CacheMapper.class);
    Emp emp2 = mapper1.getEmpById(1);
    System.out.println(emp2);
    sqlSession1.close();
}
运行效果
二级缓存相关配置
- 在mapper配置文件中添加的cache标签可以设置一些属性
- eviction属性:缓存回收策略
- LRU(Least Recently Used) – 最近最少使用的:移除最长时间不被使用的对象。
- FIFO(First in First out) – 先进先出:按对象进入缓存的顺序来移除它们。
- SOFT – 软引用:移除基于垃圾回收器状态和软引用规则的对象。
- WEAK – 弱引用:更积极地移除基于垃圾收集器状态和弱引用规则的对象。
- 默认的是 LRU
- flushInterval属性:刷新间隔,单位毫秒
- 默认情况是不设置,也就是没有刷新间隔,缓存仅仅调用语句(增删改)时刷新
- size属性:引用数目,正整数
- 代表缓存最多可以存储多少个对象,太大容易导致内存溢出
- readOnly属性:只读,true/false
- true:只读缓存;会给所有调用者返回缓存对象的相同实例。因此这些对象不能被修改。这提供了很重要的性能优势。
- false:读写缓存;会返回缓存对象的拷贝(通过序列化)。这会慢一些,但是安全,因此默认是false
MyBatis缓存查询的顺序
- 先查询二级缓存,因为二级缓存中可能会有其他程序已经查出来的数据,可以拿来直接使用
- 如果二级缓存没有命中,再查询一级缓存
- 如果一级缓存也没有命中,则查询数据库
- SqlSession关闭之后,一级缓存中的数据会写入二级缓存
整合第三方缓存EHCache
导入依赖
<!-- Mybatis EHCache整合包 -->
<dependency>
    <groupId>org.mybatis.caches</groupId>
    <artifactId>mybatis-ehcache</artifactId>
    <version>1.2.1</version>
</dependency>
<!-- slf4j日志门面的一个具体实现 -->
<dependency>
    <groupId>ch.qos.logback</groupId>
    <artifactId>logback-classic</artifactId>
    <version>1.2.3</version>
</dependency>
创建EHCache的配置文件ehcache.xml
- 名字必须叫
ehcache.xml
<?xml version="1.0" encoding="utf-8" ?>
<ehcache xmlns:xsi="http://www.w3.org/2001/XMLSchema-instance"
         xsi:noNamespaceSchemaLocation="../config/ehcache.xsd">
    <!-- 磁盘保存路径 -->
    <diskStore path="D:\atguigu\ehcache"/>
    <defaultCache
            maxElementsInMemory="1000"
            maxElementsOnDisk="10000000"
            eternal="false"
            overflowToDisk="true"
            timeToIdleSeconds="120"
            timeToLiveSeconds="120"
            diskExpiryThreadIntervalSeconds="120"
            memoryStoreEvictionPolicy="LRU">
    </defaultCache>
</ehcache>
设置二级缓存的类型
- 在xxxMapper.xml文件中设置二级缓存类型
<cache type="org.mybatis.caches.ehcache.EhcacheCache"/>
加入logback日志
- 存在SLF4J时,作为简易日志的log4j将失效,此时我们需要借助SLF4J的具体实现logback来打印日志。创建logback的配置文件
logback.xml,名字固定,不可改变
<?xml version="1.0" encoding="UTF-8"?>
<configuration debug="true">
    <!-- 指定日志输出的位置 -->
    <appender name="STDOUT"
              class="ch.qos.logback.core.ConsoleAppender">
        <encoder>
            <!-- 日志输出的格式 -->
            <!-- 按照顺序分别是:时间、日志级别、线程名称、打印日志的类、日志主体内容、换行 -->
            <pattern>[%d{HH:mm:ss.SSS}] [%-5level] [%thread] [%logger] [%msg]%n</pattern>
        </encoder>
    </appender>
    <!-- 设置全局日志级别。日志级别按顺序分别是:DEBUG、INFO、WARN、ERROR -->
    <!-- 指定任何一个日志级别都只打印当前级别和后面级别的日志。 -->
    <root level="DEBUG">
        <!-- 指定打印日志的appender,这里通过“STDOUT”引用了前面配置的appender -->
        <appender-ref ref="STDOUT" />
    </root>
    <!-- 根据特殊需求指定局部日志级别 -->
    <logger name="com.atguigu.crowd.mapper" level="DEBUG"/>
</configuration>
Mybatis逆向工程
- 正向工程:先创建java实体类,有框架负责根据实体类生成数据库表,Hibernate是支持正向工程的
- 逆向工程:先创建数据库表,有框架负责根据数据库表,反向生成如下资源
- Java实体类
- Mapper 接口
- Mapper 映射文件
清新简洁版
生成的接口中只有最基本的增删改查方法
添加依赖和插件
<dependencies>
	<!-- MyBatis核心依赖包 -->
	<dependency>
		<groupId>org.mybatis</groupId>
		<artifactId>mybatis</artifactId>
		<version>3.5.9</version>
	</dependency>
	<!-- junit测试 -->
	<dependency>
		<groupId>junit</groupId>
		<artifactId>junit</artifactId>
		<version>4.13.2</version>
		<scope>test</scope>
	</dependency>
	<!-- MySQL驱动 -->
	<dependency>
		<groupId>mysql</groupId>
		<artifactId>mysql-connector-java</artifactId>
		<version>8.0.27</version>
	</dependency>
	<!-- log4j日志 -->
	<dependency>
		<groupId>log4j</groupId>
		<artifactId>log4j</artifactId>
		<version>1.2.17</version>
	</dependency>
</dependencies>
<!-- 控制Maven在构建过程中相关配置 -->
<build>
	<!-- 构建过程中用到的插件 -->
	<plugins>
		<!-- 具体插件,逆向工程的操作是以构建过程中插件形式出现的 -->
		<plugin>
			<groupId>org.mybatis.generator</groupId>
			<artifactId>mybatis-generator-maven-plugin</artifactId>
			<version>1.3.0</version>
			<!-- 插件的依赖 -->
			<dependencies>
				<!-- 逆向工程的核心依赖 -->
				<dependency>
					<groupId>org.mybatis.generator</groupId>
					<artifactId>mybatis-generator-core</artifactId>
					<version>1.3.2</version>
				</dependency>
				<!-- 数据库连接池 -->
				<dependency>
					<groupId>com.mchange</groupId>
					<artifactId>c3p0</artifactId>
					<version>0.9.2</version>
				</dependency>
				<!-- MySQL驱动 -->
				<dependency>
					<groupId>mysql</groupId>
					<artifactId>mysql-connector-java</artifactId>
					<version>8.0.27</version>
				</dependency>
			</dependencies>
		</plugin>
	</plugins>
</build>
创建mybatis核心配置文件
<?xml version="1.0" encoding="UTF-8" ?>
<!DOCTYPE configuration
        PUBLIC "-//mybatis.org//DTD Config 3.0//EN"
        "http://mybatis.org/dtd/mybatis-3-config.dtd">
<configuration>
    <!--引入配置文件,读取数据库连接信息-->
    <properties resource="jdbc.properties"></properties>

    <settings>
        <!--驼峰式命名-->
        <setting name="mapUnderscoreToCamelCase" value="true"/>
        <!--开启分布式查询延迟加载-->
        <setting name="lazyLoadingEnabled" value="true"/>
    </settings>

    <!--配置实体类的映射包-->
    <typeAliases>
        <package name="com.szx.mybatis.pojo"/>
    </typeAliases>

    <!--设置连接数据库的环境-->
    <environments default="development">
        <environment id="development">
            <transactionManager type="JDBC"/>
            <dataSource type="POOLED">
                <!--设置驱动类的全类名-->
                <property name="driver" value="${jdbc.driver}"/>
                <!--设置连接数据库的连接地址-->
                <property name="url" value="${jdbc.url}"/>
                <!--设置连接数据库的用户名-->
                <property name="username" value="${jdbc.name}"/>
                <!--设置连接数据库的密码-->
                <property name="password" value="${jdbc.password}"/>
            </dataSource>
        </environment>
    </environments>

    <!--引入映射文件-->
    <mappers>
        <!--com/szx/mybatis/mapper-->
        <package name="com.szx.mybatis.mapper"/>
    </mappers>
</configuration>
创建jdbc.properties
jdbc.driver=com.mysql.jdbc.Driver
jdbc.url=jdbc:mysql://localhost:3306/mybatis
jdbc.name=root
jdbc.password=abc123
创建逆向工程的配置文件
- 文件名必须是:
generatorConfig.xml
<?xml version="1.0" encoding="UTF-8"?>
<!DOCTYPE generatorConfiguration
        PUBLIC "-//mybatis.org//DTD MyBatis Generator Configuration 1.0//EN"
        "http://mybatis.org/dtd/mybatis-generator-config_1_0.dtd">
<generatorConfiguration>
    <!--
    targetRuntime: 执行生成的逆向工程的版本
    MyBatis3Simple: 生成基本的CRUD(清新简洁版)
    MyBatis3: 生成带条件的CRUD(奢华尊享版)
    -->
    <context id="DB2Tables" targetRuntime="MyBatis3Simple">
        <!-- 数据库的连接信息 -->
        <jdbcConnection driverClass="com.mysql.cj.jdbc.Driver"
                        connectionURL="jdbc:mysql://localhost:3306/mybatis"
                        userId="root"
                        password="abc123">
        </jdbcConnection>
        <!-- javaBean的生成策略-->
        <javaModelGenerator targetPackage="com.atguigu.mybatis.pojo" targetProject=".\src\main\java">
            <property name="enableSubPackages" value="true" />
            <property name="trimStrings" value="true" />
        </javaModelGenerator>
        <!-- SQL映射文件的生成策略 -->
        <sqlMapGenerator targetPackage="com.atguigu.mybatis.mapper"
                         targetProject=".\src\main\resources">
            <property name="enableSubPackages" value="true" />
        </sqlMapGenerator>
        <!-- Mapper接口的生成策略 -->
        <javaClientGenerator type="XMLMAPPER"
                             targetPackage="com.atguigu.mybatis.mapper" targetProject=".\src\main\java">
            <property name="enableSubPackages" value="true" />
        </javaClientGenerator>
        <!-- 逆向分析的表 -->
        <!-- tableName设置为*号,可以对应所有表,此时不写domainObjectName -->
        <!-- domainObjectName属性指定生成出来的实体类的类名 -->
        <table tableName="t_emp" domainObjectName="Emp"/>
        <table tableName="t_dept" domainObjectName="Dept"/>
    </context>
</generatorConfiguration>
执行插件生成代码
双击
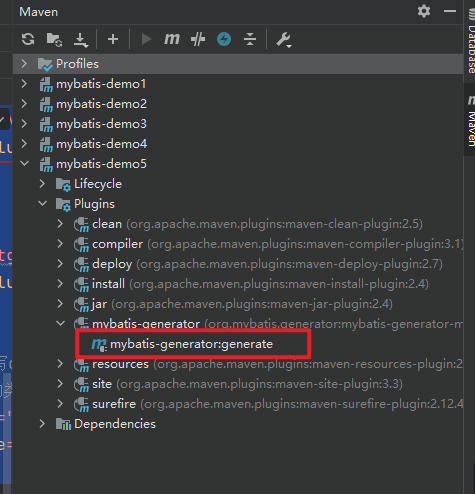
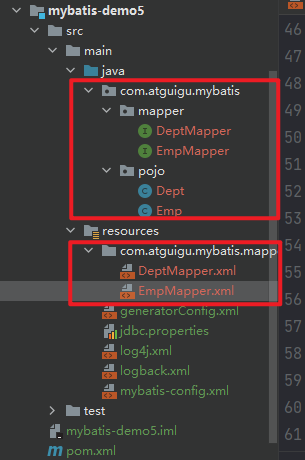
执行成功后

查看生成的代码
至尊奢华版
首先将 pojo,mapper 包下面的文件全部删除。然后吧 generatorConfig.xml 文件中的 MyBatis3Simple 换成 MyBatis3。之后点击插件重新生成代码
测试查询方法
@Test
public void test() throws IOException {
    Reader is = Resources.getResourceAsReader("mybatis-config.xml");
    SqlSession sqlSession = new SqlSessionFactoryBuilder().build(is).openSession(true);
    EmpMapper mapper = sqlSession.getMapper(EmpMapper.class);
    // 根据条件查询,传递一个null表示没有条件查询所有
    /*List<Emp> emps = mapper.selectByExample(null);
    emps.forEach(emp -> System.out.println(emp));*/

    // 有条件查询
    EmpExample empExample = new EmpExample();
    // 查询年龄大于等于16的或者姓名等于张三的数据
    empExample.createCriteria().andAgeGreaterThanOrEqualTo(16);
    empExample.or().andEmpNameEqualTo("张三");
    List<Emp> emps = mapper.selectByExample(empExample);
    emps.forEach(emp -> System.out.println(emp));
}
测试修改方法
@Test
public void test1() throws IOException {
    Reader is = Resources.getResourceAsReader("mybatis-config.xml");
    SqlSession sqlSession = new SqlSessionFactoryBuilder().build(is).openSession(true);
    EmpMapper mapper = sqlSession.getMapper(EmpMapper.class);
    // updateByPrimaryKey 如果更新条件中是null,则会将表中数据设置成null
    // updateByPrimaryKeySelective 如果更新条件中是null,则不会添加到SQL语句中
    int i = mapper.updateByPrimaryKeySelective(new Emp(1, "admin", 15, null, "123@qq.com", 2));
    System.out.println(i);
}
接口方法的含义和条件含义
接口含义
| 方法 | 功能说明 |
|---|---|
| int countByExample(UserExample example) thorws SQLException | 按条件计数 |
| int deleteByPrimaryKey(Integer id) thorws SQLException | 按主键删除 |
| int deleteByExample(UserExample example) thorws SQLException | 按条件删除 |
| String/Integer insert(User record) thorws SQLException | 插入数据(返回值为ID) |
| User selectByPrimaryKey(Integer id) thorws SQLException | 按主键查询 |
| ListselectByExample(UserExample example) thorws SQLException | 按条件查询 |
| ListselectByExampleWithBLOGs(UserExample example) thorws SQLException | 按条件查询(包括BLOB字段)。只有当数据表中的字段类型有为二进制的才会产生 |
| int updateByPrimaryKey(User record) thorws SQLException | 按主键更新 |
| int updateByPrimaryKeySelective(User record) thorws SQLException | 按主键更新值不为null的字段 |
| int updateByExample(User record, UserExample example) thorws SQLException | 按条件更新 |
| int updateByExampleSelective(User record, UserExample example) thorws SQLException | 按条件更新值不为null的字段 |
条件含义
| 方法 | 功能说明 |
|---|---|
| example.setOrderByClause(“字段名 ASC”); | 添加升序排列条件,DESC为降序 |
| example.setDistinct(false) | 去除重复,boolean型,true为选择不重复的记录 |
| criteria.andXxxIsNull | 添加字段xxx为null的条件 |
| criteria.andXxxIsNotNull | 添加字段xxx不为null的条件 |
| criteria.andXxxEqualTo(value) | 添加xxx字段等于value条件 |
| criteria.andXxxNotEqualTo(value) | 添加xxx字段不等于value条件 |
| criteria.andXxxGreaterThan(value) | 添加xxx字段大于value条件 |
| criteria.andXxxGreaterThanOrEqualTo(value) | 添加xxx字段大于等于value条件 |
| criteria.andXxxLessThan(value) | 添加xxx字段小于value条件 |
| criteria.andXxxLessThanOrEqualTo(value) | 添加xxx字段小于等于value条件 |
| criteria.andXxxIn(List<?>) | 添加xxx字段值在List<?>条件 |
| criteria.andXxxNotIn(List<?>) | 添加xxx字段值不在List<?>条件 |
| criteria.andXxxLike(“%”+value+”%”) | 添加xxx字段值为value的模糊查询条件 |
| criteria.andXxxNotLike(“%”+value+”%”) | 添加xxx字段值不为value的模糊查询条件 |
| criteria.andXxxBetween(value1,value2) | 添加xxx字段值在value1和value2之间条件 |
| criteria.andXxxNotBetween(value1,value2) | 添加xxx字段值不在value1和value2之间条件 |
Mybatis分页插件
配置分页插件
添加依赖
<!-- https://mvnrepository.com/artifact/com.github.pagehelper/pagehelper -->
<dependency>
	<groupId>com.github.pagehelper</groupId>
	<artifactId>pagehelper</artifactId>
	<version>5.2.0</version>
</dependency>
在MyBatis的核心配置文件(mybatis-config.xml)中配置插件
<plugins>
    <!--设置分页插件-->
    <plugin interceptor="com.github.pagehelper.PageInterceptor"></plugin>
</plugins>
放置的位置

分页插件的使用
@Test
public void test2() throws IOException {
    Reader is = Resources.getResourceAsReader("mybatis-config.xml");
    SqlSession sqlSession = new SqlSessionFactoryBuilder().build(is).openSession(true);
    EmpMapper mapper = sqlSession.getMapper(EmpMapper.class);
    // 开启分页查询,查询第一页,每页展示4条
    Page<Object> page = PageHelper.startPage(1, 4);
    // 查询数据
    List<Emp> emps = mapper.selectByExample(null);
    emps.forEach(emp -> System.out.println(emp));
    // 获取分页基础信息
    System.out.println(page);
    System.out.println("*****");
    // 获取分页详细信息
    PageInfo<Emp> pageInfo = new PageInfo<>(emps,5);
    System.out.println(pageInfo);
}
常用数据
- pageNum:当前页的页码
- pageSize:每页显示的条数
- size:当前页显示的真实条数
- total:总记录数
- pages:总页数
- prePage:上一页的页码
- nextPage:下一页的页码
- isFirstPage/isLastPage:是否为第一页/最后一页
- hasPreviousPage/hasNextPage:是否存在上一页/下一页
- navigatePages:导航分页的页码数
- navigatepageNums:导航分页的页码,[1,2,3,4,5]

瓜分20万奖金 获得内推名额 丰厚实物奖励 易参与易上手
更多推荐

 0
0 0
0- 0


 已为社区贡献3条内容

所有评论(0)