
【Vue3】标准化大厂编程规范解决方案之ESLint + Git Hooks
标准化大厂编程规范解决方案
·
为什么需要编程规范
为了实现统一的编码规范,需要使用程序自动进行规范化,人为规范化有一定的缺陷
使用 vue-cli 创建项目
升级vue/cli脚手架
npm update -g @vue/cli
查看vue脚手架版本
vue -V
代码检测工具 ESLint
提供一个插件化的JavaScript代码检测工具
// ESLint 配置文件遵循 commonJS 的导出规则,所导出的对象就是 ESLint 的配置对象
// 文档:https://eslint.bootcss.com/docs/user-guide/configuring
module.exports = {
  // 表示当前目录即为根目录,ESLint 规则将被限制到该目录下
  root: true,
  // env 表示启用 ESLint 检测的环境
  env: {
    // 在 node 环境下启动 ESLint 检测
    node: true
  },
  // ESLint 中基础配置需要继承的配置
  extends: ["plugin:vue/vue3-essential", "@vue/standard"],
  // 解析器
  parserOptions: {
    parser: '@babel/eslint-parser'
  },
  // 需要修改的启用规则及其各自的错误级别
  /**
   * 错误级别分为三种:
   * "off" 或 0 - 关闭规则
   * "warn" 或 1 - 开启规则,使用警告级别的错误:warn (不会导致程序退出)
   * "error" 或 2 - 开启规则,使用错误级别的错误:error (当被触发的时候,程序会退出)
   */
  rules: {
    "no-console": process.env.NODE_ENV === "production" ? "warn" : "off",
    "no-debugger": process.env.NODE_ENV === "production" ? "warn" : "off"
  }
};
代码格式化 Prettier
- 一个代码格式化工具
- 开箱即用
- 可以直接集成到
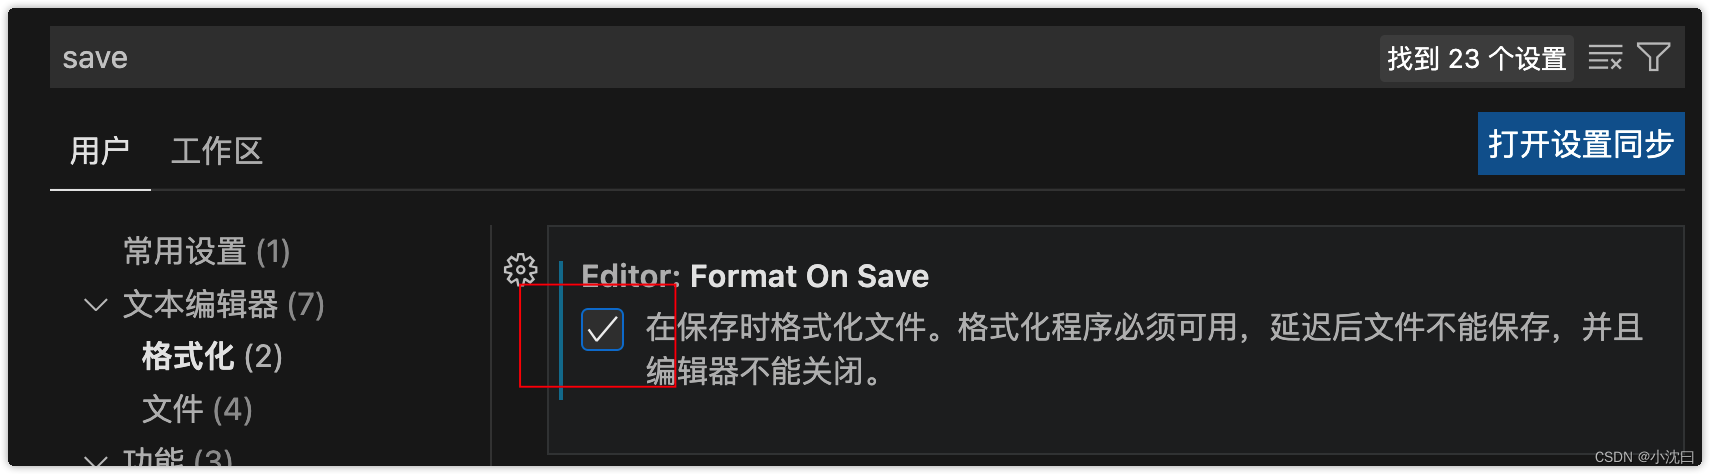
VSCode之中 - 在保存时,让代码直接符合
ESLint标准
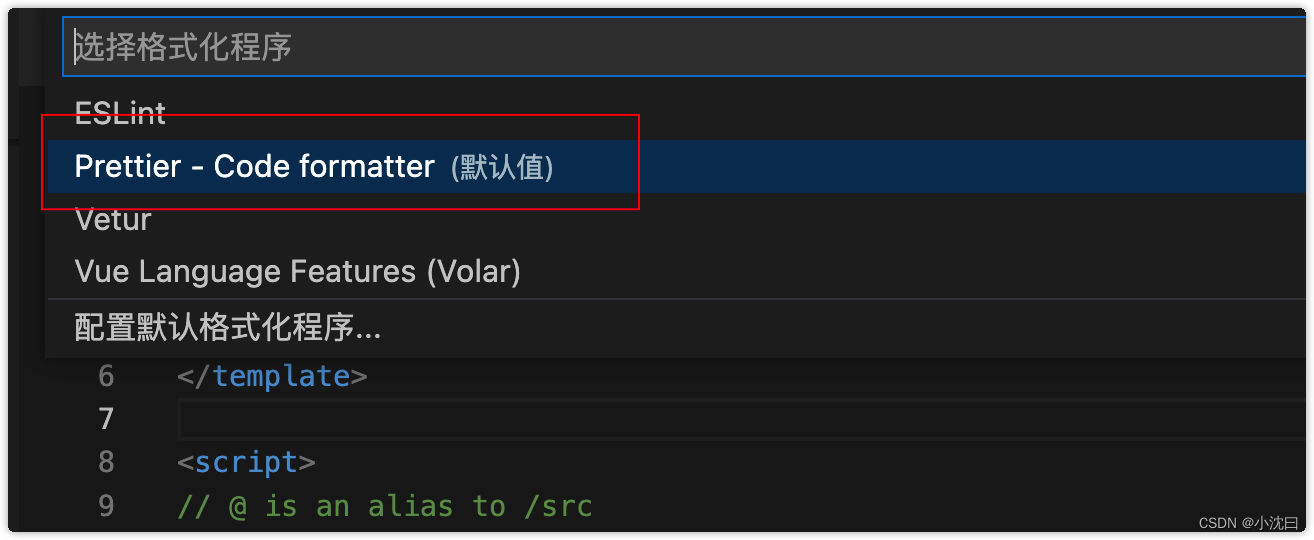
ESLint 与 Prettier 配合解决代码格式问题
- 在
VSCode中安装prettier插件(搜索prettier) - 在项目中新建
.prettierrc文件,该文件为perttier默认配置文件 - 在该文件中写入如下配置:
 {
     // 不尾随分号
     "semi": false,
     // 使用单引号
     "singleQuote": true,
     // 多行逗号分割的语法中,最后一行不加逗号
     "trailingComma": "none"
   }
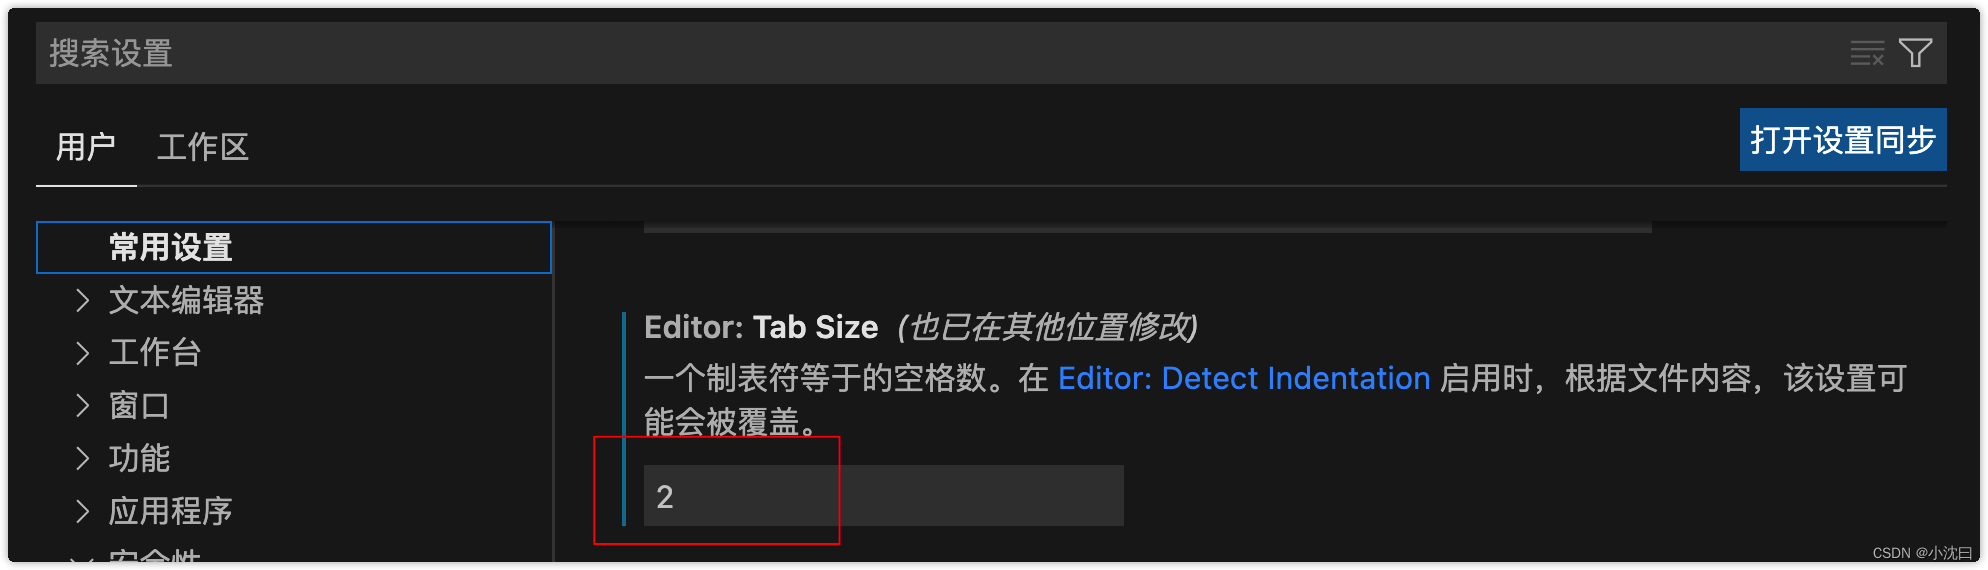
- 打开
VSCode《设置面板》
- .eslintrc.js文件添加配置
  rules: {
    'no-console': process.env.NODE_ENV === 'production' ? 'warn' : 'off',
    'no-debugger': process.env.NODE_ENV === 'production' ? 'warn' : 'off',
    'space-before-function-paren': 'off' // 新增
  }
git 提交规范解析
目前使用较多的 Angular团队规范 延伸出的 Conventional Commits specification(约定式提交)
约定式提交规范要求如下:
<type>[optional scope]: <description>

[optional body]

[optional footer(s)]

--------  翻译 -------------

<类型>[可选 范围]: <描述>

[可选 正文]

[可选 脚注]
Commitizen规范化提交代码
commitizen 仓库名为 cz-cli ,提供一个 git cz 的指令用于代替 git commit
- 全局安装
Commitizen
npm install -g commitizen
- 安装并配置
cz-customizable插件- 使用
npm下载cz-customizable
- 使用
npm i cz-customizable -D
- 添加以下配置到
package.json中
      ...
        "config": {
          "commitizen": {
            "path": "node_modules/cz-customizable"
          }
        }
- 项目根目录下创建
.cz-config.js自定义提示文件
   module.exports = {
     // 可选类型
     types: [
       { value: 'feat', name: 'feat:     新功能' },
       { value: 'fix', name: 'fix:      修复' },
       { value: 'docs', name: 'docs:     文档变更' },
       { value: 'style', name: 'style:    代码格式(不影响代码运行的变动)' },
       {
         value: 'refactor',
         name: 'refactor: 重构(既不是增加feature,也不是修复bug)'
       },
       { value: 'perf', name: 'perf:     性能优化' },
       { value: 'test', name: 'test:     增加测试' },
       { value: 'chore', name: 'chore:    构建过程或辅助工具的变动' },
       { value: 'revert', name: 'revert:   回退' },
       { value: 'build', name: 'build:    打包' }
     ],
     // 消息步骤
     messages: {
       type: '请选择提交类型:',
       customScope: '请输入修改范围(可选):',
       subject: '请简要描述提交(必填):',
       body: '请输入详细描述(可选):',
       footer: '请输入要关闭的issue(可选):',
       confirmCommit: '确认使用以上信息提交?(y/n/e/h)'
     },
     // 跳过问题
     skipQuestions: ['body', 'footer'],
     // subject文字长度默认是72
     subjectLimit: 72
   }
- 使用
git cz代替git commit
使用git cz代替git commit,即可看到提示内容
什么是 Git Hooks
| Git Hook | 调用时机 | 说明 |
|---|---|---|
| pre-applypatch | git am执行前 | |
| applypatch-msg | git am执行前 | |
| post-applypatch | git am执行后 | 不影响git am的结果 |
| pre-commit | git commit执行前 | 可以用git commit --no-verify绕过 |
| commit-msg | git commit执行前 | 可以用git commit --no-verify绕过 |
| post-commit | git commit执行后 | 不影响git commit的结果 |
| pre-merge-commit | git merge执行前 | 可以用git merge --no-verify绕过。 |
| prepare-commit-msg | git commit执行后,编辑器打开之前 | |
| pre-rebase | git rebase执行前 | |
| post-checkout | git checkout或git switch执行后 | 如果不使用--no-checkout参数,则在git clone之后也会执行。 |
| post-merge | git commit执行后 | 在执行git pull时也会被调用 |
| pre-push | git push执行前 | |
| pre-receive | git-receive-pack执行前 | |
| update | ||
| post-receive | git-receive-pack执行后 | 不影响git-receive-pack的结果 |
| post-update | 当 git-receive-pack对 git push 作出反应并更新仓库中的引用时 | |
| push-to-checkout | 当``git-receive-pack对git push做出反应并更新仓库中的引用时,以及当推送试图更新当前被签出的分支且receive.denyCurrentBranch配置被设置为updateInstead`时 | |
| pre-auto-gc | git gc --auto执行前 | |
| post-rewrite | 执行git commit --amend或git rebase时 | |
| sendemail-validate | git send-email执行前 | |
| fsmonitor-watchman | 配置core.fsmonitor被设置为.git/hooks/fsmonitor-watchman或.git/hooks/fsmonitor-watchmanv2时 | |
| p4-pre-submit | git-p4 submit执行前 | 可以用git-p4 submit --no-verify绕过 |
| p4-prepare-changelist | git-p4 submit执行后,编辑器启动前 | 可以用git-p4 submit --no-verify绕过 |
| p4-changelist | git-p4 submit执行并编辑完changelist message后 | 可以用git-p4 submit --no-verify绕过 |
| p4-post-changelist | git-p4 submit执行后 | |
| post-index-change | 索引被写入到read-cache.c do_write_locked_index后 |
PS:详细的 HOOKS介绍 可点击这里查看
整体的 hooks 非常多,当时我们其中用的比较多的其实只有两个:
| Git Hook | 调用时机 | 说明 |
|---|---|---|
| pre-commit | git commit执行前它不接受任何参数,并且在获取提交日志消息并进行提交之前被调用。脚本 git commit以非零状态退出会导致命令在创建提交之前中止。 | 可以用git commit --no-verify绕过 |
| commit-msg | git commit执行前可用于将消息规范化为某种项目标准格式。 还可用于在检查消息文件后拒绝提交。 | 可以用git commit --no-verify绕过 |
| 简单来说这两个钩子: |
commit-msg:可以用来规范化标准格式,并且可以按需指定是否要拒绝本次提交pre-commit:会在提交前被调用,并且可以按需指定是否要拒绝本次提交
使用 husky + commitlint 检查提交描述是否符合规范要求
- commitlint:用于检查提交信息
- husky:是
git hooks工具
commitlint
- 安装依赖:
npm install -D @commitlint/config-conventional @commitlint/cli
- 创建
commitlint.config.js文件
echo "module.exports = {extends: ['@commitlint/config-conventional']}" > commitlint.config.js
- 打开
commitlint.config.js, 增加配置项( config-conventional 默认配置点击可查看 ):
   module.exports = {
     // 继承的规则
     extends: ['@commitlint/config-conventional'],
     // 定义规则类型
     rules: {
       // type 类型定义,表示 git 提交的 type 必须在以下类型范围内
       'type-enum': [
         2,
         'always',
         [
           'feat', // 新功能 feature
           'fix', // 修复 bug
           'docs', // 文档注释
           'style', // 代码格式(不影响代码运行的变动)
           'refactor', // 重构(既不增加新功能,也不是修复bug)
           'perf', // 性能优化
           'test', // 增加测试
           'chore', // 构建过程或辅助工具的变动
           'revert', // 回退
           'build' // 打包
         ]
       ],
       // subject 大小写不做校验
       'subject-case': [0]
     }
   }
husky
- 安装依赖:
npm install husky -D
- 启动
hooks, 生成.husky文件夹
npx husky install
- 在
package.json中生成prepare指令( 需要 npm > 7.0 版本 )
npm set-script prepare "husky install"
- 执行
prepare指令
npm run prepare
- 执行成功,提示
> admin@0.1.0 prepare
> husky install

husky - Git hooks installed
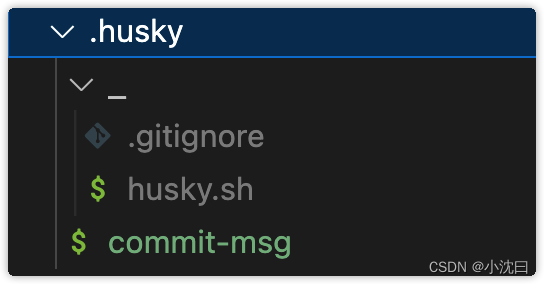
- 添加
commitlint的hook到husky中,并指令在commit-msg的hooks下执行npx --no-install commitlint --edit "$1"指令
npx husky add .husky/commit-msg 'npx --no-install commitlint --edit "$1"'
- 此时的
.husky的文件结构
通过 pre-commit 检测提交时代码规范
- 执行
npx husky add .husky/pre-commit "npx eslint --ext .js,.vue src"添加commit时的hook(npx eslint --ext .js,.vue src会在执行到该 hook 时运行) - 该操作会生成对应文件
pre-commit: - 关闭
VSCode的自动保存操作 - 修改一处代码,使其不符合
ESLint校验规则 - 执行 提交操作 会发现,抛出一系列的错误,代码无法提交
通过 pre-commit 处理 检测代码的提交规范问题,当进行代码提交时,会检测所有的代码格式规范 。
存在两个问题:
- 只修改个别的文件,没有必要检测所有的文件代码格式
- 它只能给提示出对应的错误,还需要手动的进行代码修改
lint-staged 自动修复格式错误
lint-staged 让当前代码检查 只检查本次修改更新的代码,并在出现错误的时候,自动修复并且推送
lint-staged 无需单独安装,生成项目时,vue-cli 已经帮助我们安装过了,所以直接使用
- 修改
package.json配置
   "lint-staged": {
       "src/**/*.{js,vue}": [
         "eslint --fix",
         "git add"
       ]
     }
-
如上配置,每次它只会在你本地
commit之前,校验你提交的内容是否符合你本地配置的eslint规则(这个见文档 ESLint ),校验会出现两种结果:- 如果符合规则:则会提交成功。
- 如果不符合规则:它会自动执行
eslint --fix尝试帮你自动修复,如果修复成功则会帮你把修复好的代码提交,如果失败,则会提示你错误,让你修好这个错误之后才能允许你提交代码。
-
修改
.husky/pre-commit文件
   #!/bin/sh
   . "$(dirname "$0")/_/husky.sh"

   npx lint-staged
- 再次执行提交代码
- 发现 暂存区中 不符合
ESlint的内容,被自动修复

瓜分20万奖金 获得内推名额 丰厚实物奖励 易参与易上手
更多推荐

 1
1 0
0- 0


 已为社区贡献2条内容

所有评论(0)