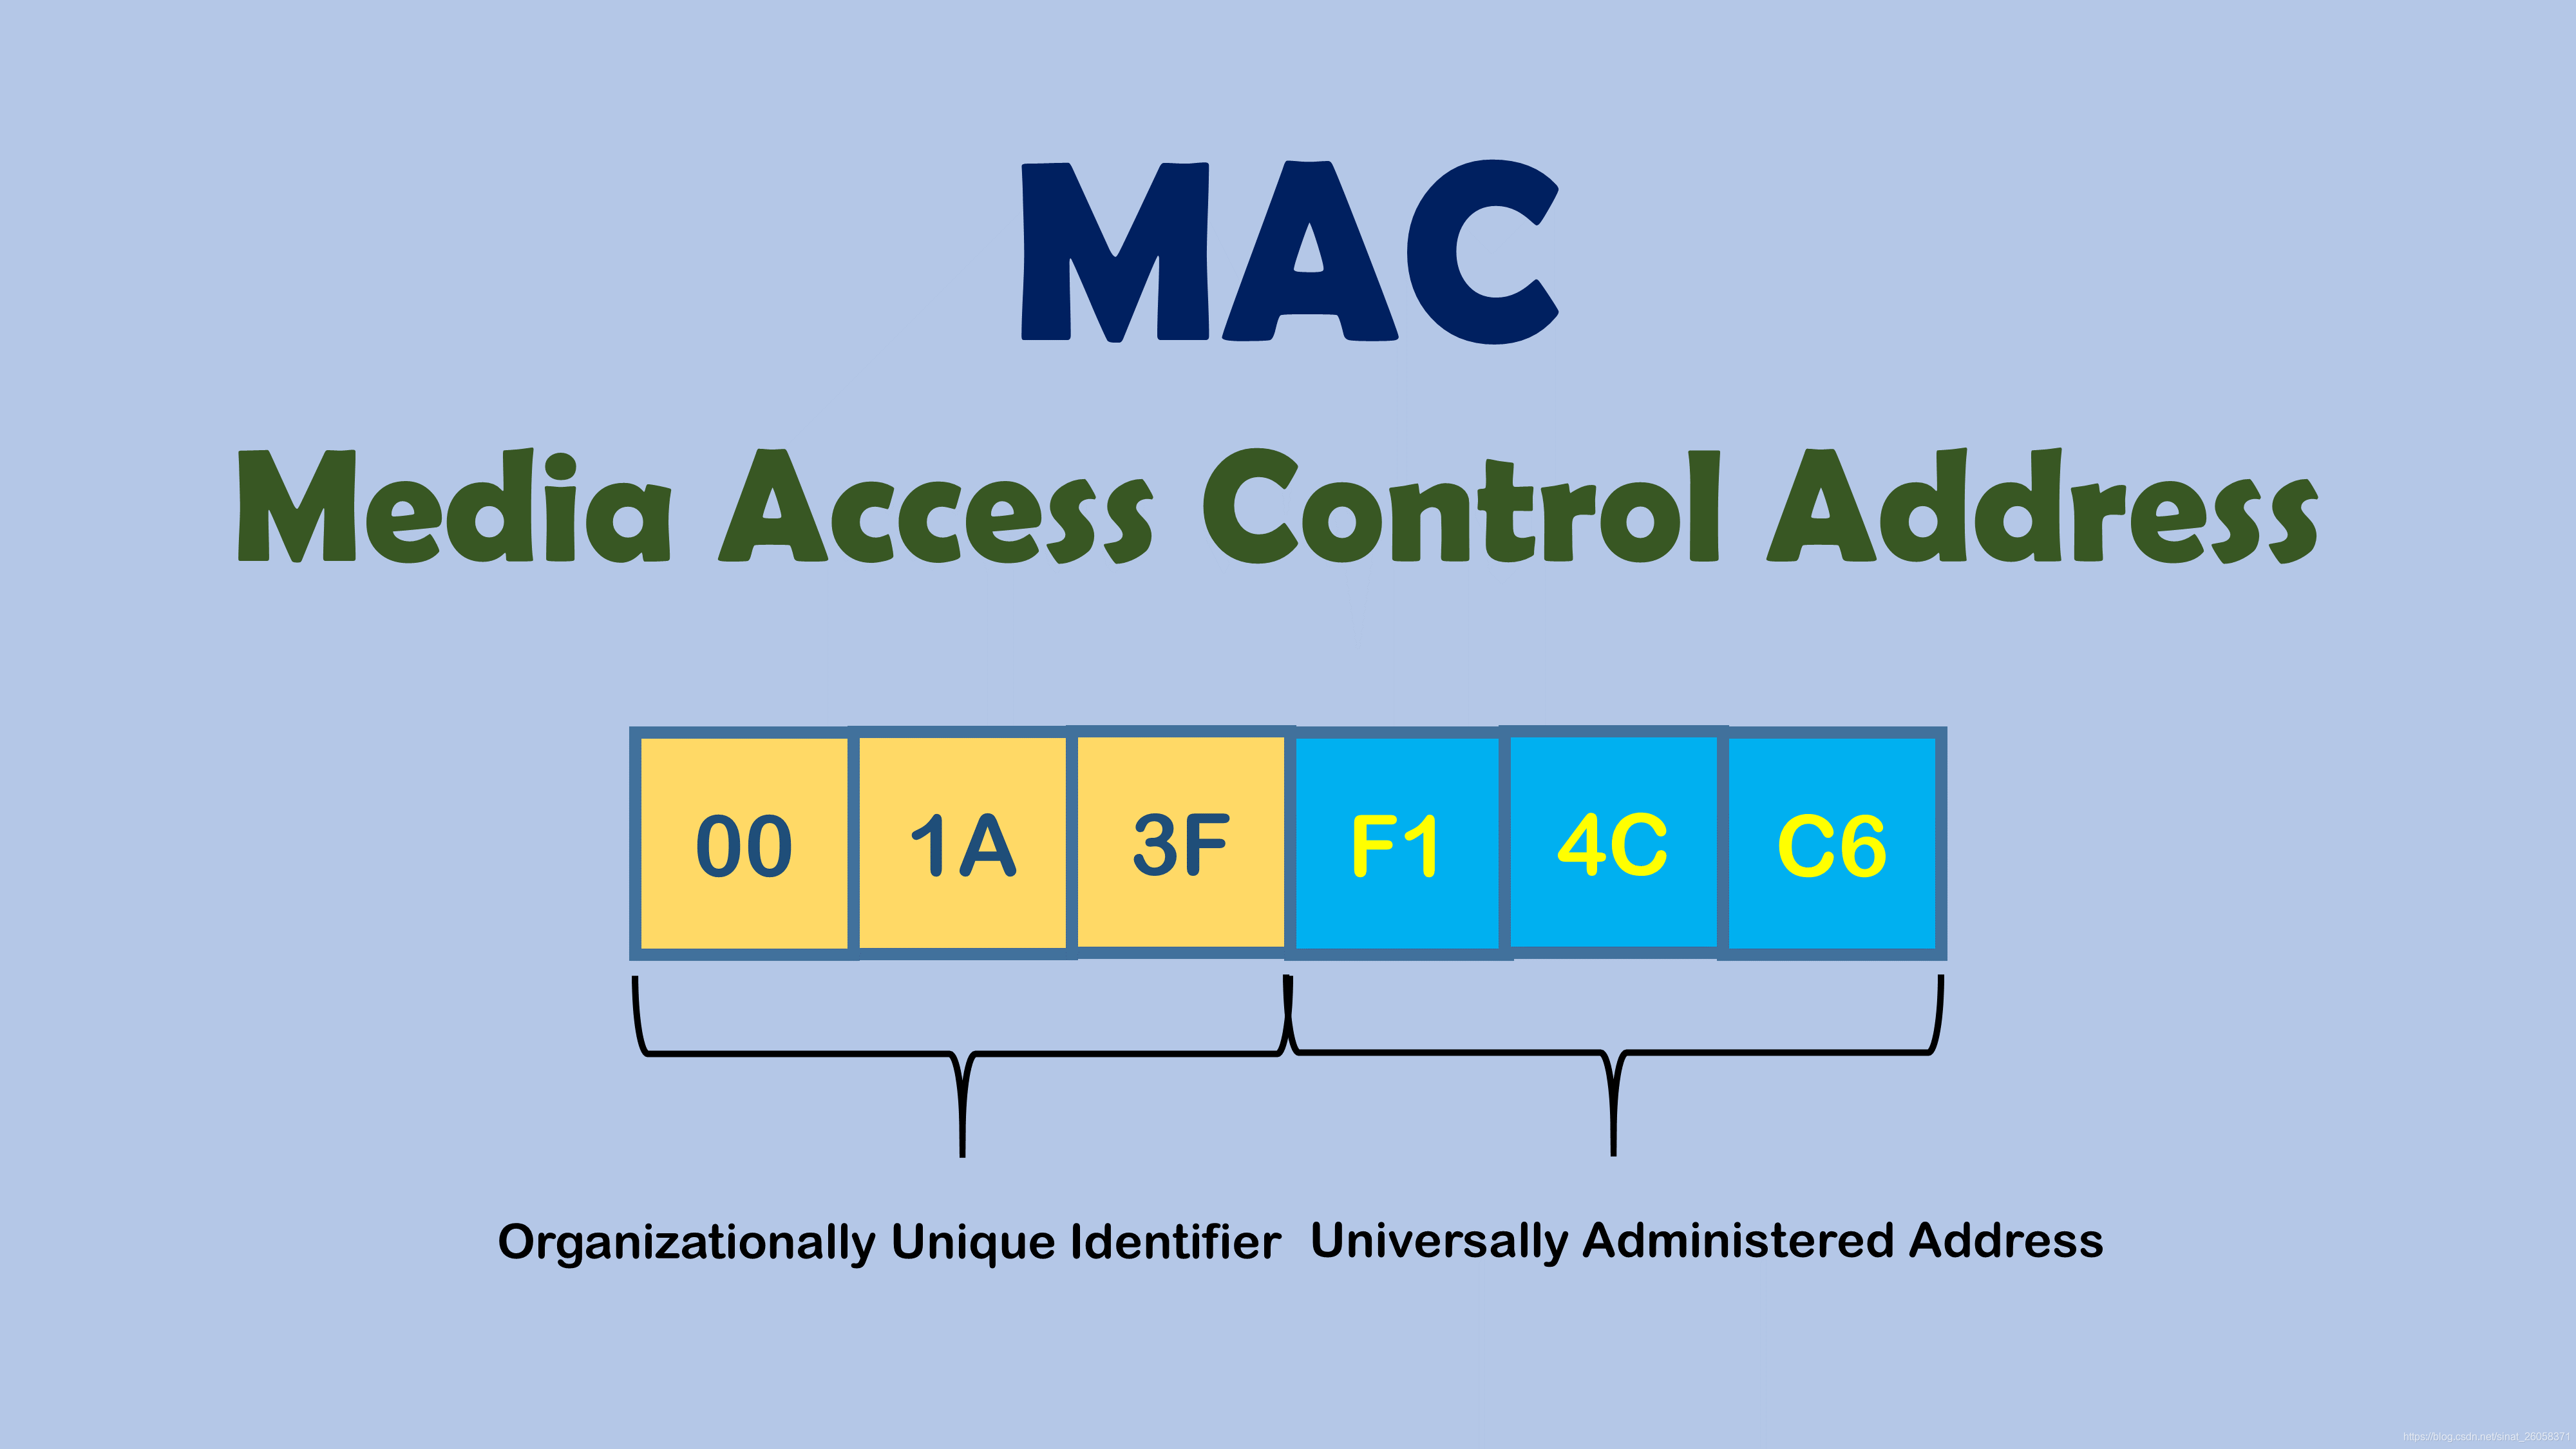
【网管博客 | 02】我命由我!教你用两种方式修改Intel网卡MAC地址
实际生产过程中,由于某些原因可能需要修改网卡的 MAC 地址。本文介绍两种修改Intel网卡MAC地址的方法
🗺️博客地图
在实际生产过程中,由于某些原因可能需要修改网卡的 MAC 地址。本文介绍两种修改Intel网卡MAC地址的方法
方法一:ethtool命令
1、备份网卡eeprom,运行命令:
ethtool -e 网口名称 raw on > 网口名称.data
例如:ethtool -e eth5 raw on > /root/backup/eth5.data
2、检查网卡mac地址在网卡eeprom中的偏移量,运行命令:
ethtool -e 网口名称 | grep "mac地址"
例如:ethtool -e eth5 | grep "5c 35 9f 48 e2 11")
查看mac地址偏移量是否符合下面的要求
3、检查网卡的magic值( VenID与DevID ),magic值可以通过命令lspci -nn -vv | grep Eth查询,下列示例的magic需要根据实际情况进行修改,macgic值得确认
[root@localhost ~]# lspci -nn -vv | grep Eth

pcilib: sysfs_read_vpd: read failed: Input/output error

0b:00.0 Ethernet controller [0200]: Intel Corporation 82599ES 10-Gigabit SFI/SFP+ Network Connection [8086:10fb] (rev 01)

        Subsystem: Intel Corporation Ethernet Server Adapter X520-2 [8086:000c]

13:00.0 Ethernet controller [0200]: VMware VMXNET3 Ethernet Controller [15ad:07b0] (rev 01)

        Subsystem: VMware VMXNET3 Ethernet Controller [15ad:07b0]
通过ethtool -i网卡名称 可以知道0b:00.0才是我们需要的,0b:00.0 那一列中 中括号包围的部分就是DevID与VenID ([8086:10fb]),按0x VenID DevID拼接就是:0x10fb8086
5、修改网卡mac
如果网卡是82599或X520,使用ethtool -e p1p1(p1p1是第一个接口的名称,根据实际情况修改),检查偏移量为0x0360开始的6个字节是否是当前mac地址(把当前的mac记录下来,以便后续还原)
如果确认无误,82599或X520修改MAC地址可以依次执行下列命令,最后1列的值是改成的MAC
           网卡      0xVenID与DevID     偏移量      字节     mac值
ethtool -E p1p1 magic 0x10fb8086 offset 0x360 length 1 value 0x48
ethtool -E p1p1 magic 0x10fb8086 offset 0x361 length 1 value 0xf8
ethtool -E p1p1 magic 0x10fb8086 offset 0x362 length 1 value 0xdb
ethtool -E p1p1 magic 0x10fb8086 offset 0x363 length 1 value 0x7e
ethtool -E p1p1 magic 0x10fb8086 offset 0x364 length 1 value 0xda
ethtool -E p1p1 magic 0x10fb8086 offset 0x365 length 1 value 0x5c如果网卡是X550T,则需要更改上面的magic值和offset值,依旧使用ethtool -e p1p1(p1p1是第一个接口的名称,根据实际情况修改),检查偏移量为0x0212开始的6个字节是否是当前mac地址(把当前的mac记录下来,以便后续还原)
如果确认无误,X550T网卡修改MAC可以依次执行下列命令,最后1列的值是改成的MAC
ethtool -E p1p1 magic 0x15638086 offset 0x0212 length 1 value 0xf8
ethtool -E p1p1 magic 0x15638086 offset 0x0213 length 1 value 0xf2
ethtool -E p1p1 magic 0x15638086 offset 0x0214 length 1 value 0x1e
ethtool -E p1p1 magic 0x15638086 offset 0x0215 length 1 value 0x12
ethtool -E p1p1 magic 0x15638086 offset 0x0216 length 1 value 0x0c
ethtool -E p1p1 magic 0x15638086 offset 0x0217 length 1 value 0x8c如果网卡是X710 等其他Inter的网卡,通过上面的方法的方法无法在eeprom中找到唯一的MAC值,而且按照ethtool命令进行修改,但是有时这种方法可能会因各种原因而失败。那么可以通过方法二进行修改
方法二:eeupdate工具
1. 修改前,先备份要修改网卡的 eeprom 值:
运行命令
ethtool -e 网口名称 raw on > 网口名称.data(例如
ethtool -e ens192 raw on > /opt/backup/ens192.data)
2. 将压缩包上传到要修改 MAC 地址的服务器,解压:unzip Eeupdate_Linux64.zip
3. 进入 OEM_Mfg 目录:
cd Eeupdate_Linux64/OEM_Mfg
4. 给文件添加执行权限:
chmod +x install
chmod +x eeupdate64e
5. 执行安装:
./install
(如果报错,先尝试往下面步骤继续操作)
6. 查看需要修改 MAC 网卡的 bus-info 值:
ethtool -i <网卡>
查看网卡bus-info值:
[root@localhost OEM_Mfg]# ethtool -i ens192 | grep -i bus-info
bus-info: 0000:0b:00.0
bus-info 由四部分组成:按顺序分别是值域(0000),总线值(0b),设备值(00),功能值(0)
7. 查看需要修改 MAC 网卡原来的 MAC 值:
ip a或者ip link show <网卡>或者ifconfig
查看网卡MAC地址
[root@localhost OEM_Mfg]# ip link show ens192 | grep link
link/ether00:50:56:89:b5:21 brd ff:ff:ff:ff:ff:ff
8. 执行 eeupdate64e 查看所有网卡设备
./eeupdate64e/ALL
查找要修改MAC的网卡的NIC
[root@localhost OEM_Mfg]# ./eeupdate64e /ALL
Using: Intel (R) PRO Network Connections SDK v2.35.23
EEUPDATE v5.35.23.02
Copyright (C) 1995 - 2020 Intel Corporation
Intel (R) Confidential and notforgeneral distribution.
NIC Bus Dev Fun Vendor-Device Branding string
=== === === === ============= =================================================
1 11 00 00 8086-1521 Intel(R) Ethernet Server Adapter I350-T4
命令输出显示的 Bus、Dev、Fun 分别就是对照网卡设备 bus-info 的总线值、设备值和功能值;那么将 NIC=1 设备的 Bus、Dev、Fun 转换为 16 进制就是 b,0,0,对应的就是上面的 ens192 网卡的 0b:00.0
9. 除了上面,还可以直接查看 MAC 地址进行对照,比如查看 NIC=1 设备的 MAC 值:
./eeupdate64e /NIC=<要查看网卡的NIC值> /MAC_DUMP
查看指定NIC网卡的MAC值
[root@localhost OEM_Mfg]# ./eeupdate64e /NIC=1 /MAC_DUMP
Using: Intel (R) PRO Network Connections SDK v2.35.23
EEUPDATE v5.35.23.02
Copyright (C) 1995 - 2020 Intel Corporation
Intel (R) Confidential and notforgeneral distribution.
NIC Bus Dev Fun Vendor-Device Branding string
=== === === === ============= =================================================
1 11 00 00 8086-1521 Intel(R) Ethernet Server Adapter I350-T4
1: LAN MAC Address is 00505689B521.
10. 找到要修改 MAC 网卡后,就可以执行命令修改 MAC:./eeupdate64e /NIC=<要修改网卡的NIC值> /MAC=<mac地址> (MAC 地址要小写)
修改网卡MAC
[root@localhost OEM_Mfg]# ./eeupdate64e /NIC=1 /MAC=48f8db7eda5c
Using: Intel (R) PRO Network Connections SDK v2.35.23
EEUPDATE v5.35.23.02
Copyright (C) 1995 - 2020 Intel Corporation
Intel (R) Confidential and notforgeneral distribution.
NIC Bus Dev Fun Vendor-Device Branding string
=== === === === ============= =================================================
1 11 00 00 8086-1521 Intel(R) Ethernet Server Adapter I350-T4
1: Updating Mac Address to 48F8DB7EDA5C...Done.
1: Updating Checksum and CRCs...Done.
11. 修改后,需要重启服务器,重启后,查看网卡 mac 是否修改成功
eeupdate常用参数
/HELP或/?:显示命令行帮助信息。/ALL:选择系统中找到的所有适配器。/NIC=XX:选择指定的适配器 (1-32)。/MAC=macaddr:使用 macaddr 替换 EEPROM 中的 MAC 地址,不修改 EEPROM 中的其它内容。/DUMP:将 EEPROM 存储器中的内容转存到文件中。如:./eeupdate64e /NIC=1 /DUMP/MAC_DUMP:显示适配器的 MAC 地址。
eeupdate常见用法
查看所有适配器:
./eeupdate64e /ALL
命令输出会显示 nic 号对应的网卡
查看指定 nic 号网卡的 MAC:
./eeupdate64e /NIC=1 /MAC_DUMP
修改网卡 MAC:
在 CentOS 系统下,如果您想直接写入网卡 1 的 MAC 地址为 48F8DB7EDA5C,则可以使用以下命令:
eeupdate64e /NIC=1 /MAC=48f8db7eda5c

开放原子开发者工作坊旨在鼓励更多人参与开源活动,与志同道合的开发者们相互交流开发经验、分享开发心得、获取前沿技术趋势。工作坊有多种形式的开发者活动,如meetup、训练营等,主打技术交流,干货满满,真诚地邀请各位开发者共同参与!
更多推荐
 已为社区贡献3条内容


所有评论(0)