机器学习方法在测井解释上的应用-以岩性分类为例
机器学习在测井解释上的应用越来越广泛,主要用于提高油气勘探和开发的效率和精度。通过使用机器学习算法,可以从测井数据中自动识别地质特征,预测岩石物理性质,以及优化油气储层的评估和管理。:机器学习模型能够分析测井数据,如声波、电阻率、伽玛射线等,来识别不同的岩石类型和沉积环境。:使用机器学习算法可以根据测井数据预测岩石的孔隙度和渗透性,这对于评估储层质量和油气潜力非常关键。:机器学习方法可以帮助解释和
机器学习在测井解释上的应用越来越广泛,主要用于提高油气勘探和开发的效率和精度。通过使用机器学习算法,可以从测井数据中自动识别地质特征,预测岩石物理性质,以及优化油气储层的评估和管理。
以下是机器学习在测井解释中的一些关键应用:
-
岩性分类:机器学习模型能够分析测井数据,如声波、电阻率、伽玛射线等,来识别不同的岩石类型和沉积环境。
-
孔隙度和渗透性预测:使用机器学习算法可以根据测井数据预测岩石的孔隙度和渗透性,这对于评估储层质量和油气潜力非常关键。
-
储层特征化:机器学习方法可以帮助解释和量化储层的复杂特性,如裂缝、岩层压实度和含油饱和度等。
-
时间序列分析:在动态测井解释中,机器学习模型能够分析时间序列数据,监测储层的变化,优化生产策略。
-
自动化和精确性:通过自动化的数据处理和分析,机器学习可以减少人为误差,提高解释的精确性和效率。
使用这些技术,地球物理学家和工程师可以更准确地评估油气田的潜力,优化开采计划,从而降低风险和成本。
本文介绍零基础配置机器学习环境完成测井解释中的常见任务——岩性分类
1. 配置实验环境
1.1 安装conda
Conda 是一个开源的包管理系统和环境管理系统,它支持多种语言,如 Python、R、Ruby、Lua、Scala、Java、JavaScript、C/C++ 等。Conda 主要用于科学计算领域,帮助用户管理依赖关系和环境,从而方便在不同项目之间切换不同的库版本。
Conda 的主要特点包括:
-
跨平台支持:支持 Linux、Windows 和 macOS。
-
环境管理:用户可以创建隔离的环境以避免不同库之间的依赖冲突。每个环境可以拥有不同的库版本,使得多项目开发更为便捷。
-
便捷的包管理:Conda 允许用户从其仓库中安装、升级和删除软件包。这些软件包预编译好了,可以避免用户自己编译的复杂性。
-
大型生态系统:Conda 通过 Anaconda 和 Miniconda 发行版,为用户提供了大量预编译的科学计算和数据科学相关的软件包。
使用 Conda 的基本命令很简单,比如:
- 创建新环境:
conda create --name myenv python=3.9 - 激活环境:
conda activate myenv - 安装包:
conda install numpy - 列出环境中的包:
conda list
这样的特性使 Conda 成为科学研究和数据科学领域非常受欢迎的工具之一。
参考安装方法:Conda安装及使用方法
这里安装成功即可,记得执行配置清华源(国内网速);
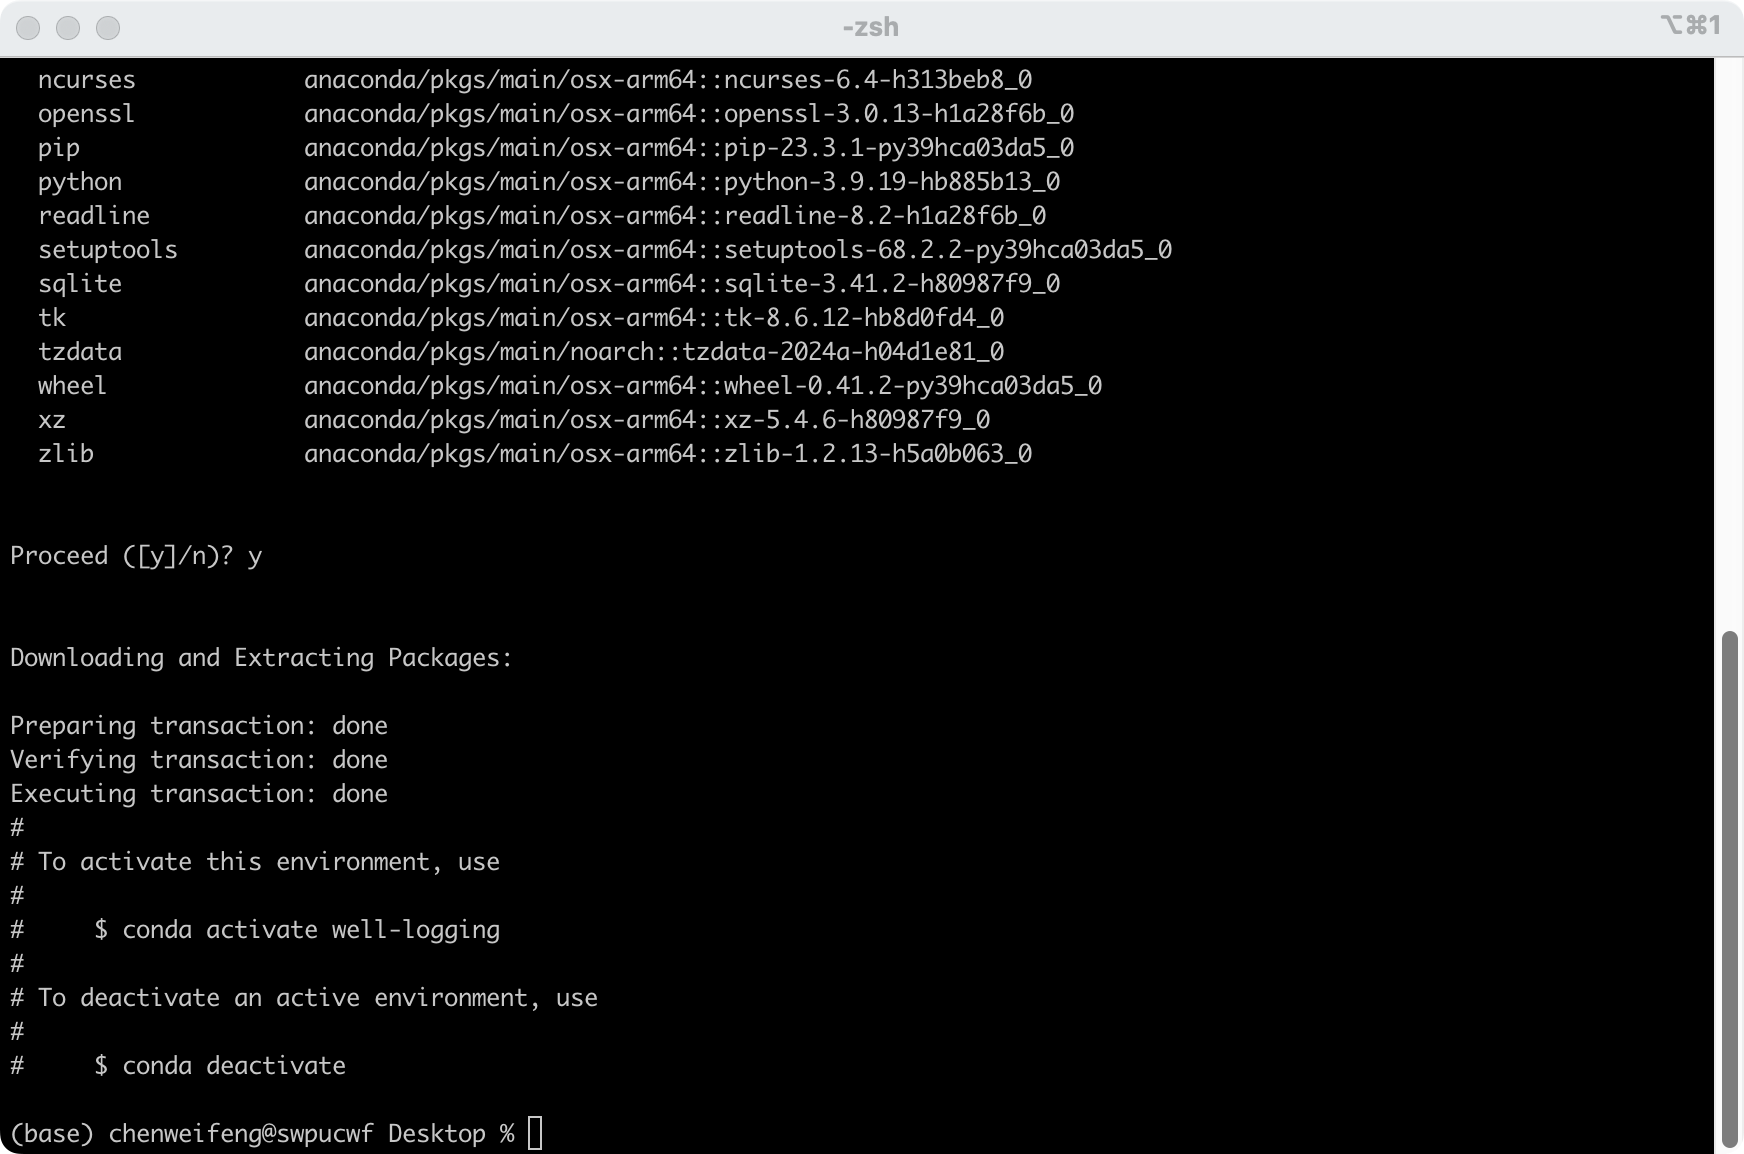
1.2 Conda安装Python环境
打开终端,windows打开cmd;
依次执行以下命令:
# 1. 创建环境
conda create -n well-logging python=3.9

# 激活环境
conda activate well-logging

# 安装包
pip install jupyter
pip install matplotlib
pip install pandas
pip install scikit-learn
2. 准备数据
打开vscode ,选择python环境即可

2.1 测井数据准备
以csv存储的数据为基础,需要包含研究的测井响应特征以判别的标签;这里Core Lithology 作为岩性标签,为了方便研究这里已经将对应的标签进行数据编号;其中 1=粗砂岩 2=中砂岩 3=细砂岩 4=粉砂岩 5=白云岩 6=石灰岩 7=泥岩;

2.2 导入环境
2.2.1 导入基本环境
import pandas as pd
import numpy as np
import matplotlib as mpl
import matplotlib.pyplot as plt
import matplotlib.colors as colors
from mpl_toolkits.axes_grid1 import make_axes_locatable
from pandas import set_option
set_option("display.max_rows", 10)#设置要显示的默认行数,显示的最大行数是10
pd.options.mode.chained_assignment = None #为了在增加列表行数的时候防止出现setting with copy warning
2.2.2 读取数据显示
# 模型训练的数据
training_data = pd.read_csv('./train.csv')
training_data
# 预测的数据
testing_data = pd.read_csv('./test.csv')
testing_data

2.2.3 查看数据分布(可选,防止测井响应特征存在缺失情况)
查看数目、均值、方差、误差分布图
# 1=粗砂岩  2=中砂岩   3=细砂岩
# 4=粉砂岩 5=白云岩 6=石灰岩 7=泥岩 ,不同的颜色选项
facies_colors = ['#F4D03F', '#F5B041','#DC7633','#6E2C00',
       '#1B4F72','#2E86C1', '#AED6F1']

# 类别不支持中文, 编为英文
facies_labels = ['CS', 'MS', 'FS', 'SS', 'DM',
                 'LS', 'MDS']
#facies_color_map is a dictionary that maps facies labels
#to their respective colors
facies_color_map = {}
for ind, label in enumerate(facies_labels):
    facies_color_map[label] = facies_colors[ind]
testing_data.describe()

2.2.3 查看训练数据的标签数量
#count the number of unique entries for each facies, sort them by facies number (instead of by number of entries)
#计算每个相的唯一条目数,然后按相数(而不是条目数)对它们进行排序
facies_counts = training_data['Core Lithology'].value_counts().sort_index()
#use facies labels to index each count
#使用相标签索引每个计数
facies_counts.index = facies_labels

facies_counts.plot(kind='bar',color=facies_colors,
                   title='Distribution of Training Data by Facies')
# 各个岩性数据点统计
facies_counts

2.2.4 提取对应数据
除Core Lithology 列,其余均为需要研究的测井响应特征、这里全部提取;
# 训练数据
correct_facies_labels = training_data['Core Lithology'].values
correct_facies_labels_test = testing_data['Core Lithology'].values
# 测试数据
feature_vectors = training_data.drop(['Core Lithology'], axis=1)
feature_vectors_test = testing_data.drop(['Core Lithology'], axis=1)

feature_vectors.describe()
feature_vectors_test.describe()

3. 数据建模
3.1 数据标准化
Scikit包含一个预处理模块,可以“标准化”数据(赋予每个变量零均值和单位方差,也称为白化)。 许多机器学习算法都假定特征将是标准的正态分布数据(即:均值和单位方差为零的高斯)。 用于标准化训练集的因素必须应用于将输入到分类器的任何后续功能集中。 StandardScalar类可以适合于训练集,并在以后用于标准化任何训练数据。
from sklearn import preprocessing
# 数据标准化
scaler = preprocessing.StandardScaler().fit(feature_vectors)
scaled_features = scaler.transform(feature_vectors)


scaler_test = preprocessing.StandardScaler().fit(feature_vectors_test)
scaled_features_test = scaler.transform(feature_vectors_test)

# 数据标准化后数据
feature_vectors

3.2 数据划分
X_train = scaled_features
X_test = scaled_features_test
y_train = correct_facies_labels
y_test = correct_facies_labels_test
3.3 数据建模
常用的几种分类方法
# 支持向量机(Support Vector Machine)
from sklearn.svm import SVC
# k近邻分类
from sklearn.neighbors import KNeighborsClassifier
# 逻辑回归
from sklearn.linear_model import LogisticRegression
# 决策树
from sklearn.tree import DecisionTreeClassifier
# 随机森林(Random Forest)
from sklearn.tree import DecisionTreeClassifier
# 梯度提升树(Gradient Boosting Machines)
from sklearn.ensemble import GradientBoostingClassifier


## 定义模型,这里调用支持向量机
clf = SVC()
# 调用方式如下:
# clf = KNeighborsClassifier()
3.4 模型训练
clf.fit(X_train,y_train)
3.5 模型预测
predicted_labels = clf.predict(X_test)
See the file classification_utilities.py in this repo for the display_cm() function.
3.6 评估指标
我们需要一些指标来评估分类器的效果。 混淆矩阵是可用于描述分类模型性能的表。 Scikit-learn通过提供实际和预测的相貌标签,使我们能够轻松创建混淆矩阵。
混淆矩阵只是2D数组。 混淆矩阵C [i] [j]的条目等于预测具有相j的观测次数,但已知具有相i。
精度和回忆度是能够更深入地了解分类器对单个相的执行情况的指标。精度是给定一个样本的分类结果,这个样本实际上属于这个类别的概率。召回率是样本将被正确分类为给定类的概率。使用混淆矩阵可以很容易地计算出精确度和查全率
from sklearn.metrics import confusion_matrix
from classification_utilities import display_cm, display_adj_cm
# 混淆矩阵,还有其他例如,准确率、召回率
conf = confusion_matrix(y_test, predicted_labels)
3.7 不同超参数调参
svm算法存在不同过的超参数,需要显示参数过程,以实际准确率作为评估标准,显示不同超参数情况下模型准确率
#model selection takes a few minutes, change this variable
#to true to run the parameter loop
from sklearn.svm import SVC
def accuracy(conf):
    total_correct = 0.
    nb_classes = conf.shape[0]
    for i in np.arange(0,nb_classes):
        total_correct += conf[i][i]
    acc = total_correct/sum(sum(conf))
    return acc
def accuracy_adjacent(conf, adjacent_facies):
    nb_classes = conf.shape[0]
    total_correct = 0.
    for i in np.arange(0,nb_classes):
        total_correct += conf[i][i]
        for j in adjacent_facies[i]:
            total_correct += conf[i][j]
    return total_correct / sum(sum(conf))

do_model_selection = True

if do_model_selection:
    C_range = np.array([.01, 1, 5, 10, 20, 50, 100, 1000, 5000, 10000])
    gamma_range = np.array([0.0001, 0.001, 0.01, 0.1, 1, 10])

    fig, axes = plt.subplots(3, 2,
                        sharex='col', sharey='row',figsize=(10,10))
    plot_number = 0
    for outer_ind, gamma_value in enumerate(gamma_range):
        row = int(plot_number / 2)
        column = int(plot_number % 2)
        cv_errors = np.zeros(C_range.shape)
        train_errors = np.zeros(C_range.shape)
        for index, c_value in enumerate(C_range):

            clf = SVC(C=c_value, gamma=gamma_value)
            clf.fit(X_train,y_train)

            train_conf = confusion_matrix(y_train, clf.predict(X_train))
            cv_conf = confusion_matrix(y_test, clf.predict(X_test))

            cv_errors[index] = accuracy(cv_conf)
            train_errors[index] = accuracy(train_conf)

        ax = axes[row, column]
        ax.set_title('Gamma = %g'%gamma_value)
        ax.semilogx(C_range, cv_errors, label='CV error')
        ax.semilogx(C_range, train_errors, label='Train error')
        plot_number += 1
        ax.set_ylim([0.2,1])

    ax.legend(bbox_to_anchor=(1.05, 0), loc='lower left', borderaxespad=0.)
    fig.text(0.5, 0.03, 'C value', ha='center',
             fontsize=14)

    fig.text(0.04, 0.5, 'Classification Accuracy', va='center',
             rotation='vertical', fontsize=14)

3.8 交叉验证
clf = SVC(C=10, gamma=1)
clf.fit(X_train, y_train)

cv_conf = confusion_matrix(y_test, clf.predict(X_test))

print('Optimized facies classification accuracy = %.2f' % accuracy(cv_conf))
print(f'准确率{accuracy(cv_conf)}')

开放原子开发者工作坊旨在鼓励更多人参与开源活动,与志同道合的开发者们相互交流开发经验、分享开发心得、获取前沿技术趋势。工作坊有多种形式的开发者活动,如meetup、训练营等,主打技术交流,干货满满,真诚地邀请各位开发者共同参与!
更多推荐
 已为社区贡献12条内容


所有评论(0)