Facebook、Google 第三方登录
react native facebook、google 第三方登录
·
1.react native 使用facebook登录
1.登录facebook开发者,创建项目

2.填写应用信息

3.设置 安卓和ios 配置
添加平台


填写iOS 和安卓的信息


4.配置获取信息 ,默认自带一个,看个人需求添加

5.发布前进行数据审核

6.找到 facebook id 和token
id为应用编号,在基础信息中可以找到
token 在高级中可以找到

7.将facebook id和token 放置到app中
安卓 /android/app/src/main/AndroidManifest.xml

ios /ios/powerbankApp/Info.plist

提示:ios还需要在xcode 中修改facebook id

8.Rn 代码
//安装
yarn add react-native-fbsdk-next
//引入
import {LoginManager, Profile, AccessToken} from "react-native-fbsdk-next";

faceLogin = () => {
  const that = this;
  that.setState({loading: true})
  LoginManager.logInWithPermissions(['public_profile', 'email']).then(
    result => {
      if (result.isCancelled) {
        that.setState({loading: false})
        alertToast.show('Login cancelled', global.language.ok || 'OK')}
      else {
        AccessToken.getCurrentAccessToken().then(data => {
        const {accessToken} = data;
        let token = accessToken.toString();
        return fetch('https://graph.facebook.com/v15.0/mefields=email,name,first_name,last_name,picture.type(large),friends&access_token=' +token,
      {method: 'GET',
       headers: {'Content-Type': 'application/json'}},)
       .then(response => {
        that.setState({loading: false})
        console.log(response.facebookData)
        response.json().then(facebookData => {
        const fbData = JSON.stringify(facebookData);
        console.log("My fbData", fbData)
        console.log(facebookData)
        console.log(facebookData.email)
        console.log(facebookData.id)
        console.log(facebookData.name)
        let params = {
             openId: facebookData.id,
             bindType: 4,
             email: facebookData.email || ''
        }
        //执行自己的需求
})
}
)
 .catch(err => {
    that.setState({loading: false })
    alertToast.show('FBERROR:' + err.message,  'OK')
         });
 });
  }
},
   function (error) {
     console.log('Login fail with error: ' + error);
    },
  );

};
9.获取密钥散列
参考以下链接 目录第16条
2.react native 使用Google登录
1.登录firebase开发者台 创建一个新的应用


创建安卓应用 ios也是一样的流程

2.安卓应用设置

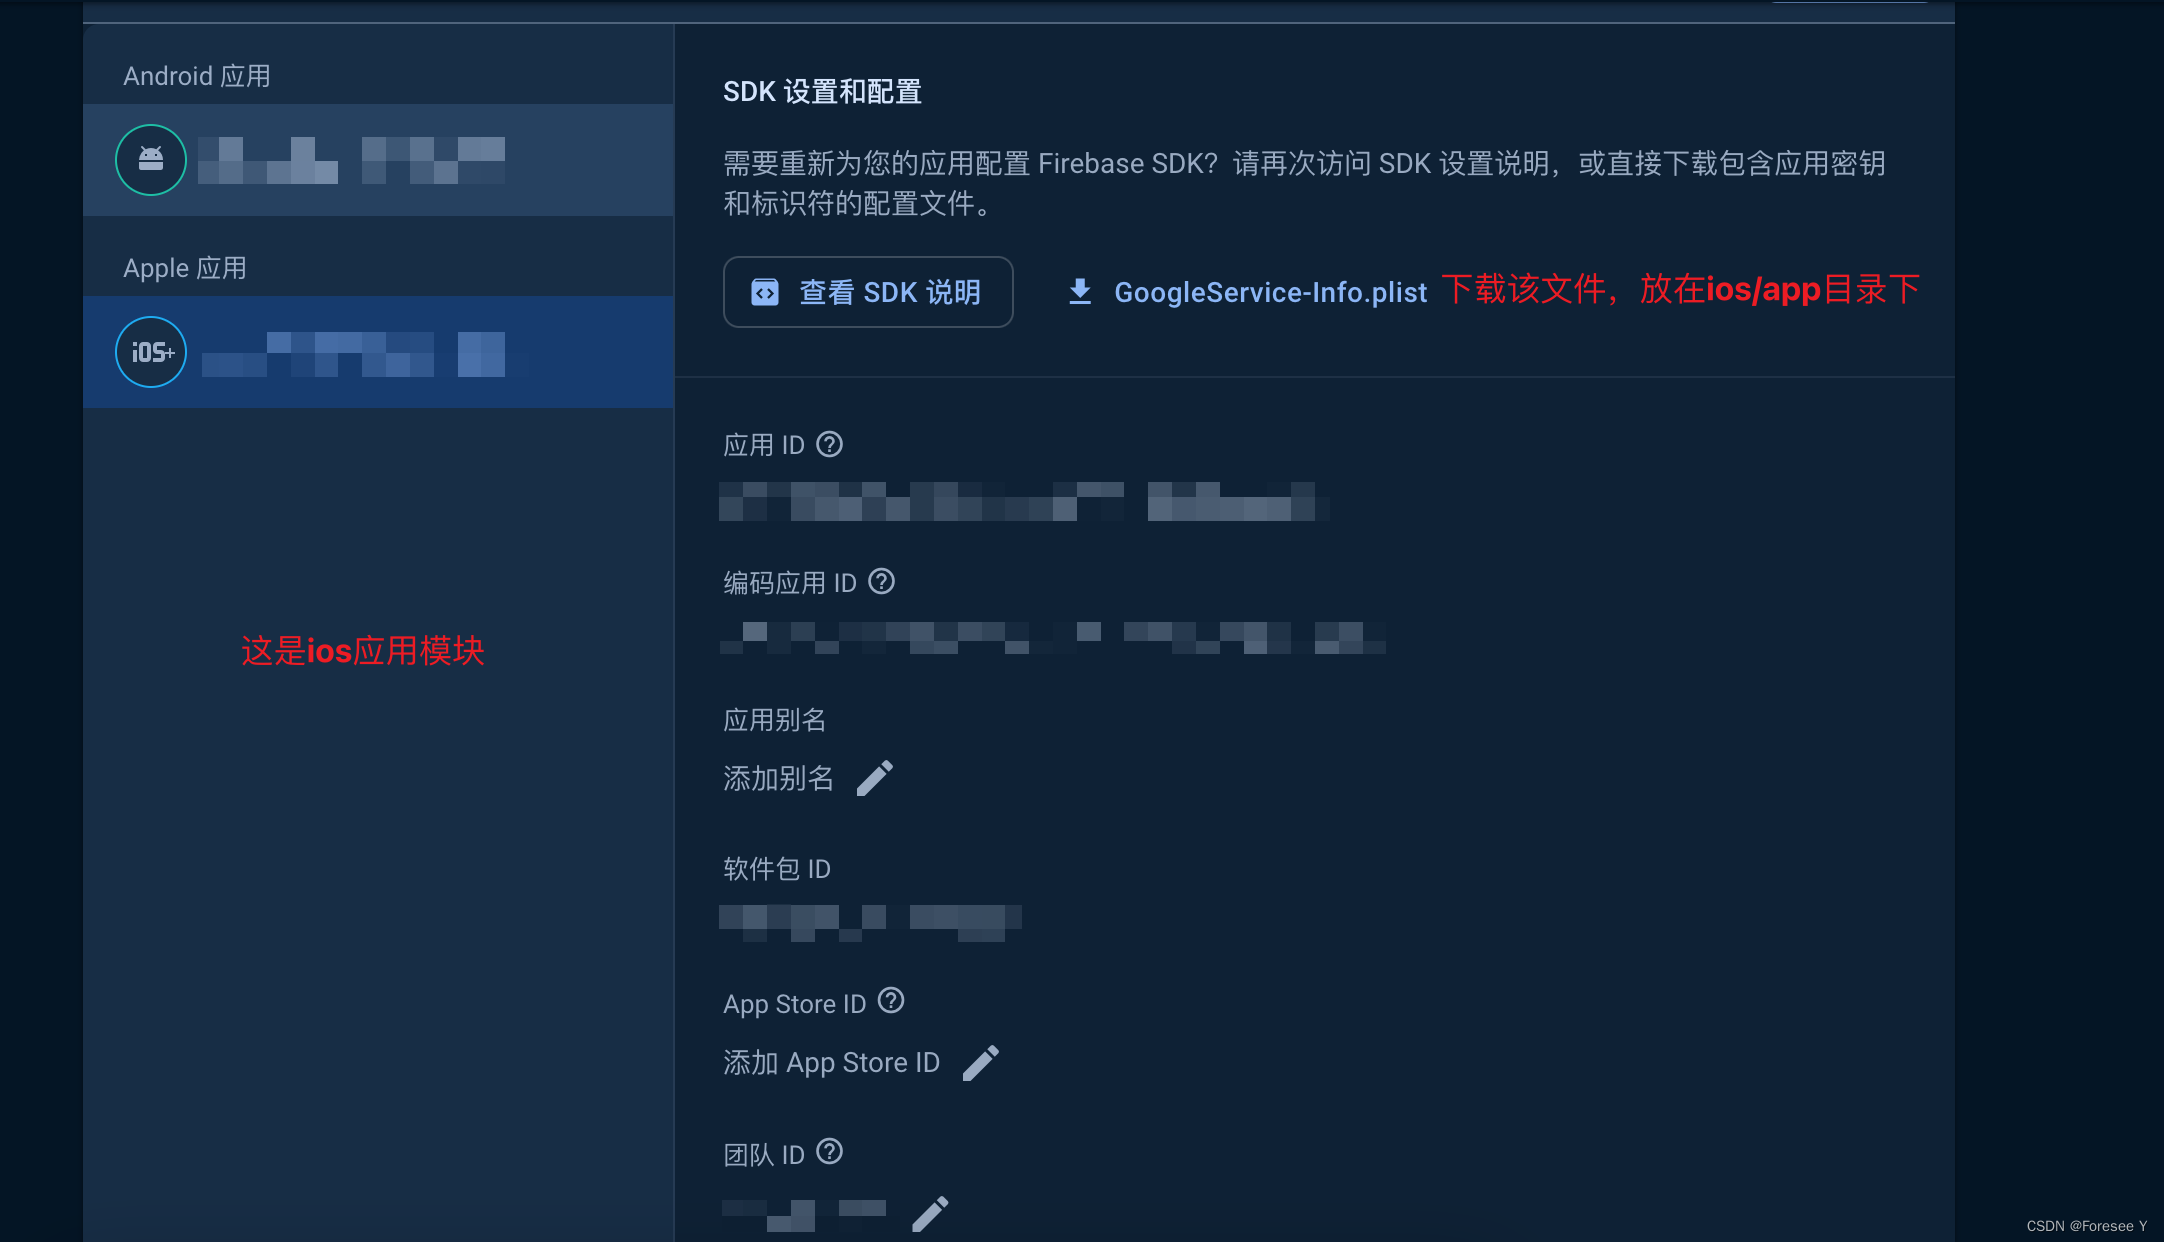
3.ios应用设置
4.启用Goolge 登录

5.在Google Cloud 中找到安卓和ios 登录token

点击链接进入到详情,可以查看到toekn

提示:如果页面和一下图片一致,需要按照步骤设置

6.Rn代码
//安装 yarn add @react-native-google-signin/google-signin
//引入@react-native-google-signin/google-signin

import {GoogleSignin, statusCodes} from '@react-native-google-signin/google-signin';

//初始化
componentDidMount() {
   if (Platform.OS === 'ios') {
      GoogleSignin.configure({
          webClientId: C.WebCliendId,
          offlineAccess: false,
          forceCodeForRefreshToken: false,
          iosClientId: C.IosClientId, //ios token
      });
   } else if (Platform.OS === 'android') {
       GoogleSignin.configure({
         webClientId: C.WebCliendId, //安卓toekn
       });
   }
}


googleLogin = async () => {
      try {
          await GoogleSignin.hasPlayServices();
          const userInfo = await GoogleSignin.signIn();
          // 获取googleId 直接登录
          //userInfo.user.id  userInfo.user.name  userInfo.user.email
          console.log('userInfo',userInfo)
          //执行自己的操作
      } catch (error) {
          if (error.code === statusCodes.SIGN_IN_CANCELLED) {
              alertToast.show('user cancelled the login flow', 'OK')
              // user cancelled the login flow
          } else if (error.code === statusCodes.IN_PROGRESS) {
              alertToast.show('operation (e.g. sign in) is in progress already', 'OK')
              // operation (e.g. sign in) is in progress already
          } else if (error.code === statusCodes.PLAY_SERVICES_NOT_AVAILABLE) {
              alertToast.show('play services not available or outdated', 'OK')
              // play services not available or outdated
          } else {
              alertToast.show(error.toString(), 'OK')
              // some other error happened
          }
      }
};
7.在android中的文件进行配置
在项目的 android/build.gradle 文件中添加 Google 服务插件和依赖
buildscript {
    dependencies {
        // Add this line
        classpath 'com.google.gms:google-services:4.3.10'
    }
}
在应用级别的 android/app/build.gradle 文件中添加 Google 服务插件和 Firebase 应用依赖
apply plugin: 'com.android.application'
apply plugin: 'com.google.gms.google-services' // Add this line

dependencies {
    // Add the Firebase Authentication dependency
    implementation 'com.google.firebase:firebase-auth:20.0.3'
}
8.在应用的 MainActivity.java 文件中添加以下内容来配置 Firebase
package com.yourproject; //替换成你的应用包名

import com.facebook.react.ReactActivity;
import com.google.firebase.FirebaseApp; // Add this line

public class MainActivity extends ReactActivity {
    @Override
    protected void onCreate(Bundle savedInstanceState) {
        super.onCreate(savedInstanceState);
        FirebaseApp.initializeApp(this); // Add this line
    }

    // Your existing code
}
9.ios 需要在 AppDelegate.m 中添加 Firebase 初始化代码
#import "AppDelegate.h"
#import <Firebase.h>

@implementation AppDelegate

- (BOOL)application:(UIApplication *)application didFinishLaunchingWithOptions:(NSDictionary *)launchOptions
{
    [FIRApp configure]; // Add this line
    // Other configuration code

    return YES;
}

@end
10.在xcode中,转到“Info”选项卡,并在“URL Types”部分中添加一个 URL 类型。
- 标识符(Identifier)应为您的 Google 服务的反转域名,例如
com.googleusercontent.apps.1234567890-abcdefg(请替换为您的 Google 服务标识符)。 - URL 方案(URL Schemes)应为
REVERSED_CLIENT_ID(请替换为您的 Google 服务的反转客户端 ID)

开放原子开发者工作坊旨在鼓励更多人参与开源活动,与志同道合的开发者们相互交流开发经验、分享开发心得、获取前沿技术趋势。工作坊有多种形式的开发者活动,如meetup、训练营等,主打技术交流,干货满满,真诚地邀请各位开发者共同参与!
更多推荐
 已为社区贡献2条内容
 https://blog.csdn.net/m0_64402767/article/details/137084200


所有评论(0)