Visual Studio 发布程序自动更新 ClickOnce和AutoUpdater测试
虽然写的大部分都是不联网项目,上位机的项目一般写好了就不动了。但是说不定以后就需要自动更新呢。桌面程序不像网页,联网就能用。而是要进行版本号判断进行更新的。还是AutoHelper好使,简单好用。AutoHelper的UpdateLog.html就自己加描述了,就是简单的html语言。
·
文章目录
前言
虽然写的大部分都是不联网项目,上位机的项目一般写好了就不动了。但是说不定以后就需要自动更新呢。桌面程序不像网页,联网就能用。而是要进行版本号判断进行更新的。
运行环境
- Visual Studio 2022
- .net core 8.0
- IIS
ClickOnce(Visual Studio 程序发布)
毕竟是微软官方的部署方式,应该是挺简单的


IIS新建文件夹

C# 控制台测试
新建一个简单的控制台程序进行测试


安装测试

这里报错是因为没有签名。


安装成功,但是默认路径是C盘,有点尬尴

更新测试


卸载
直接卸载即可


AutoUpdaterDotNET


实现原理
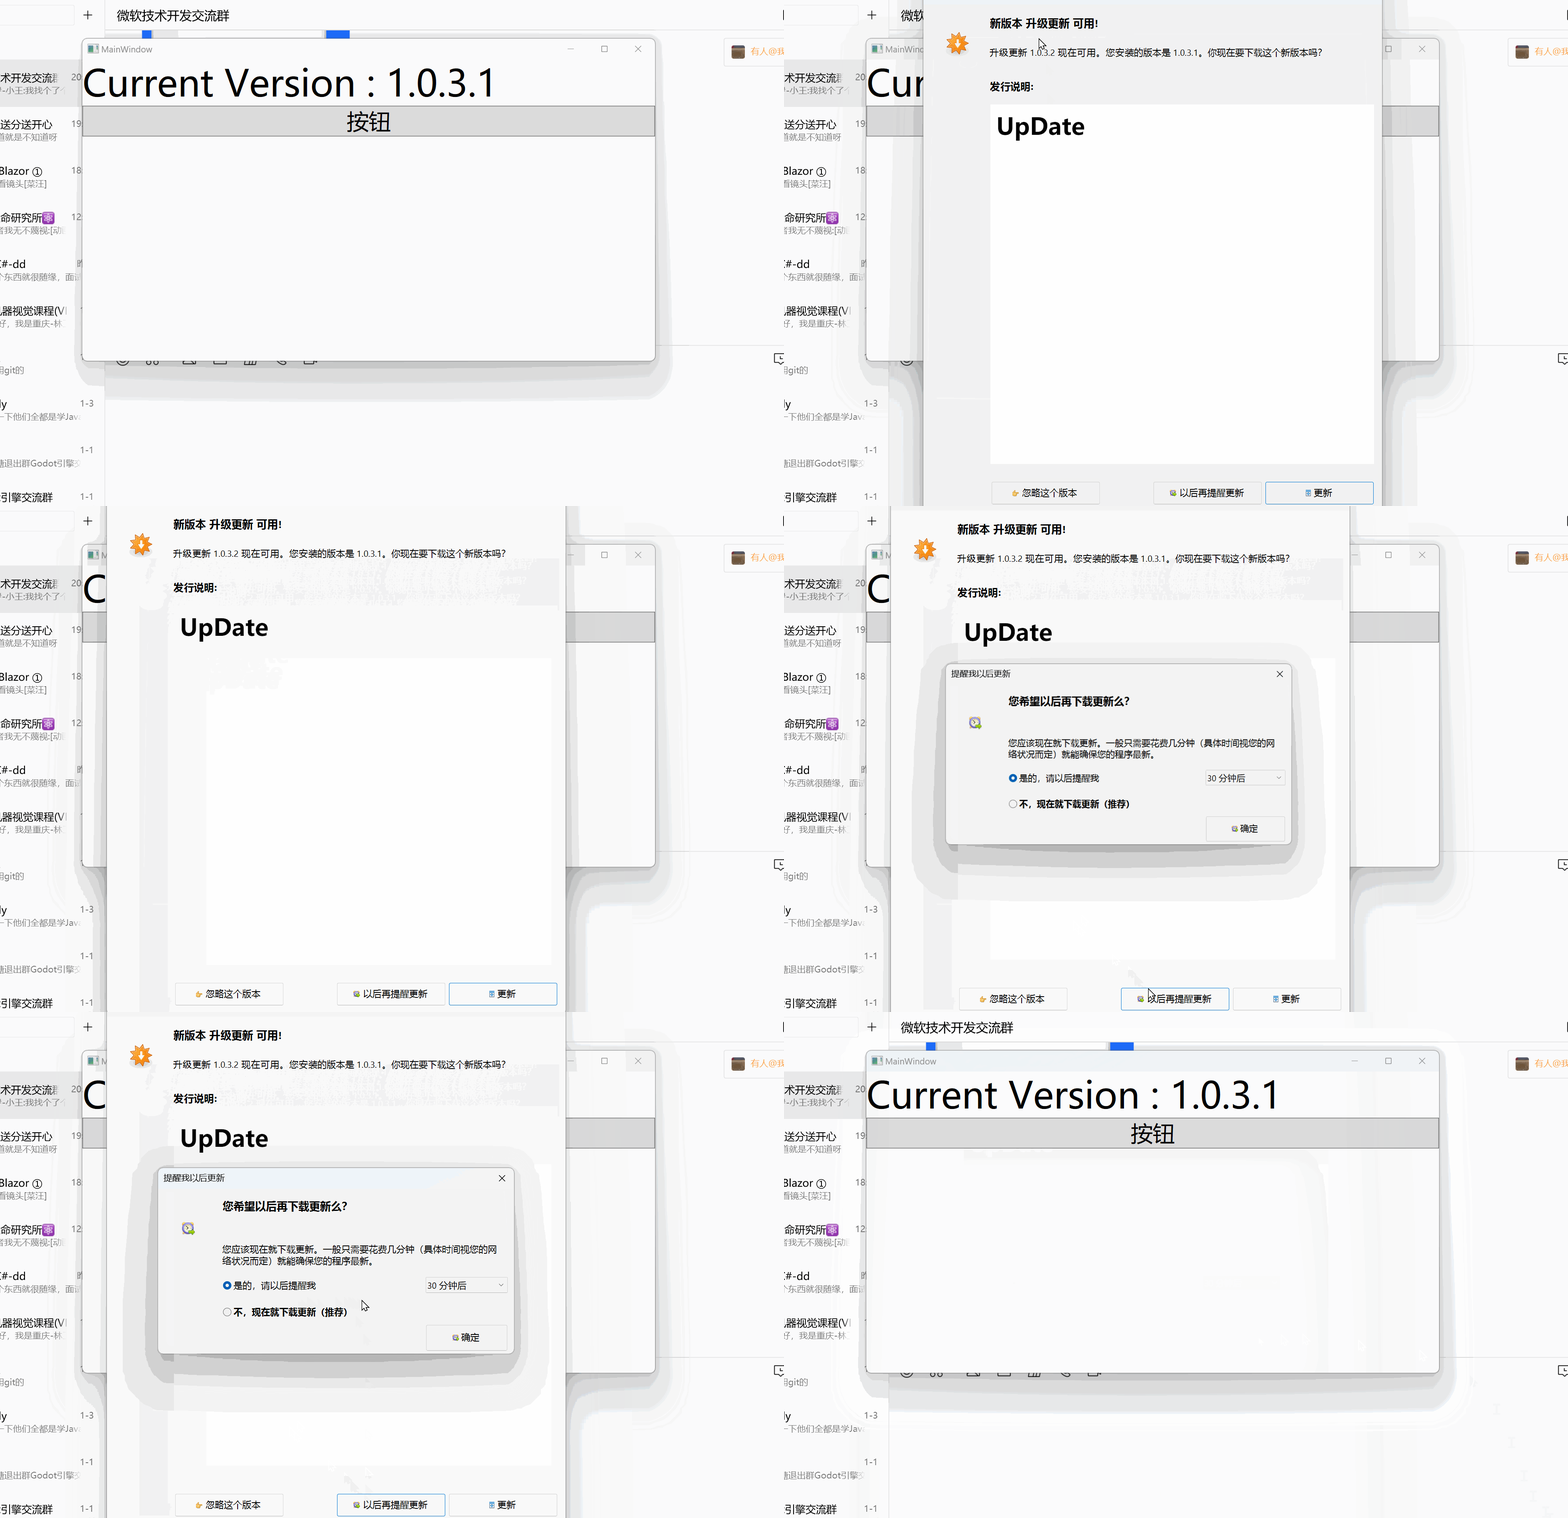
简单使用


新建一个WPF项目
<Window x:Class="WpfApp1.MainWindow"
        xmlns="http://schemas.microsoft.com/winfx/2006/xaml/presentation"
        xmlns:x="http://schemas.microsoft.com/winfx/2006/xaml"
        xmlns:d="http://schemas.microsoft.com/expression/blend/2008"
        xmlns:mc="http://schemas.openxmlformats.org/markup-compatibility/2006"
        xmlns:local="clr-namespace:WpfApp1"
        mc:Ignorable="d"
        Title="MainWindow"
        Height="450"
        Width="800">
    <Grid>
        <StackPanel>
            <TextBlock Text="版本1.0.1"
                       FontSize="50"
                       Name="LabelVersion" />
            <Button Content="按钮"  FontSize="30" Click="Button_Click"/>
        </StackPanel>

    </Grid>
</Window>
    /// <summary>
    /// Interaction logic for MainWindow.xaml
    /// </summary>
    public partial class MainWindow : Window
    {
        public MainWindow()
        {
            InitializeComponent();
            AutoUpdateTest();
        }

        public void AutoUpdateTest()
        {
            Assembly assembly = Assembly.GetEntryAssembly();
            LabelVersion.Text = $"Current Version : {assembly.GetName().Version}";//显示版本号
            AutoUpdater.AppTitle = "升级更新";
            Thread.CurrentThread.CurrentCulture =
                Thread.CurrentThread.CurrentUICulture = CultureInfo.CreateSpecificCulture("zh");
            AutoUpdater.LetUserSelectRemindLater = true;
            AutoUpdater.RemindLaterTimeSpan = RemindLaterFormat.Minutes;
            AutoUpdater.RemindLaterAt = 1;
            AutoUpdater.ReportErrors = true;
            DispatcherTimer timer = new DispatcherTimer { Interval = TimeSpan.FromMinutes(2) };//定时去检测更新根据自己业务需求
            timer.Tick += delegate { AutoUpdater.Start("http://localhost:10911/Updates/AutoUpdaterStarter.xml"); };
            timer.Start();
        }

        private void Button_Click(object sender, RoutedEventArgs e)
        {
            AutoUpdater.Start("http://localhost:10911/Updates/AutoUpdaterStarter.xml");
        }
    }


代码封装
这里用到了之前的代码
   public class MyXmlConfigHelper<T>
   {
       public T Setting { get; set; }

       public string FileName { get; set; } = "MyConfig.xml";

       public string DirectoryPath
       {
           get
           {
               var regex = new Regex(@"\\(\w+)\.(\w+)$");
               return regex.Split(FullPath)[0];
           }
       }
       public string DebugPath { get => Directory.GetCurrentDirectory(); }

       public string FullPath { get => DebugPath + "\\" + FileName; }

       public bool IsFileExist { get => File.Exists(FullPath); }

       public bool IsDirectoryExist { get => Directory.Exists(DirectoryPath); }

       public Action<string> ShowMsg { get; set; } = (msg)=>Console.WriteLine(msg);

       public MyXmlConfigHelper()
       {

       }
       public MyXmlConfigHelper(string filename)
       {
           FileName = filename;
           if (!IsDirectoryExist)
           {
               DirectoryInfo directoryInfo = new DirectoryInfo(DirectoryPath);
               directoryInfo.Create();
           }
       }

       public MyXmlConfigHelper(T setting ,string filename):this(filename)
       {
           Setting = setting;
       }

       /// <summary>
       /// 创建文件
       /// </summary>
       public void Init()
       {
           if(IsFileExist)
           {
               try
               {
                   Read();
               }
               catch (Exception ex)
               {
                   ShowMsg(ex.ToString());
                   throw new Exception("文件读取失败!请确认是否配置文件格式是否正确");
               }
           }
           else
           {
               Write();
           }
       }

       /// <summary>
       /// 覆盖文件
       /// </summary>
       public void ReInit()
       {
           ShowMsg("正在覆盖配置文件:" + FullPath);
           Write();
       }
       /// <summary>
       /// 写入配置类
       /// </summary>
       private void Write()
       {
           ShowMsg("正在生成配置文件:" + FullPath);
           var xmlHelper = new XmlSerializer(typeof(T));
           using (StreamWriter xmlWriter = new StreamWriter(FullPath))
           {
               //去掉烦人的命名空间
               XmlSerializerNamespaces ns = new XmlSerializerNamespaces();
               ns.Add("", "");
               xmlHelper.Serialize(xmlWriter, Setting, ns);
               xmlWriter.Close();
           }
       }

       /// <summary>
       /// 读取配置类
       /// </summary>
       private void Read()
       {
           ShowMsg("正在读取配置文件:"+FullPath);
           var xmlHelper = new XmlSerializer(typeof(T));
           using (StreamReader xmlReader = new StreamReader(FullPath))
           {

               Setting = (T)xmlHelper.Deserialize(xmlReader);
               xmlReader.Close();
           }

       }
   }
自动更新代码封装
  /// <summary>
  /// 自动更新帮助类
  /// </summary>
  public class AutoUpdateHelper
  {
      /// <summary>
      /// 更新地址
      /// </summary>
      public string UpdateLogUrl { get => BaseUrl + "Updates/UpdateLog.html"; }


      /// <summary>
      /// 网路基本路径
      /// </summary>
      public string BaseUrl { get; set; } = "http://localhost:10911/";

      /// <summary>
      /// Xml配置地址
      /// </summary>
      public string AutoXmlUrl { get => BaseUrl + "Updates/AutoUpdaterStarter.xml"; }

      /// <summary>
      /// 文件下载地址
      /// </summary>
      public string DownLoadUrl { get => BaseUrl + "DownLoads/Update.zip"; }


      /// <summary>
      /// Xml配置生成类
      /// </summary>
      public MyXmlConfigHelper<AutoUpdaterXmlEntity> MyXmlConfigHelper { get; set; } = new MyXmlConfigHelper<AutoUpdaterXmlEntity>(@"AutoUpdater\AutoUpdaterStarter.xml");

      /// <summary>
      /// 版本号
      /// </summary>
      public string VersionNo
      {
          get
          {
              Assembly assembly = Assembly.GetExecutingAssembly();
              return assembly.GetName().Version.ToString();
          }
      }

      /// <summary>
      /// 自动更新默认配置,Updates放配置文件,DownLoads放zip
      /// </summary>
      public AutoUpdateHelper()
      {
          AutoUpdater.AppTitle = $"升级更新";
          AutoUpdater.LetUserSelectRemindLater = true;
          AutoUpdater.RemindLaterTimeSpan = RemindLaterFormat.Minutes;
          AutoUpdater.RemindLaterAt = 1;
          AutoUpdater.ReportErrors = true;
      }
      /// <summary>
      /// 修改IIS网络地址,Updates放配置文件,DownLoads放zip
      /// </summary>
      /// <param name="url"></param>
      public AutoUpdateHelper(string url):this()
      {
          this.BaseUrl = url;
      }


      /// <summary>
      /// 自动更新程序
      /// </summary>
      public void Update()
      {
          AutoUpdater.Start(AutoXmlUrl);
      }


      /// <summary>
      /// 创建AutoXml文件
      /// </summary>
      public void CreateAutoXmlFile()
      {
          AutoUpdaterXmlEntity autoUpdaterXmlEntity = new AutoUpdaterXmlEntity()
          {
              Version = VersionNo,
              DownLoadUrl = DownLoadUrl,
              UpdateLogUrl = UpdateLogUrl
          };
          MyXmlConfigHelper.Setting = autoUpdaterXmlEntity;
          MyXmlConfigHelper.ReInit();
      }


  }

  /// <summary>
  /// 配置文件对应实体
  /// </summary>
  [XmlRoot("item")]
  public class AutoUpdaterXmlEntity
  {
      [XmlElement("version")]
      public string Version { get; set; }

      [XmlElement("url")]
      public string DownLoadUrl { get; set; }

      [XmlElement("changelog")]
      public string UpdateLogUrl { get; set; }

      [XmlElement("mandatory")]
      public string Mandatory { get; set; } = "false";
  }
简单使用


总结
还是AutoHelper好使,简单好用。AutoHelper的UpdateLog.html就自己加描述了,就是简单的html语言。

开放原子开发者工作坊旨在鼓励更多人参与开源活动,与志同道合的开发者们相互交流开发经验、分享开发心得、获取前沿技术趋势。工作坊有多种形式的开发者活动,如meetup、训练营等,主打技术交流,干货满满,真诚地邀请各位开发者共同参与!
更多推荐
 已为社区贡献25条内容


所有评论(0)