Vue-element-template学习,登录、角色权限自定义
vue-element-admin学习记录,登录、角色权限自定义
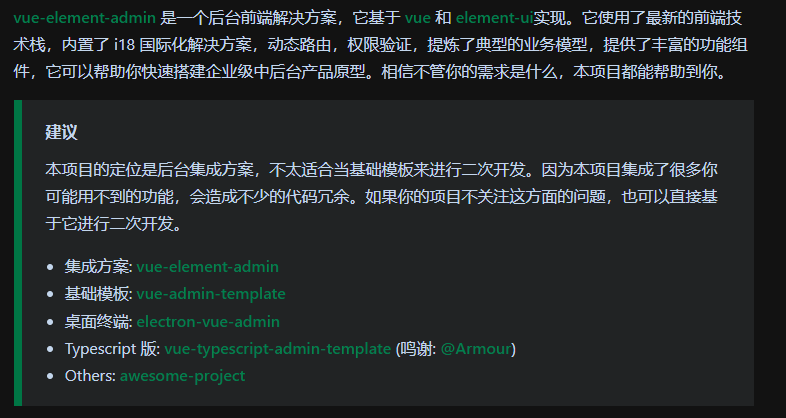
一、vue-element-admin
官网地址:https://panjiachen.gitee.io/vue-element-admin-site/zh/
二、运行vue-element-template项目
vue-element-admin更适合二次开发的版本的项目地址:https://github.com/PanJiaChen/vue-admin-template/tree/permission-control
1、进入地址下载压缩包,解压
2、运行项目
1.需要检查自己的node和npm的版本:

2.通过vs打开项目所在文件夹或通过cmd进入到项目所在文件夹,并在终端处执行
npm install #安装所有依赖
npm run dev #启动项目

三、认识vue-admin-template的目录
├── build                      # 构建相关
├── mock                       # 项目mock 模拟数据,在接口服务器没有就绪时,临时充当接口
├── public                     # 静态资源
│   ├── favicon.ico            # favicon图标
│   └── index.html             # html模板
├── src                        # 源代码
│   ├── api                    # 所有请求
│   ├── assets                 # 主题 字体等静态资源  不会参与打包  直接直出
│   ├── components             # 全局公用组件 和业务不相关  上传组件
│   ├── icons                  # 项目所有 svg icons
│   ├── layout                 # 全局 layout 负责搭建项目的整体架子结构 html结构
│   ├── router                 # 路由
│   ├── store                  # 全局 store管理 vuex管理数据的位置 模块化开发 全局getters
│   ├── styles                 # 全局样式
│   ├── utils                  # 全局公用方法 request.js
│   ├── vendor                 # 公用vendor
│   ├── views                  # views 所有页面 路由级别的组件
│   ├── App.vue                # 入口页面 根组件
│   ├── main.js                # 入口文件 加载组件 初始化等
│   └── permission.js          # 权限管理
│   └── settings.js            # 配置文件
├── tests                      # 测试
├── .env.xxx                   # 环境变量配置
├── .eslintignore              # eslint 忽略文件
├── .eslintrc.js               # eslint 配置项
├── .gitignore                 # git 忽略文件
├── .travis.yml                # 自动化CI配置
├── .babel.config.js           # babel-loader 配置
├── jest.config.js             # 测试配置
├── vue.config.js              # vue-cli 配置
├── postcss.config.js          # postcss 配置
└── package.json               # package.json
四、二次开发
npm run dev的端口设置
vue.config.js ,通过这里修改9528端口为需要的端口
修改数据接口
dev:.env.development
端口修改完以后,需要重新执行npm run dev才能生效
# base api
VUE_APP_BASE_API = '/dev-api'  #将/dev-api修改为自己的后端地址如:http://localhost:8090
build:.env.production
# base api
VUE_APP_BASE_API = '修改为自己的生存环境的ip:端口'  #npm run build打包就需要通过这个地址访问
保留自带的登录功能,修改mock-server地址
修改 mock/mock-server.js 文件 第37行
url: new RegExp(`/dev-api${url}`),
修改** src/api/user.js** 中的接口调用,为每一个远程调用添加配置
baseURL: '/dev-api',

给每一个user.js添加function
修改页面标题
src/settings.js 第3行出修改页面标题
国际化设置
**src/main.js **第7行处修改语言
修改菜单主题
src/styles/variables.scss:修改这里对应的颜色


显示左上角LOGO
src/setting.js
sidebarLogo: true


如果修改了主题色,这是要修改logo背景色和字体颜色使其符合主题色:
修改 src/layout/components/Sidebar/Logo.vue
@import "~@/styles/variables.scss";
按照图片设置

过滤器解决时间格式问题
针对从后台传过来的时间格式,可以采用过滤器进行处理
<el-table-column label="入职时间" sortable prop="timeOfEntry">
	 	<template slot-scope="obj">
	 		{{  obj.row.timeOfEntry | 过滤器  }}
	 	</template>
 </el-table-column>
然后过滤器该如何设置呢
新建目录:src->filters ,在filters中新建index.js
编写过滤器函数
import moment from 'moment'
export function formatTime(value) {
	return moment(value * 1000).format('YYYY-MM-DD HH:mm:ss')
}
在 main.js 中全局注册过滤器,直接添加
import * as filters from '@/filters'
Object.keys(filters).forEach(key => {
	Vue.filter(key, filters[key]
)})
现在可以通过过滤器使用过滤器函数formateTime了
<el-table-column label="创建时间" sortable="">
	<template slot-scope="scope">
		{{ scope.row.create_time | formatTime }}
	 </template>
 </el-table-column>
axios响应拦截器修改
src/utils/request.js 中 将第49行的
if (res.code !== 20000) {
修改为自己成功响应结果:(我这里是0)
if (res.code !== 0 && res.code !== 20000) {
登录功能自定义
需求:
- 登录需要的表单属性为:mailNum(int,校验是否为6位纯数字),password(String)
- 角色(通过账号密码点击登录给到后端,后端通过账号判断身份,返回身份信息给前端,前端根据身份信息给出该身份的显示页面):
- 人事
- 部门人员
- 分管领导
- 公司领导
1、修改登录页,登录页位置:src/views/index.vue
a. 根据表单属性修改页面
 ——>
——>
password符合需求,修改提示信息即可 ——>修改提示信息
修改js的loginFrom ——>
——>
删除提示信息

b. 修改校验规则,需求:校验是否为纯数字,不是纯数字提示错误信息
- 修改loginRules
 ——>修改username,密码不需要校验所以删除
- 修改validateUsername的内容,删除多余内容
 ——>校验信息修改,校验名称修改与上面loginRules中mailNum的validator的值一致
- 修改校验规则(规则:6位纯数字)
 ——>将validUsername修改为validateMailNum中进行判断的validMailNum
进入src/utils/validate.js修改原来名称为validUsername的内容 ——>
——>
- 测试结果
不足6位数字就报错,满足6位数字不报错


2、登录接口修改
登录逻辑(src/permission.js)
src/views/index.vue/handleLogin(页面的登录按钮事件:表单校验规则,跳转到主页)——>src/store/modules/user.js/login(登录接口:完成账号密码验证,存储token)——>src/store/modules/user.js/getInfo(获取身份信息接口:通过token回到后端获取身份信息——角色,角色名字,头像)——>src/store/modules/permission.js/generateRoutes(根据角色获取相应的路由:设置路由表,默认只设置了admin的角色,admin的路由表为asyncRoutes,定义在src/router/index.js)
1、修改登录接口:src/store/modules/user.js/login
src/views/index.vue中的登录函数在:
其登录的接口:this.$store.dispatch(‘user/login’, this.loginForm).then,调用的内容在src/modules/user.js:
const actions = {
  // user login
  login({ commit }, userInfo) {
    const { username, password } = userInfo			//设置表单属性为userInfo
    return new Promise((resolve, reject) => {

      //login调用的内容是在src/api/user.js中,调用后台接口需要到src/api/user.js的login函数修改
      login({ username: username.trim(), password: password }).then(response => {
        const data = response

        //设置token,通过后台返回的token值
        commit('SET_TOKEN', data.token)
        setToken(data.token)
        resolve()
      }).catch(error => {
        reject(error)
      })
    })
  },
login函数修改以后:
调用后台登录接口在:login({ username: username.trim(), password: password }).then(),接口位置在src/api/user.js ——>修改为自己的接口
2、修改获取身份信息接口:src/store/modules/user.js/getInfo
// get user info
  getInfo({ commit, state }) {
    return new Promise((resolve, reject) => {
      //接口调用,接口在src/api/user.js的getInfo,接口的参数为token值
      getInfo(state.token).then(response => {
        const { data }   = response
      	//如果返回值为空,返回校验错误的信息
        if (!data) {
          reject('Verification failed, please Login again.')
        }

        const { roles, name, avatar } = data
        //角色必须是一个非空数组
        // roles must be a non-empty array
        if (!roles || roles.length <= 0) {
          reject('getInfo: roles must be a non-null array!')
        }
      	//保存返回的角色,用户名称,头像
        commit('SET_ROLES', roles)
        commit('SET_NAME', name)
        commit('SET_AVATAR', avatar)
        //返回data
        resolve(data)
      }).catch(error => {
        reject(error)
      })
    })
  },
修改后:
// get user info
  getInfo({ commit, state }) {
    return new Promise((resolve, reject) => {
      getInfo(state.token).then(response => {
        const data = response.data.userInfoVo

        //修改校验失败返回信息
        if (!data) {
          reject('校验失败,请重新登录')
        }

        //设置角色,默认为admin,根据返回的role的名称确定设置的roles的内容
        var roles=['admin']
        if (data.role === '总经办') {
          roles = ['zjb']
        }else if(data.role === '部门人员'){
          roles = ['dept']
        }else if(data.role === '分管领导'){
          roles = ['led']
        }else if(data.role === '公司领导'){
          roles = ['filmLed']
        }

        commit('SET_ROLES', roles)
        commit('SET_NAME', data.name)
        //删除了头像,因为没有头像内容
        //修改返回值,为roles,因为使用这个函数的位置,只用了roles的内容:src/permission/.js
        resolve(roles)
      }).catch(error => {
        reject(error)
      })
    })
  },
修改src/permission/.js:

修改{roles}——>roles
修改src/api/user.js的getInfo函数
 ——>
——>
修改为了不需要通过token作为参数去查询,
因为token通过login函数以后就会通过cookie存储token,而且在之后的接口调用中都会将token作为请求头传入,
后端通过获取请求头中的token即可
3、修改token存储到cookie的名称、token的请求头
cookie名称修改:src/utils/auth.js
请求头名称修改,修改为与后端抓取token的请求头名字:src/utils/request.js第22行 ——>
——>
4、修改路由表(达到不同角色获取不同的界面)
添加其他角色的路由表:src/router/index.js
admin角色的路由表如下:
/**
 * asyncRoutes
 * the routes that need to be dynamically loaded based on user roles
 */
export const asyncRoutes = [
  {
    path: '/nested',
    component: Layout,
    redirect: '/nested/menu1',
    name: 'Nested',
    meta: {
      title: 'Nested',
      icon: 'nested'
    },
    children: [
      {
        path: 'menu1',
        component: () => import('@/views/nested/menu1/index'), // Parent router-view
        name: 'Menu1',
        meta: { title: 'Menu1' },
        children: [
          {
            path: 'menu1-1',
            component: () => import('@/views/nested/menu1/menu1-1'),
            name: 'Menu1-1',
            meta: { title: 'Menu1-1' }
          },
          {
            path: 'menu1-2',
            component: () => import('@/views/nested/menu1/menu1-2'),
            name: 'Menu1-2',
            meta: { title: 'Menu1-2' },
            children: [
              {
                path: 'menu1-2-1',
                component: () => import('@/views/nested/menu1/menu1-2/menu1-2-1'),
                name: 'Menu1-2-1',
                meta: { title: 'Menu1-2-1' }
              },
              {
                path: 'menu1-2-2',
                component: () => import('@/views/nested/menu1/menu1-2/menu1-2-2'),
                name: 'Menu1-2-2',
                meta: { title: 'Menu1-2-2' }
              }
            ]
          },
          {
            path: 'menu1-3',
            component: () => import('@/views/nested/menu1/menu1-3'),
            name: 'Menu1-3',
            meta: { title: 'Menu1-3' }
          }
        ]
      },
      {
        path: 'menu2',
        component: () => import('@/views/nested/menu2/index'),
        meta: { title: 'menu2' }
      }
    ]
  },

  {
    path: 'external-link',
    component: Layout,
    children: [
      {
        path: 'https://panjiachen.github.io/vue-element-admin-site/#/',
        meta: { title: 'External Link', icon: 'link' }
      }
    ]
  },

  // 404 page must be placed at the end !!!
  { path: '*', redirect: '/404', hidden: true }
]
以admin的路由表为例,创建其他角色的路由表:
export const asyncRoutes_zjb = [
  {
    path: '/nested',
    component: Layout,
    redirect: '/nested/menu1',
    name: 'Nested',
    meta: {
      title: 'Nested',
      icon: 'nested'
    }
  },

  {
    path: 'external-link',
    component: Layout,
    children: [
      {
        path: 'https://panjiachen.github.io/vue-element-admin-site/#/',
        meta: { title: 'External Link', icon: 'link' }
      }
    ]
  },

  // 404 page must be placed at the end !!!
  { path: '*', redirect: '/404', hidden: true }
]
以上面这个asyncRoutes_zjb,创建asyncRoutes_dept、asyncRoutes_led、asyncRoutes_filmLed
可以删掉公用路由表的一些内容,方便测试
添加需要导入的路由表:src/store/modules/permission.js

修改为:
添加其他角色的路由选择信息:src/store/modules/permission.js
const actions = {
  generateRoutes({ commit }, roles) {
    return new Promise(resolve => {
      let accessedRoutes
      //判断角色名称
      if (roles.includes('admin')) {
        //根据角色给出路由表
        accessedRoutes = asyncRoutes || []
      } else {
        accessedRoutes = filterAsyncRoutes(asyncRoutes, roles)
      }
      commit('SET_ROUTES', accessedRoutes)
      resolve(accessedRoutes)
    })
  }
}
修改后:
const actions = {
  generateRoutes({ commit }, roles) {
    return new Promise(resolve => {
      let accessedRoutes
      if (roles.includes('admin')) {
        accessedRoutes = asyncRoutes || []
      } else if (roles.includes('zjb')) {
        accessedRoutes = asyncRoutes_zjb || []
      }else if (roles.includes('dept')) {
        accessedRoutes = asyncRoutes_dept || []
      }else if (roles.includes('led')) {
        accessedRoutes = asyncRoutes_dept || []
      }else if (roles.includes('filmLed')) {
        accessedRoutes = asyncRoutes_filmLed || []
      }else {
        accessedRoutes = filterAsyncRoutes(asyncRoutes, roles)
      }
      commit('SET_ROUTES', accessedRoutes)
      resolve(accessedRoutes)
    })
  }
}
登录界面新增一个无需登录的功能入口
点击跳转即可使用
由于模板的登录做了限制,因此所有跳转到另一个页面的呢


1、新建提问页面
src/views新建core文件夹,新建feedback_question.vue
<template>
  <div class="login-container">
    <el-form
      ref="feedback"
      :model="feedback"
      :rules="submitFeedbackRules"
      class="login-form"
      auto-complete="on"
      label-position="left"
    >
      <div class="title-container">
        <h3 class="title">提案反馈</h3>
      </div>

      <el-form-item prop="question">
        <el-input
          ref="question"
          v-model="feedback.question"
          placeholder="问题反馈"
          :rows="6"
          name="question"
          type="textarea"
          tabindex="1"
          auto-complete="on"
        />
      </el-form-item>

      <el-form-item prop="advice">
        <el-input
          ref="advice"
          v-model="feedback.advice"
          type="textarea"
          placeholder="改善意见"
          :rows="6"
          name="advice"
          tabindex="2"
          auto-complete="on"
          @keyup.enter.native="submitFeedback"
        />
      </el-form-item>

      <el-button
        :loading="loading"
        type="primary"
        style="width: 100%; margin-bottom: 30px"
        @click.native.prevent="submitFeedback"
      >
        提交
      </el-button>
    </el-form>
  </div>
</template>

<script>
import { validFeedback } from '@/utils/validate'
import feedbackApi from '@/api/feedbackSubmit'
import {removeToken } from '@/utils/auth'

export default {
  data() {
    const validateQuestion = (rule, value, callback) => {
      if (!validFeedback(value)) {
        callback(new Error('请输入不少于10个字符'))
      } else {
        callback()
      }
    }

    return {
      feedback: {
        question: '',
        advice: '',
      },

      loading: false,
      redirect: undefined,

      submitFeedbackRules: {
        question: [
          { required: true, trigger: 'blur', validator: validateQuestion },
        ],
        advice: [
          { required: true, trigger: 'blur', validator: validateQuestion },
        ],
      },
    }
  },
  watch: {
    $route: {
      handler: function (route) {
        this.redirect = route.query && route.query.redirect
      },
      immediate: true,
    },
  },
  methods: {
    //初始化删除从cookie里的token
    created(){
      removeToken()

    },
    //提交
    submitFeedback() {
      if (!validFeedback(this.feedback.question)) {
        this.$message.error('请输入不少于10个字符')
      } else if (!validFeedback(this.feedback.advice)) {
        this.$message.error('请输入不少于10个字符')
      } else {
        feedbackApi.submitFeedback(this.feedback).then((response) => {
          this.$message({
            type: 'success',
            message: response.message,
          })
          //清空数据
          this.feedback = {}
        })
      }
    },
  },
}
</script>

<style lang="scss">
/* 修复input 背景不协调 和光标变色 */
/* Detail see https://github.com/PanJiaChen/vue-element-admin/pull/927 */

$bg: #283443;
$light_gray: #fff;
$cursor: #fff;

@supports (-webkit-mask: none) and (not (cater-color: $cursor)) {
  .login-container .el-input input {
    color: $cursor;
  }
}

/* reset element-ui css */
.login-container {
  .el-input {
    display: inline-block;
    height: 47px;
    width: 85%;

    input {
      background: transparent;
      border: 0px;
      -webkit-appearance: none;
      border-radius: 0px;
      padding: 12px 5px 12px 15px;
      color: $light_gray;
      height: 47px;
      caret-color: $cursor;

      &:-webkit-autofill {
        box-shadow: 0 0 0px 1000px $bg inset !important;
        -webkit-text-fill-color: $cursor !important;
      }
    }
  }

  .el-form-item {
    border: 1px solid rgba(255, 255, 255, 0.1);
    background: rgba(0, 0, 0, 0.1);
    border-radius: 5px;
    color: #454545;
  }
}
</style>

<style lang="scss" scoped>
$bg: #2d3a4b;
$dark_gray: #889aa4;
$light_gray: #eee;

.login-container {
  min-height: 100%;
  width: 100%;
  background-color: $bg;
  overflow: hidden;

  .login-form {
    position: relative;
    width: 520px;
    max-width: 100%;
    padding: 160px 35px 0;
    margin: 0 auto;
    overflow: hidden;
  }

  .tips {
    font-size: 14px;
    color: #fff;
    margin-bottom: 10px;

    span {
      &:first-of-type {
        margin-right: 16px;
      }
    }
  }

  .svg-container {
    padding: 6px 5px 6px 15px;
    color: $dark_gray;
    vertical-align: middle;
    width: 30px;
    display: inline-block;
  }

  .title-container {
    position: relative;

    .title {
      font-size: 26px;
      color: $light_gray;
      margin: 0px auto 40px auto;
      text-align: center;
      font-weight: bold;
    }
  }

  .show-pwd {
    position: absolute;
    right: 10px;
    top: 7px;
    font-size: 16px;
    color: $dark_gray;
    cursor: pointer;
    user-select: none;
  }
}
</style>
新增校验规则:src/utils/validate.js
export function validFeedback(str) {
  return /\S{10,}/.test(str)
}
2、新建API接口
src/api新建feedbackSubmit.js,新增submitFeedback:
import  request from '@/utils/request'


export default{
  submitFeedback(feedback){
    return request({
      url: '/feedback-service/feedback/submit',
      method: 'post',
      data: feedback
    })
  }

}
src/views/feedback_question.vue修改:
- 导入接口

- 提交按钮事件绑定

- 实现submitFeedback提交事件函数,调用api接口

3、路由表新增,src/router/index.js
修改constantRoutes公用路由表:
4、新增入口, src/views/login/index.vue

methods中新增toFeedback函数:
toFeedback() {
      this.loading = true;
      this.$router.push({
        path: "/feedback_question",
      });
      this.loading = false;
    },
5、过滤白名单新增:src/permission.js第11行


开放原子开发者工作坊旨在鼓励更多人参与开源活动,与志同道合的开发者们相互交流开发经验、分享开发心得、获取前沿技术趋势。工作坊有多种形式的开发者活动,如meetup、训练营等,主打技术交流,干货满满,真诚地邀请各位开发者共同参与!
更多推荐
 2
2 0
0- 0


 已为社区贡献1条内容

所有评论(0)