基于web端flask登录注册设计
基于web端flask,mysql登录注册界面设计,对一些基本问题进行处理讲解
·
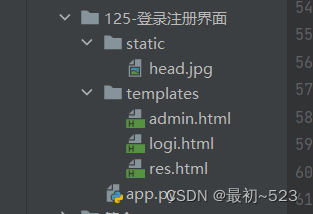
项目文件
项目成品
注册界面

登陆界面

基于flask,mysql的web端注册登录功能
flask 需要创建flask框架 下面的:static为存放图片其他文件的地方 templates存放html文件

1、配置python flask
1.1、配置数据库 并创建app,db对象
# 导入Flask 模板
from flask import Flask,render_template,request,redirect
# 导入要用到的数据库 第三方库
from flask_sqlalchemy import SQLAlchemy

app = Flask(__name__)

# 连接数据库的配置
app.config['SQLALCHEMY_DATABASE_URI'] = 'mysql+pymysql://root:123456@localhost:3306/information?charset=utf8mb4'
db = SQLAlchemy(app)
这里的information为MySQL里面已存在的数据库
1.2 创建表格、添加字段,并执行所有sql语句
# 创建好用户信息的表格的信息
class User(db.Model):
    __tablename__ = "information_user"
    id = db.Column(db.Integer, primary_key=True,comment="用户id")
    name = db.Column(db.String(20), nullable=False,comment="用户姓名")

# 执行所有的创建表格的语句
with app.app_context():
    db.create_all()
information_user为表名
1.3 创建每个模块的路由
1.3.1 登陆路由
@app.route('/login', methods=["GET", "POST"])
def login():
    if request.method == 'POST':
        id = request.form.get('user_name')
        pwd = request.form.get('user_passwd')
        a = User.query.filter_by(id=int(id)).first()
        if a.name == pwd and int(id) == a.id:
            return redirect('admin')
    return render_template('logi.html')
request.form.get('界面表单id')从网页获取表单输入数据
1.3.2 注册路由
@app.route('/res', methods=["GET", "POST"])
def res():
    if request.method == 'POST':
        id = request.form.get('user_name')
        passwd = request.form.get('user_passwd')
        pwd_q = request.form.get('user_passwd_to')
        a = User.query.filter_by(id=id).first()
        b = User.query.filter_by(id=id).all()
        print(a)
        # print(a.name)
        if pwd_q != passwd:
            return '密码不一致!请返回重新输入!'

        if a is None:
            user = User(id=int(id), name=passwd)
            db.session.add(user)
            db.session.commit()
            return redirect('login')
        if int(id) == a.id:
            return '已存在该用户!'
    return render_template('res.html')
注册路由这里处理时有个注意:
	a = User.query.filter_by(id=id).first() 获取数据库里面的第一个id数据,如果数据库里面没有数据会报一个,’None of ~~~~’name‘‘的错 处理方式为判定他是否为空 为空才进行添加数据处理
1.3.3 登录成功后的界面路由
@app.route('/admin')
def admin():
    return render_template('admin.html')
1.4 执行app对象
if __name__ == '__main__':
    app.run(debug=True)
debug=True 是设置crtl+s后页面进行自动刷新
2、配置html
2.1 登录界面
<!doctype html>
<html lang="en">
  <head>
    <!-- Required meta tags -->
    <meta charset="utf-8">
    <meta name="viewport" content="width=device-width, initial-scale=1">

    <!-- Bootstrap CSS -->
    <link href="https://cdn.jsdelivr.net/npm/bootstrap@5.0.1/dist/css/bootstrap.min.css" rel="stylesheet" integrity="sha384-+0n0xVW2eSR5OomGNYDnhzAbDsOXxcvSN1TPprVMTNDbiYZCxYbOOl7+AMvyTG2x" crossorigin="anonymous">

    <title>用户登录界面</title>
    <style>
      *{
        margin: 0;
        padding: 0;
      }
      body{
        background-color: #99D9EA ;
      }
      .im1{
        width: 60px;
        height: 60px;
        margin: 0 auto;
        margin-top: 100px;
      }
      .im{
        width: 60px;
        height: 60px;
      }
      .title{
        width: 200px;
        height: 10px;
        text-align: center;
        margin: auto;
        margin-top: 20px;
        font-size: 25px;
        color: #fff;
      }
      .title .lo{
        margin: 0;
        border-bottom:1px  #9FFCFD solid;
        padding: 10px;
      }
      .title .log{
        font-size: 5px;
        margin: 0;
      }
      input{
        height: 30px;
      }
      .btu{
        width: 80px;
        display: block;
        margin: 0 auto;
        color: #fff;
        border:1px  #9FFCFD solid;
      }
      .res{
        width: 80px;
        display: block;
        border:1px  #9FFCFD solid;

      }
      a{
        text-decoration: none;
        color: #fff;
      }
    </style>
  </head>
  <body>
    <div class="im1">
<!--        <img src="{{ url_for('static', filename='head.jpg')}}">-->
      <img src="{{url_for('static',filename='head.jpg')}} " class='im' alt="">
    </div>
    <div class="title">
        <p class="lo">用户登录</p>
        <p class="log">user login</p>
    </div>
    <form style="width: 200px ;margin:100px auto" method="POST">

        <div class="mb-3">
        <!-- <label for="user_name" class="form-label">用户名</label> -->
        <input type="text"
               class="form-control"
               id="user_name"
               aria-describedby="emailHelp"
               name = "user_name"
        >
        </div>
        <div class="mb-3">
        <!-- <label for="user_passwd" class="form-label">用户密码</label> -->
        <input type="text"
               class="form-control"
               id="user_passwd"
               name ="user_passwd"
        >
        </div>
        <!-- <button type="submit" class="btu">登录</button> -->
        <button type="submit" class="res" style="display:inline;width:60px;height:35px;color: #fff;padding:5px 0;background-color: #99D9EA;text-align:center;float:left;border-radius:5px;">登录</button>
        <div class="res" style="display:inline;width:60px;height:35px;padding:5px 0;text-align:center;float:right;border-radius:5px;">
            <a href="{{url_for('res')}}">注册</a>
        </div>
    </form>
    <!-- Optional JavaScript; choose one of the two! -->

    <!-- Option 1: Bootstrap Bundle with Popper -->
    <script src="https://cdn.jsdelivr.net/npm/bootstrap@5.0.1/dist/js/bootstrap.bundle.min.js" integrity="sha384-gtEjrD/SeCtmISkJkNUaaKMoLD0//ElJ19smozuHV6z3Iehds+3Ulb9Bn9Plx0x4" crossorigin="anonymous"></script>

    <!-- Option 2: Separate Popper and Bootstrap JS -->
    <!--
    <script src="https://cdn.jsdelivr.net/npm/@popperjs/core@2.9.2/dist/umd/popper.min.js" integrity="sha384-IQsoLXl5PILFhosVNubq5LC7Qb9DXgDA9i+tQ8Zj3iwWAwPtgFTxbJ8NT4GN1R8p" crossorigin="anonymous"></script>
    <script src="https://cdn.jsdelivr.net/npm/bootstrap@5.0.1/dist/js/bootstrap.min.js" integrity="sha384-Atwg2Pkwv9vp0ygtn1JAojH0nYbwNJLPhwyoVbhoPwBhjQPR5VtM2+xf0Uwh9KtT" crossorigin="anonymous"></script>
    -->
  </body>
</html>
2.2 注册界面
<!doctype html>
<html lang="en">
  <head>
    <!-- Required meta tags -->
    <meta charset="utf-8">
    <meta name="viewport" content="width=device-width, initial-scale=1">

    <!-- Bootstrap CSS -->
    <link href="https://cdn.jsdelivr.net/npm/bootstrap@5.0.1/dist/css/bootstrap.min.css" rel="stylesheet" integrity="sha384-+0n0xVW2eSR5OomGNYDnhzAbDsOXxcvSN1TPprVMTNDbiYZCxYbOOl7+AMvyTG2x" crossorigin="anonymous">

    <title>注册用户信息</title>
    <style>
      *{
        margin: 0;
        padding: 0;
      }
      body{
        background-color: #99D9EA ;
      }
      .im1{
        width: 60px;
        height: 60px;
        margin: 0 auto;
        margin-top: 100px;
      }
      .im{
        width: 60px;
        height: 60px;
      }
      .title{
        width: 200px;
        height: 10px;
        text-align: center;
        margin: auto;
        margin-top: 20px;
        font-size: 25px;
        color: #fff;
      }
      .title .lo{
        margin: 0;
        border-bottom:1px  #9FFCFD solid;
        padding: 10px;
      }
      .title .log{
        font-size: 5px;
        margin: 0;
      }
      input{
        height: 30px;
      }
      .btu1{
        width: 80px;
        background-color: #99D9EA;
        display: block;
        margin: 0 auto;
        color: #fff;
        border:1px  #9FFCFD solid;

      }
      /* .res{
        width: 80px;
        display: block;
      }
      a{
        text-decoration: none;
        color: #fff;
      } */
    </style>
  </head>
  <body>
    <div class="im1">
        <img src="{{url_for('static',filename='head.jpg')}} " class='im' alt="">
<!--      <img src="头像.png" class='im' alt="">-->
    </div>
    <div class="title">
        <p class="lo">用户注册</p>
        <p class="log">user res</p>
    </div>
    <form style="width: 200px ;margin:100px auto" method="POST">

        <div class="mb-3">
        <!-- <label for="user_name" class="form-label">用户名</label> -->
        <input type="text"
               class="form-control"
               id="user_name"
               aria-describedby="emailHelp"
               name = "user_name"
               value="用户名"
        >
        </div>
        <div class="mb-3">
        <!-- <label for="user_passwd" class="form-label">用户密码</label> -->
        <input type="text"
               class="form-control"
               id="user_passwd"
               name ="user_passwd"
               value="密码"
        >
        </div>

        <div class="mb-3">
          <!-- <label for="user_passwd" class="form-label">用户密码</label> -->
          <input type="text"
                 class="form-control"
                 id="user_passwd_to"
                 name ="user_passwd_to"
                 value="确认密码"
          >
          </div>
        <button type="submit" class="btu1">注册</button>
        <!-- <button type="submit" class="btn" style="color:#fff;">注册</button> -->
        <!-- <div class="res" style="display:inline;width:60px;height:35px;padding:5px 0;text-align:center;float:right;border-radius:5px;">
            <a href="#">注册</a>
        </div> -->
    </form>
    <!-- Optional JavaScript; choose one of the two! -->

    <!-- Option 1: Bootstrap Bundle with Popper -->
    <script src="https://cdn.jsdelivr.net/npm/bootstrap@5.0.1/dist/js/bootstrap.bundle.min.js" integrity="sha384-gtEjrD/SeCtmISkJkNUaaKMoLD0//ElJ19smozuHV6z3Iehds+3Ulb9Bn9Plx0x4" crossorigin="anonymous"></script>

    <!-- Option 2: Separate Popper and Bootstrap JS -->
    <!--
    <script src="https://cdn.jsdelivr.net/npm/@popperjs/core@2.9.2/dist/umd/popper.min.js" integrity="sha384-IQsoLXl5PILFhosVNubq5LC7Qb9DXgDA9i+tQ8Zj3iwWAwPtgFTxbJ8NT4GN1R8p" crossorigin="anonymous"></script>
    <script src="https://cdn.jsdelivr.net/npm/bootstrap@5.0.1/dist/js/bootstrap.min.js" integrity="sha384-Atwg2Pkwv9vp0ygtn1JAojH0nYbwNJLPhwyoVbhoPwBhjQPR5VtM2+xf0Uwh9KtT" crossorigin="anonymous"></script>
    -->
  </body>
</html>
前端界面要注意的是:
	1、引入文件需要添加:{{url_for('static',filename='head.jpg')}}
	例如:  <img src="{{url_for('static',filename='head.jpg')}} " class='im' alt="">
	2、直接界面进行跳转:  <a href="{{url_for('res')}}">注册</a>

开放原子开发者工作坊旨在鼓励更多人参与开源活动,与志同道合的开发者们相互交流开发经验、分享开发心得、获取前沿技术趋势。工作坊有多种形式的开发者活动,如meetup、训练营等,主打技术交流,干货满满,真诚地邀请各位开发者共同参与!
更多推荐
 26
26 0
0- 0


 已为社区贡献1条内容

所有评论(0)