Python实现(条形码,二维码)生成与识别
Python 条形码,二维码生成与识别
Python实现(二维码,条形码)生成识别
生成条形码
安装barcode模块:
$ pip install python-barcode
barcode文档
import barcode
from barcode.writer import ImageWriter
# 更多了解:https://pypi.org/project/python-barcode/0.8.1/
# pip install python-barcode
#查看 python-barcode 支持的条形码格式
print(f"python-barcode支持的条形码格式:\n{barcode.PROVIDED_BARCODES}")
# 创建条形码格式对象,参数为支持的格式
EAN = barcode.get_barcode_class('code39')
# 条形码内容
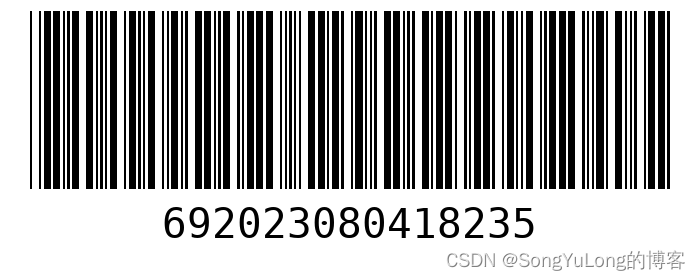
message = "69202308041823"
# 创建条形码对象
ean = EAN(message,writer=ImageWriter())
# 保存条形码图片,并且返回路径
fullname = ean.save("./resource/image/条形码")
print(f"条形码保存路径:{fullname}")
python-barcode支持的条形码格式:
[‘codabar’, ‘code128’, ‘code39’, ‘ean’, ‘ean13’, ‘ean13-guard’, ‘ean14’, ‘ean8’, ‘ean8-guard’, ‘gs1’, ‘gs1_128’, ‘gtin’, ‘isbn’, ‘isbn10’, ‘isbn13’,
‘issn’, ‘itf’, ‘jan’, ‘nw-7’, ‘pzn’, ‘upc’, ‘upca’]
生成的条形码:

生成二维码
安装qrcode和pillow模块:
$pip install qrcode
$pip install pillow
qrcode文档
import qrcode

website_link = 'http://www.baidu.com'

qr = qrcode.QRCode(version = 1, error_correction=qrcode.ERROR_CORRECT_M, box_size = 10, border = 5)

qr.add_data(website_link)

qr.make(fit=True)

img = qr.make_image(fill_color = 'black', back_color = 'white')
img.show()
img.save('./resource/image/qr1.png')
生成的二维码图片:

生成带LOGO图片的二维码:
from PIL import Image
import qrcode

#生成带logo图案的二维码

qr = qrcode.QRCode(version=5,error_correction=qrcode.constants.ERROR_CORRECT_H,box_size=8,border=4)
#version:值为1~40的整数,控制二维码的大小(最小值是1,是个21×21的矩阵)
#error_correction:控制二维码的错误纠正功能。可取值下列4个常量:
'''
qrcode.constants.ERROR_CORRECT_X:
    1. X=L时,大约7%或更少的错误能被纠正。
    2. X=M(默认)时,大约15%或更少的错误能被纠正。
    3. X=Q时,25%以下的错误会被纠正。
    4. X=H时,大约30%或更少的错误能被纠正。
'''
#box_size:控制二维码中每个小格子包含的像素数。
#border:控制边框(二维码与图片边界的距离)包含的格子数(默认为4)


#向二维码中添加信息
qr.add_data("https://www.csdn.net/")

qr.make(fit=True)

img = qr.make_image()
#二维码设置为彩色
img = img.convert('RGBA')
#打开logo图片
logo = Image.open("./resource/image/logo.png")
#二维码尺寸
img_w,img_h = img.size
#默认LOGO最大设为图片的1/4
factor = 4
#最大logo尺寸
size_w = int(img_w/factor)
size_h = int(img_h/factor)
#logo的尺寸
logo_w,logo_h = logo.size

if logo_w > size_w or logo_h > size_h:
    logo_w = size_w
    logo_h = size_h
logo = logo.resize((logo_w,logo_h),Image.ANTIALIAS).convert('RGBA')
l_w = int((img_w-logo_w)/2)
l_h = int((img_h-logo_h)/2)
#替换指定位置
img.paste(logo,(l_w,l_h),logo)
img.show()
img.save("./resource/image/qrcode1.png")
生成的带logo的图片

文件识别条形码二维码
安装pyzbar模块:
$pip install pyzbar
自动识别条形码或二维码图片,一张图若有多个码返回识别列表
import cv2
from pyzbar.pyzbar import decode

# 安装依赖库
# pip install pyzbar

# 读取图像
img = cv2.imread('./resource/image/bar3.jpg', cv2.IMREAD_GRAYSCALE)
# img = cv2.imread('./resource/image/uni-android.png', cv2.IMREAD_GRAYSCALE)
# img = cv2.imread('./resource/image/uni-ios.png', cv2.IMREAD_GRAYSCALE)
# img = cv2.imread('./resource/image/mp-jd-qrcode.png', cv2.IMREAD_GRAYSCALE)
# img = cv2.imread('./resource/image/barcode1.png', cv2.IMREAD_GRAYSCALE)
# img = cv2.imread('./resource/image/zbxx_qr.png', cv2.IMREAD_GRAYSCALE)

# 解码图像
decode_data = decode(img)

print(decode_data)

# 输出结果
for barcode in decode_data:
    print(barcode.type)
    print(barcode.data)
    print(barcode.quality)
    print(barcode.orientation)
    print(barcode.rect)
    print(barcode.polygon)

# 一张图片包含多个码,识别结果:
# [
# Decoded(data=b'201541332863', type='CODE39', rect=Rect(left=206, top=2928, width=1927, height=224), polygon=[Point(x=206, y=2939), Point(x=206, y=3129), Point(x=207, y=3151), Point(x=2128, y=3152), Point(x=2132, y=3056), Point(x=2133, y=2928), Point(x=208, y=2929), Point(x=207, y=2933)], quality=78, orientation='UP'),
# Decoded(data=b'201541393029', type='CODE39', rect=Rect(left=205, top=2529, width=1930, height=234), polygon=[Point(x=205, y=2665), Point(x=205, y=2709), Point(x=206, y=2761), Point(x=207, y=2763), Point(x=2133, y=2742), Point(x=2135, y=2646), Point(x=2135, y=2574), Point(x=2134, y=2546), Point(x=2133, y=2534), Point(x=207, y=2529)], quality=135, orientation='UP'),
# Decoded(data=b'201541371885', type='CODE39', rect=Rect(left=210, top=2134, width=1924, height=229), polygon=[Point(x=210, y=2363), Point(x=2134, y=2362), Point(x=2134, y=2134), Point(x=217, y=2135)], quality=186, orientation='UP'),
# Decoded(data=b'201541332768', type='CODE39', rect=Rect(left=223, top=1747, width=1909, height=218), polygon=[Point(x=223, y=1941), Point(x=223, y=1965), Point(x=2131, y=1958), Point(x=2132, y=1850), Point(x=2132, y=1752), Point(x=2131, y=1750), Point(x=229, y=1747), Point(x=228, y=1751), Point(x=227, y=1779)], quality=182, orientation='UP'),
# Decoded(data=b'201541395223', type='CODE39', rect=Rect(left=232, top=1364, width=1902, height=215), polygon=[Point(x=232, y=1527), Point(x=232, y=1579), Point(x=2131, y=1578), Point(x=2132, y=1560), Point(x=2134, y=1398), Point(x=2134, y=1388), Point(x=2133, y=1366), Point(x=2132, y=1364), Point(x=235, y=1365), Point(x=234, y=1403)], quality=196, orientation='UP'),
# Decoded(data=b'201541350294', type='CODE39', rect=Rect(left=238, top=979, width=1900, height=210), polygon=[Point(x=238, y=1159), Point(x=238, y=1189), Point(x=2135, y=1188), Point(x=2138, y=1040), Point(x=2137, y=980), Point(x=243, y=979), Point(x=242, y=983), Point(x=240, y=1039)], quality=191, orientation='UP'),
# Decoded(data=b'201541368446', type='CODE39', rect=Rect(left=243, top=595, width=1896, height=203), polygon=[Point(x=243, y=705), Point(x=243, y=771), Point(x=244, y=797), Point(x=2138, y=798), Point(x=2139, y=770), Point(x=2139, y=598), Point(x=2138, y=596), Point(x=246, y=595), Point(x=245, y=599)], quality=159, orientation='UP')
# ]

# 一张图片只有一个码,识别结果:
# [Decoded(data=b'987602111523382F', type='CODE39', rect=Rect(left=30, top=11, width=677, height=177), polygon=[Point(x=30, y=11), Point(x=30, y=187), Point(x=707, y=188), Point(x=707, y=12)], quality=178, orientation='UP')]
# [Decoded(data=b'0280000532', type='CODE128', rect=Rect(left=777, top=327, width=0, height=44), polygon=[Point(x=777, y=327), Point(x=777, y=371)], quality=22, orientation='UP')]
摄像头实时识别条形码二维码
import cv2
import numpy as np

import qrcode
import barcode
from pyzbar.pyzbar import decode

# 视频捕获,传入参数摄像头ID, 0:默认第一个摄像头
cap = cv2.VideoCapture(1)

# 判断摄像头是否正常打开
if cap.isOpened():
    print('Camera Opened.')
else:
    print('Camera Open error.')

# 处理流程
while True:
    ret, frame = cap.read()
    if ret == False:
        # 读取帧失败
        break

    # 图像处理
    frame_gray = cv2.cvtColor(frame, cv2.COLOR_BGR2GRAY)

    # 二维码条形码识别
    codes = decode(frame_gray)

    # 输出识别结果
    for barcode in codes:
        print(barcode.type)
        print(barcode.data)
        print(barcode.quality)
        print(barcode.orientation)
        print(barcode.rect)
        print(barcode.polygon)

        # 绘制识别结果
        text = barcode.data.decode('utf-8')
        cv2.putText(frame, text, (10, 50), cv2.FONT_HERSHEY_SIMPLEX, 1, (0,0,255), 2)

        # 绘制矩形边框
        # x,y,w,h = barcode.rect
        # cv2.rectangle(frame, (x, y), (x+w, y+h), (0,0,255), 1)
        rect = barcode.rect
        cv2.rectangle(frame, (rect.left, rect.top), (rect.left + rect.width, rect.top + rect.height), (0, 0, 255), 2)

        # 绘制多边形框
        pts = np.array(barcode.polygon, np.int32)
        cv2.polylines(frame, [pts], True, (0, 255, 0), 2)

        # [
        # Decoded(
        #   data=b'openapp.jdmobile://virtual?params={ "category": "jump","des": "vapp","appId":"01AC2B212E66FC75303349169B3F2958", "vapptype": "1"}',
        #   type='QRCODE',
        #   rect=Rect(left=342, top=234, width=255, height=242),
        #   polygon=[Point(x=342, y=423), Point(x=593, y=476), Point(x=597, y=264), Point(x=385, y=234)],
        #   quality=1,
        #   orientation='DOWN'
        #   )
        # ]


    k = cv2.waitKey(30)&0xFF
    if k == 27:
        break
    else:
        cv2.imshow('gray', frame_gray)
        # cv2.imshow('frame', frame)


cap.release()
cv2.destroyAllWindows()

二维码条形码小工具
功能:
1.摄像头实时识别二维码、条形码。
2.识别图片中的二维码、条形码。
3.生成条形码。
4.生成二维码。
5.生成带logo的二维码。
import cv2
import numpy as np
# import pyperclip
from PIL import Image

import os
import sys
import qrcode
import barcode
from barcode.writer import ImageWriter
from pyzbar.pyzbar import decode

from PyQt5.QtGui import *
from PyQt5.QtCore import *
from PyQt5.QtWidgets import *


from Ui_main_window import Ui_MainWindow


class AppMainWindow(QMainWindow, Ui_MainWindow):
    def __init__(self, parent=None):
        super(AppMainWindow, self).__init__(parent)
        self.setupUi(self)
        self.setWindowTitle("二维码条形码工具")
        self.started = False
        self.currentPath = 'C:\\'
        self.qrcodeLogoPath = 'C:\\'
        self.cameraid = 0   # 摄像头ID
        self.cap = cv2.VideoCapture()
        self.timer_cam = QTimer(self)   # 摄像头实时更新定时器
        self.timer_cam.timeout.connect(self.update_cam)

        self.btnStartStop.clicked.connect(self.start_recognize) # 通过摄像头实时识别二维码条形码
        self.btnFileRecognize.clicked.connect(self.onFileRecognize) # 通过导入图片文件识别二维码条形码
        self.btnBarCode.clicked.connect(self.generate_barcode)     # 生成条形码
        self.btnQrCode.clicked.connect(self.generate_qrcode)   #  生成普通二维码
        self.btnQrCodeLogo.clicked.connect(self.generate_qrcode_with_logo) # 生成带LOGO图片的二维码
        self.spinBoxCamID.valueChanged.connect(self.camid_select)
        self.btnLOGO.clicked.connect(self.selectQrCodeLogo)

    def selectQrCodeLogo(self):
        '''
        选择生成二维码LOGO
        '''
        fname, aa = QFileDialog.getOpenFileName(self, '请选择二维码LOGO图片', self.qrcodeLogoPath, "Image files (*.jpg *.png *.bmp)")
        self.qrcodeLogoPath = fname
        if os.path.exists(self.qrcodeLogoPath):
            print(self.qrcodeLogoPath)
            self.lineEditLogoPath.setText(self.qrcodeLogoPath)
            self.labelLogo.setPixmap(QPixmap(self.qrcodeLogoPath))
            self.labelLogo.setScaledContents(True)
        else:
            print('选择的二维码LOGO文件不存在')

    def camid_select(self):
        self.cameraid = self.spinBoxCamID.value()
        print("Current Camera ID:"+str(self.cameraid))

    def start_recognize(self):
        if self.started == False:
            state = self.cap.open(self.cameraid)
            if state == True:
                self.timer_cam.start(50)
                self.started = True
                self.btnStartStop.setText('停止识别')
            else:
                QMessageBox.warning(self, u'Warning', u'摄像头打开失败',
                                    buttons=QMessageBox.Ok,
                                    defaultButton=QMessageBox.Ok)
        else:
            self.cap.release()
            self.timer_cam.stop()
            self.started = False
            self.btnStartStop.setText('开始识别')

    def onFileRecognize(self):
        fname, aa = QFileDialog.getOpenFileName(self, '请选择要识别的图片', self.currentPath, "Image files (*.jpg *.png *.bmp)")
        self.currentPath = fname
        print(self.currentPath)

        if not os.path.exists(fname) and not os.path.isfile(fname):
            print('文件不存在!!')
            return
        if self.started == True:
            self.cap.release()
            self.timer_cam.stop()
            self.started = False
            self.btnStartStop.setText('开始识别')

        # img = cv2.imread(fname, cv2.IMREAD_COLOR)
        # gray = cv2.imread(fname, cv2.IMREAD_GRAYSCALE)
        img = cv2.imdecode(np.fromfile(file=fname, dtype=np.uint8), cv2.IMREAD_COLOR)
        gray = cv2.cvtColor(img, cv2.COLOR_BGR2GRAY)

        # 二维码条形码识别
        result = decode(gray)
        self.textEdit.clear()

        # 绘制识别结果
        for barcode in result:
            print(barcode.type)
            print(barcode.data)
            print(barcode.quality)
            print(barcode.orientation)
            print(barcode.rect)
            print(barcode.polygon)
            text = barcode.data.decode('utf-8')
            self.textEdit.append(text)

            # 绘制多边形框
            pts = np.array(barcode.polygon, np.int32)
            cv2.polylines(img, [pts], True, (0, 0, 255), 3)

        if (self.labelView.width() > self.labelView.height()):
            img = cv2.resize(img, (self.labelView.height(), self.labelView.height()))
        else:
            img = cv2.resize(img, (self.labelView.width(), self.labelView.width()))
        img = cv2.cvtColor(img, cv2.COLOR_BGR2RGB)
        image = QImage(img.data, img.shape[1], img.shape[0], QImage.Format.Format_RGB888)
        self.labelView.setPixmap(QPixmap.fromImage(image))

    def update_cam(self):
        # 读取一帧摄像头数据
        ret, frame = self.cap.read()
        # print(frame.shape)

        # 转为灰度图
        gray = cv2.cvtColor(frame, cv2.COLOR_BGR2GRAY)

        # 二维码条形码识别
        result = decode(gray)

        # 识别结果
        for barcode in result:
            print(barcode.type)
            print(barcode.data)
            print(barcode.quality)
            print(barcode.orientation)
            print(barcode.rect)
            print(barcode.polygon)

            # 绘制识别结果
            text = barcode.data.decode('utf-8')
            self.textEdit.setText(text)

            # 绘制矩形框
            # x,y,w,h = barcode.rect
            # cv2.rectangle(frame, (x, y), (x+w, y+h), (0, 0, 255), 1)
            rect = barcode.rect
            cv2.rectangle(frame, (rect.left, rect.top), (rect.left + rect.width, rect.top+rect.height), (0, 0, 255), 2)

            # 绘制多边形框
            pts = np.array(barcode.polygon, np.int32)
            cv2.polylines(frame, [pts], True, (0, 255, 0), 2)

        frame = cv2.resize(frame, (self.labelView.width(), self.labelView.height()))
        frame = cv2.cvtColor(frame, cv2.COLOR_BGR2RGB)
        showimg = QImage(frame.data, frame.shape[1], frame.shape[0], QImage.Format.Format_RGB888)
        self.labelView.setPixmap(QPixmap.fromImage(showimg))
        # self.labelView.setScaledContents(True)

    def generate_qrcode(self):
        directory = QFileDialog.getExistingDirectory(None, "选取保存文件目录", "C:/")
        print(directory)

        message = self.textEdit.toPlainText()
        print(message)
        qr = qrcode.QRCode(version = 1, error_correction=qrcode.ERROR_CORRECT_M, box_size = 10, border = 5)
        qr.add_data(message)
        qr.make(fit=True)
        img = qr.make_image(fill_color = 'black', back_color = 'white')
        fullname = (directory + '/' + message + '.png')
        img.save(fullname)
        # self.labelView.setPixmap(QPixmap(fullname))
        # self.labelView.setScaledContents(True)

        image = cv2.imdecode(np.fromfile(file=fullname, dtype=np.uint8), cv2.IMREAD_COLOR)
        if (self.labelView.width() > self.labelView.height()):
            image = cv2.resize(image, (self.labelView.height(), self.labelView.height()))
        else:
            image = cv2.resize(image, (self.labelView.width(), self.labelView.width()))
        image = cv2.cvtColor(image, cv2.COLOR_BGR2RGB)
        showimg = QImage(image.data, image.shape[1], image.shape[0], QImage.Format.Format_RGB888)
        self.labelView.setPixmap(QPixmap.fromImage(showimg))


    def generate_qrcode_with_logo(self):
        directory = QFileDialog.getExistingDirectory(None, "选取保存文件目录", "C:/")
        print(directory)

        qr = qrcode.QRCode(version=5,error_correction=qrcode.constants.ERROR_CORRECT_H,box_size=8,border=4)
        #version:值为1~40的整数,控制二维码的大小(最小值是1,是个21×21的矩阵)
        #error_correction:控制二维码的错误纠正功能。可取值下列4个常量:
        '''
        qrcode.constants.ERROR_CORRECT_X:
            1. X=L时,大约7%或更少的错误能被纠正。
            2. X=M(默认)时,大约15%或更少的错误能被纠正。
            3. X=Q时,25%以下的错误会被纠正。
            4. X=H时,大约30%或更少的错误能被纠正。
        '''
        #box_size:控制二维码中每个小格子包含的像素数。
        #border:控制边框(二维码与图片边界的距离)包含的格子数(默认为4)


        #向二维码中添加信息
        message = self.textEdit.toPlainText()
        print(message)

        qr.add_data(message)
        qr.make(fit=True)

        img = qr.make_image()
        #二维码设置为彩色
        img = img.convert('RGBA')
        #打开logo图片
        logo = Image.open(self.qrcodeLogoPath)
        #二维码尺寸
        img_w,img_h = img.size
        #默认LOGO最大设为图片的1/4
        factor = 4
        #最大logo尺寸
        size_w = int(img_w/factor)
        size_h = int(img_h/factor)
        #logo的尺寸
        logo_w,logo_h = logo.size

        if logo_w > size_w or logo_h > size_h:
            logo_w = size_w
            logo_h = size_h
        logo = logo.resize((logo_w,logo_h),Image.ANTIALIAS).convert('RGBA')
        l_w = int((img_w-logo_w)/2)
        l_h = int((img_h-logo_h)/2)
        #替换指定位置
        img.paste(logo,(l_w,l_h),logo)
        fullname = (directory + '/' + message + '.png')
        img.save(fullname)
        # img.save("./resource/image/qrcode1.png")
        # self.labelView.setPixmap(QPixmap(fullname))
        # img.show()
        image = cv2.imdecode(np.fromfile(file=fullname, dtype=np.uint8), cv2.IMREAD_COLOR)
        if (self.labelView.width() > self.labelView.height()):
            image = cv2.resize(image, (self.labelView.height(), self.labelView.height()))
        else:
            image = cv2.resize(image, (self.labelView.width(), self.labelView.width()))
        image = cv2.cvtColor(image, cv2.COLOR_BGR2RGB)
        showimg = QImage(image.data, image.shape[1], image.shape[0], QImage.Format.Format_RGB888)
        self.labelView.setPixmap(QPixmap.fromImage(showimg))
        # self.labelView.setScaledContents(True)

    def generate_barcode(self):
        # 生成的条形码保存目录
        directory = QFileDialog.getExistingDirectory(None, "选取保存文件目录", "C:/")
        print(directory)

        #查看 python-barcode 支持的条形码格式
        print(f"python-barcode支持的条形码格式:\n{barcode.PROVIDED_BARCODES}")
        # 创建条形码格式对象,参数为支持的格式
        EAN = barcode.get_barcode_class('code39')

        # 条形码内容
        # message = "69202308041823"
        message = self.textEdit.toPlainText()
        print(message)

        # 创建条形码对象
        ean = EAN(message,writer=ImageWriter())

        # 保存条形码图片,并且返回路径
        # fullname = ean.save("./resource/image/条形码")
        # print(f"条形码保存路径:{fullname}")
        fullname = ean.save(directory + '/' + message)
        # self.labelView.setPixmap(QPixmap(fullname))

        image = cv2.imdecode(np.fromfile(file=fullname, dtype=np.uint8), cv2.IMREAD_COLOR)
        if (self.labelView.width() > self.labelView.height()):
            image = cv2.resize(image, (self.labelView.height(), self.labelView.height()))
        else:
            image = cv2.resize(image, (self.labelView.width(), self.labelView.width()))
        image = cv2.cvtColor(image, cv2.COLOR_BGR2RGB)
        showimg = QImage(image.data, image.shape[1], image.shape[0], QImage.Format.Format_RGB888)
        self.labelView.setPixmap(QPixmap.fromImage(showimg))
        # self.labelView.setScaledContents(True)

if __name__ == "__main__":
    app = QApplication(sys.argv)
    win = AppMainWindow()
    win.show()
    sys.exit(app.exec_())
main_window.ui
<?xml version="1.0" encoding="UTF-8"?>
<ui version="4.0">
 <class>MainWindow</class>
 <widget class="QMainWindow" name="MainWindow">
  <property name="geometry">
   <rect>
    <x>0</x>
    <y>0</y>
    <width>700</width>
    <height>563</height>
   </rect>
  </property>
  <property name="windowTitle">
   <string>MainWindow</string>
  </property>
  <widget class="QWidget" name="centralwidget">
   <widget class="QLabel" name="labelView">
    <property name="geometry">
     <rect>
      <x>10</x>
      <y>20</y>
      <width>320</width>
      <height>240</height>
     </rect>
    </property>
    <property name="text">
     <string>等待打开摄像头</string>
    </property>
   </widget>
   <widget class="QTextEdit" name="textEdit">
    <property name="geometry">
     <rect>
      <x>10</x>
      <y>300</y>
      <width>321</width>
      <height>211</height>
     </rect>
    </property>
   </widget>
   <widget class="QWidget" name="horizontalLayoutWidget_2">
    <property name="geometry">
     <rect>
      <x>360</x>
      <y>180</y>
      <width>321</width>
      <height>51</height>
     </rect>
    </property>
    <layout class="QHBoxLayout" name="horizontalLayout_2">
     <item>
      <widget class="QPushButton" name="btnBarCode">
       <property name="text">
        <string>生成条形码</string>
       </property>
      </widget>
     </item>
     <item>
      <widget class="QPushButton" name="btnQrCode">
       <property name="text">
        <string>生成二维码</string>
       </property>
      </widget>
     </item>
     <item>
      <widget class="QPushButton" name="btnQrCodeLogo">
       <property name="text">
        <string>生成LOGO二维码</string>
       </property>
      </widget>
     </item>
    </layout>
   </widget>
   <widget class="QWidget" name="horizontalLayoutWidget">
    <property name="geometry">
     <rect>
      <x>360</x>
      <y>10</y>
      <width>321</width>
      <height>51</height>
     </rect>
    </property>
    <layout class="QHBoxLayout" name="horizontalLayout">
     <item>
      <widget class="QPushButton" name="btnStartStop">
       <property name="sizePolicy">
        <sizepolicy hsizetype="Minimum" vsizetype="Fixed">
         <horstretch>0</horstretch>
         <verstretch>0</verstretch>
        </sizepolicy>
       </property>
       <property name="text">
        <string>开始识别</string>
       </property>
      </widget>
     </item>
     <item>
      <widget class="QPushButton" name="btnFileRecognize">
       <property name="text">
        <string>识别文件</string>
       </property>
      </widget>
     </item>
    </layout>
   </widget>
   <widget class="QLabel" name="label_2">
    <property name="geometry">
     <rect>
      <x>10</x>
      <y>270</y>
      <width>91</width>
      <height>21</height>
     </rect>
    </property>
    <property name="text">
     <string>识别结果:</string>
    </property>
   </widget>
   <widget class="QLineEdit" name="lineEditLogoPath">
    <property name="geometry">
     <rect>
      <x>360</x>
      <y>240</y>
      <width>221</width>
      <height>31</height>
     </rect>
    </property>
   </widget>
   <widget class="QPushButton" name="btnLOGO">
    <property name="geometry">
     <rect>
      <x>590</x>
      <y>240</y>
      <width>93</width>
      <height>28</height>
     </rect>
    </property>
    <property name="text">
     <string>选择LOGO图</string>
    </property>
   </widget>
   <widget class="QLabel" name="labelLogo">
    <property name="geometry">
     <rect>
      <x>390</x>
      <y>300</y>
      <width>221</width>
      <height>191</height>
     </rect>
    </property>
    <property name="text">
     <string>LOGO图片</string>
    </property>
   </widget>
   <widget class="QWidget" name="horizontalLayoutWidget_3">
    <property name="geometry">
     <rect>
      <x>360</x>
      <y>80</y>
      <width>321</width>
      <height>41</height>
     </rect>
    </property>
    <layout class="QHBoxLayout" name="horizontalLayout_3">
     <item>
      <widget class="QLabel" name="label_3">
       <property name="text">
        <string>摄像头ID:</string>
       </property>
      </widget>
     </item>
     <item>
      <widget class="QSpinBox" name="spinBoxCamID"/>
     </item>
    </layout>
   </widget>
  </widget>
  <widget class="QMenuBar" name="menubar">
   <property name="geometry">
    <rect>
     <x>0</x>
     <y>0</y>
     <width>700</width>
     <height>26</height>
    </rect>
   </property>
  </widget>
  <widget class="QStatusBar" name="statusbar"/>
 </widget>
 <resources/>
 <connections/>
</ui>

如果用pyinstaller打包后报错缺少libiconv.dll可以尝试libiconv.dll下载对应库文件安装到系统目录再重新打包。

感谢https://gitee.com/Curry_30s/ZBarWin64这位大佬开源资料!
随性Err同学验证解决方法 个人主页 感谢分享!
把下图红框内两个复制到dist文件夹下就可以了


开放原子开发者工作坊旨在鼓励更多人参与开源活动,与志同道合的开发者们相互交流开发经验、分享开发心得、获取前沿技术趋势。工作坊有多种形式的开发者活动,如meetup、训练营等,主打技术交流,干货满满,真诚地邀请各位开发者共同参与!
更多推荐
 13
13 0
0- 0


 已为社区贡献9条内容

所有评论(0)