
码神博客系统功能优化---登录图形验证码
1.导入依赖<!-- google kaptcha依赖 图像验证与行为验证--><dependency><groupId>com.github.axet</groupId><artifactId>kaptcha</artifactId><version>0.0.9</
·
1.导入依赖
            <!-- google kaptcha依赖 图像验证与行为验证-->
            <dependency>
                <groupId>com.github.axet</groupId>
                <artifactId>kaptcha</artifactId>
                <version>0.0.9</version>
            </dependency>
2.验证码配置类
这一块可以在网上找找,自己生写也挺麻烦的
/**
 * 验证码配置类
 *
 * @author zhoubin
 * @since 1.0.0
 */
@Configuration
public class CaptchaConfig {

   @Bean
   public DefaultKaptcha getDefaultKaptcha(){
      //验证码生成器
      DefaultKaptcha defaultKaptcha=new DefaultKaptcha();
      //配置
      Properties properties = new Properties();
      //是否有边框
      properties.setProperty("kaptcha.border", "yes");
      //设置边框颜色
      properties.setProperty("kaptcha.border.color", "105,179,90");
      //边框粗细度,默认为1
      // properties.setProperty("kaptcha.border.thickness","1");
      //验证码
      properties.setProperty("kaptcha.session.key","code");
      //验证码文本字符颜色 默认为黑色
      properties.setProperty("kaptcha.textproducer.font.color", "blue");
      //设置字体样式
      properties.setProperty("kaptcha.textproducer.font.names", "宋体,楷体,微软雅黑");
      //字体大小,默认40
      properties.setProperty("kaptcha.textproducer.font.size", "40");
      //验证码文本字符内容范围 默认为abced2345678gfynmnpwx
      // properties.setProperty("kaptcha.textproducer.char.string", "");
      //字符长度,默认为5
      properties.setProperty("kaptcha.textproducer.char.length", "4");
      //字符间距 默认为2
      properties.setProperty("kaptcha.textproducer.char.space", "6");
      //验证码图片宽度 默认为200
      properties.setProperty("kaptcha.image.width", "200");
      //验证码图片高度 默认为40
      properties.setProperty("kaptcha.image.height", "50");
      Config config = new Config(properties);
      defaultKaptcha.setConfig(config);
      return defaultKaptcha;
   }
}
3.发送验证码接口
它这个验证码实际上是一张图片,把它放到response中。另外这个验证码内容可以放到session域中,但是我决定代码量挺多的。
还是放入redis中,至于key,可以有好几种办法
1)取ip+userAgent,但是这个不适合测试,适合实际的业务,也要防止ip代理
2)取uuid,把生成uuid返回给前端,前端再提交的时候,再带上uuid
3)取用户的信息作为key也行,但是我考虑可能这是登录,用户的信息还没获取到
ate DefaultKaptcha defaultKaptcha;

    @Autowired
    private RedisTemplate<String, String> redisTemplate;
    /**
     * 获取缓存的key
     * @param request
     * @return
     */
    private String getCaptchaKey(HttpServletRequest request){
        // 获取用户ip地址
//        String ip = request.getRemoteAddr();
//        System.out.println("1===="+ip);
        //测试的时候 不需要用ip
        // 获取浏览器请求头
        String userAgent = request.getHeader("User-Agent");
        String key = "user-service:captcha:"+ DigestUtils.md5Hex(userAgent);
//        System.out.println("1===="+key);
        return key;
    }


    @RequestMapping("getKaptchaImage")
    public void getKaptchaImage(HttpServletRequest request, HttpServletResponse response) {
        // 定义response输出类型为image/jpeg类型
        response.setDateHeader("Expires", 0);
        // Set standard HTTP/1.1 no-cache headers.
        response.setHeader("Cache-Control", "no-store, no-cache, must-revalidate");
        // Set IE extended HTTP/1.1 no-cache headers (use addHeader).
        response.addHeader("Cache-Control", "post-check=0, pre-check=0");
        // Set standard HTTP/1.0 no-cache header.
        response.setHeader("Pragma", "no-cache");
        // return a jpeg
        response.setContentType("image/jpeg");
        //---------------生成验证码----------------
        String text = defaultKaptcha.createText();
        System.out.println("验证码内容为:" + text);
        //将验证码放入session中
        //request.getSession().setAttribute("pictureVerifyKey",text);
        //将验证码放入redis中
        String key=getCaptchaKey(request);
        redisTemplate.opsForValue().set("imageCode"+key, text,60, TimeUnit.SECONDS);
        BufferedImage image = defaultKaptcha.createImage(text);
        ServletOutputStream outputStream = null;
        try {
            outputStream = response.getOutputStream();
            ImageIO.write(image, "jpg", outputStream);
            outputStream.flush();
        } catch (IOException e) {
            e.printStackTrace();
        } finally {
            try {
                if (null != outputStream) {
                    outputStream.close();
                }
            } catch (IOException e) {
                e.printStackTrace();
            }
        }
    }
}
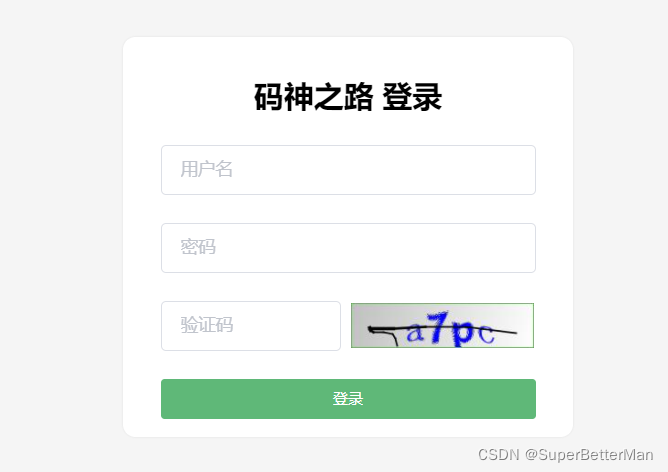
这样后端接口其实是完成了
前端,这会让我同学帮我弄了一下,好看多了

瓜分20万奖金 获得内推名额 丰厚实物奖励 易参与易上手
更多推荐


 1
1 0
0- 0


 已为社区贡献6条内容

所有评论(0)