
香橙派4和树莓派4B构建K8S集群实践之六:App服务部署
- 根据之前的k8s基础,我打算设置两种不同的虚拟主机运行在这个K8s集群上面,一个是PHP+Nginx体系的WebApp,一个是Java SpringBoot体系的WebApp。- 关于PHP+Nginx体系的WebApp,这里将实践两种部署模式:单节点多容器模式多节点单容器协作模式
目录
1.1 关于PHP+Nginx体系的WebApp,这里将实践两种部署模式:
3.1 在VS Code创建一个springboot-hello项目
1. 说明
- 根据之前的k8s基础,我打算设置两种不同的虚拟主机运行在这个K8s集群上面,一个是PHP+Nginx体系的WebApp,一个是Java SpringBoot体系的WebApp。
1.1 关于PHP+Nginx体系的WebApp,这里将实践两种部署模式:
- 单节点多容器模式 A - 即跨容器的设计模式,目的是在单个主机上运行多个具有超亲密关系的容器(进程),因此容器管理系统需要将其作为一个原子单位进行统一调度。Kubernetes编排系统设计的Pod概念就是该设计模式的实现之一。
- 多节点单容器协作模式 B - 将分布式应用(eg:nginx, php, mariadb...)的每个实例分布于多个节点,分别以单节点模式运行
1.2 配置清单
- wwwroot 是之前做pvc定义的文件目录,形如:/data0/nfs/iot-age-wwwroot-pvc-202ba85a-fd3f-4817-98ea-6764f9ec0d55
| 模式 | 主机域名 | 体系 | 指向hosts ip | 项目存放路径 |
| A | phpmyadmin.k8s-t2.com | PHP | 192.168.0.106 | /var/www/app |
| B | t1.k8s-t1.com | PHP | 192.168.0.106 | wwwroot/t1 |
| B | t2.k8s-t1.com | PHP | 192.168.0.106 | wwwroot/t2 |
| A | springboothello.k8s-t2.com | Java | 192.168.0.106 | /app.jar |
2. PHP+Nginx体系的WebApp部署
2.1 单节点多容器模式A
2.1.1 准备工作
以广为人知的phpmyadmin为示范app, 首先用buildkit工具打包成镜像,并上传到 hub.docker.com (这是我的镜像链接 https://hub.docker.com/repository/docker/bennybi/phpmyadmin/general) 。
buildctl build \
    --frontend=dockerfile.v0 \
    --local context=. \
    --local dockerfile=. \
    --export-cache type=inline \
    --output type=image,name=docker.io/bennybi/phpmyadmin:v1,push=true
Dockerfile
# This Dockerfile uses the latest version of the Bitnami PHP-FPM Docker image
FROM alpine:latest

# Copy app's source code to the /app directory
COPY . /app

# The application's directory will be the working directory
WORKDIR /app
2.2.2 部署
依据模式A的思想,模式A是用于快捷方便地部署单一应用,所以我把相关的设置都统一到 phpmyadmin.k8s-t2.com.yaml文件中定义, 其中规则:
- 项目名或domain需替换 "." 为 "-" 切换为部署名, 如phpmyadmin.k8s-t2.com => phpmyadmin-k8s-t2-com
- 容器中以刚才上传的镜像为initContainer,部署代码
- nginx, php-fpm为容器服务,nginx调用local-php-fpm:9000 解释php运行时逻辑
- 打包时,需在代码预先定义与数据库服务的连接,如:my-release-mariadb-galera.default,这里没做额外的configmap
# Service
apiVersion: v1
kind: Service
metadata:
  name: phpmyadmin-k8s-t2-com
  namespace: iot-age
spec:
  type: ClusterIP
  sessionAffinity: ClientIP
  sessionAffinityConfig:
    clientIP:
      timeoutSeconds: 10800
  ports:
  - name: nginx
    port: 80
    protocol: TCP
    targetPort: 80
  selector:
    app: phpmyadmin-k8s-t2-com

---
# deployment
apiVersion: apps/v1
kind: Deployment
metadata:
  name: phpmyadmin-k8s-t2-com
  namespace: iot-age
spec:
  replicas: 2
  selector:
    matchLabels:
      app: phpmyadmin-k8s-t2-com
  template:
    metadata:
      labels:
        app: phpmyadmin-k8s-t2-com
    spec:
      hostAliases:
      - ip: "127.0.0.1"
        hostnames:
        - "local-php-fpm"
      # 私有docker 镜像仓库
      # imagePullSecrets:
      # - name: registrykey-qlcoud-1
      # 自定义设置POD的hosts
      initContainers:
      - name: app-php
        image: "bennybi/phpmyadmin:v1"
        imagePullPolicy: Always
        # 复制php程序文件到wwwroot volume
        command: ["sh", "-c", "cp -r /app /appdata"]
        volumeMounts:
        - mountPath: /appdata
          name: wwwroot
      containers:
      #php-fpm php运行环境
      - name: php-fpm
        image: "bennybi/php-fpm:v1"
        imagePullPolicy: IfNotPresent
        volumeMounts:
        - mountPath: /var/www
          name: wwwroot
      #webserver
      - name: nginx
        image: nginx
        imagePullPolicy: IfNotPresent
        resources: {}
        terminationMessagePath: /dev/termination-log
        terminationMessagePolicy: File
        ports:
        - containerPort: 80
        volumeMounts:
        - name: wwwroot
          mountPath: /var/www
        - name: nginx-conf
          mountPath: /etc/nginx/conf.d/
      #做一个emptyDir类型,名为wwwroot的volume 用于多个容器共享同一个挂载
      volumes:
      - name: wwwroot
        emptyDir: {}
      - name: nginx-conf
        configMap:
          name: phpmyadmin-k8s-t2-com.nginx-conf

---
kind: ConfigMap
apiVersion: v1
metadata:
  name: phpmyadmin-k8s-t2-com.nginx-conf
  namespace: iot-age
  annotations:
    kubectl.kubernetes.io/last-applied-configuration: >
      {"apiVersion":"v1","data":{"default.conf":"server {\n    listen
      80;\n    listen  [::]:80;\n    server_name  localhost;\n    \n    index
      index.php index.html;\n    error_log  /var/log/nginx/error.log;\n
      access_log /var/log/nginx/access.log;\n    root /var/www/html;\n
      location / {\n        try_files $uri $uri/ /index.php?$query_string;\n
      }\n\n    #location / {\n    #    #root   /usr/share/nginx/html;\n    #
      root   /var/www/html;\n    #    index  index.php index.html
      index.htm;\n    #}\n    \n    location ~ \\.php$ {\n        try_files $uri
      =404;\n        fastcgi_split_path_info ^(.+\\.php)(/.+)$;\n
      fastcgi_pass   local-php-fpm:9000;\n        fastcgi_index  index.php;\n
      include        fastcgi_params;\n        fastcgi_param SCRIPT_FILENAME
      $document_root$fastcgi_script_name;\n        fastcgi_param PATH_INFO
      $fastcgi_path_info;\n    }\n\n    error_page   500 502 503 504
      /50x.html;\n    location = /50x.html {\n        root
      /usr/share/nginx/html;\n
      }\n}\n"},"kind":"ConfigMap","metadata":{"annotations":{},"name":"phpmyadmin-k8s-t2-com.nginx-conf","namespace":"iot-age"}}
data:
  default.conf: |
    server {
        listen       80;
        listen  [::]:80;
        server_name  localhost;

        index index.php index.html;
        error_log  /var/log/nginx/error.log;
        access_log /var/log/nginx/access.log;
        root /var/www/app;
        location / {
            try_files $uri $uri/ /index.php?$query_string;
        }

        #location / {
        #    #root   /usr/share/nginx/html;
        #    root   /var/www/html;
        #    index  index.php index.html index.htm;
        #}

        location ~ \.php$ {
            try_files $uri =404;
            fastcgi_split_path_info ^(.+\.php)(/.+)$;
            fastcgi_pass   local-php-fpm:9000;
            fastcgi_index  index.php;
            include        fastcgi_params;
            fastcgi_param SCRIPT_FILENAME $document_root$fastcgi_script_name;
            fastcgi_param PATH_INFO $fastcgi_path_info;
        }

        error_page   500 502 503 504  /50x.html;
        location = /50x.html {
            root   /usr/share/nginx/html;
        }
    }

---
# Ingress
apiVersion: networking.k8s.io/v1
kind: Ingress
metadata:
  name: phpmyadmin-k8s-t2-com
  namespace: iot-age
  annotations:
    kubernetes.io/ingress.class: nginx
    nginx.ingress.kubernetes.io/affinity: cookie
    nginx.ingress.kubernetes.io/session-cookie-name: stickounet
    nginx.ingress.kubernetes.io/session-cookie-expires: "172800"
    nginx.ingress.kubernetes.io/session-cookie-max-age: "172800"
spec:
  rules:
    - host: phpmyadmin.k8s-t2.com
      http:
        paths:
        - path: /
          pathType: Prefix
          backend:
            service:
              name: phpmyadmin-k8s-t2-com
              port:
                number: 80
  ingressClassName: nginx
2.2.3 访问效果
2.2 多节点单容器模式B
2.2.1 准备工作
先在本地准备好两个t1,t2文件夹,里面各放置一个index.php
<?
echo "T1 Site is {$_SERVER['HTTP_HOST']} <br>";
phpinfo();
<?
echo "T2 Site is {$_SERVER['HTTP_HOST']} <br>";
phpinfo();上传到设置表格描述的对应路径
当前容器组截图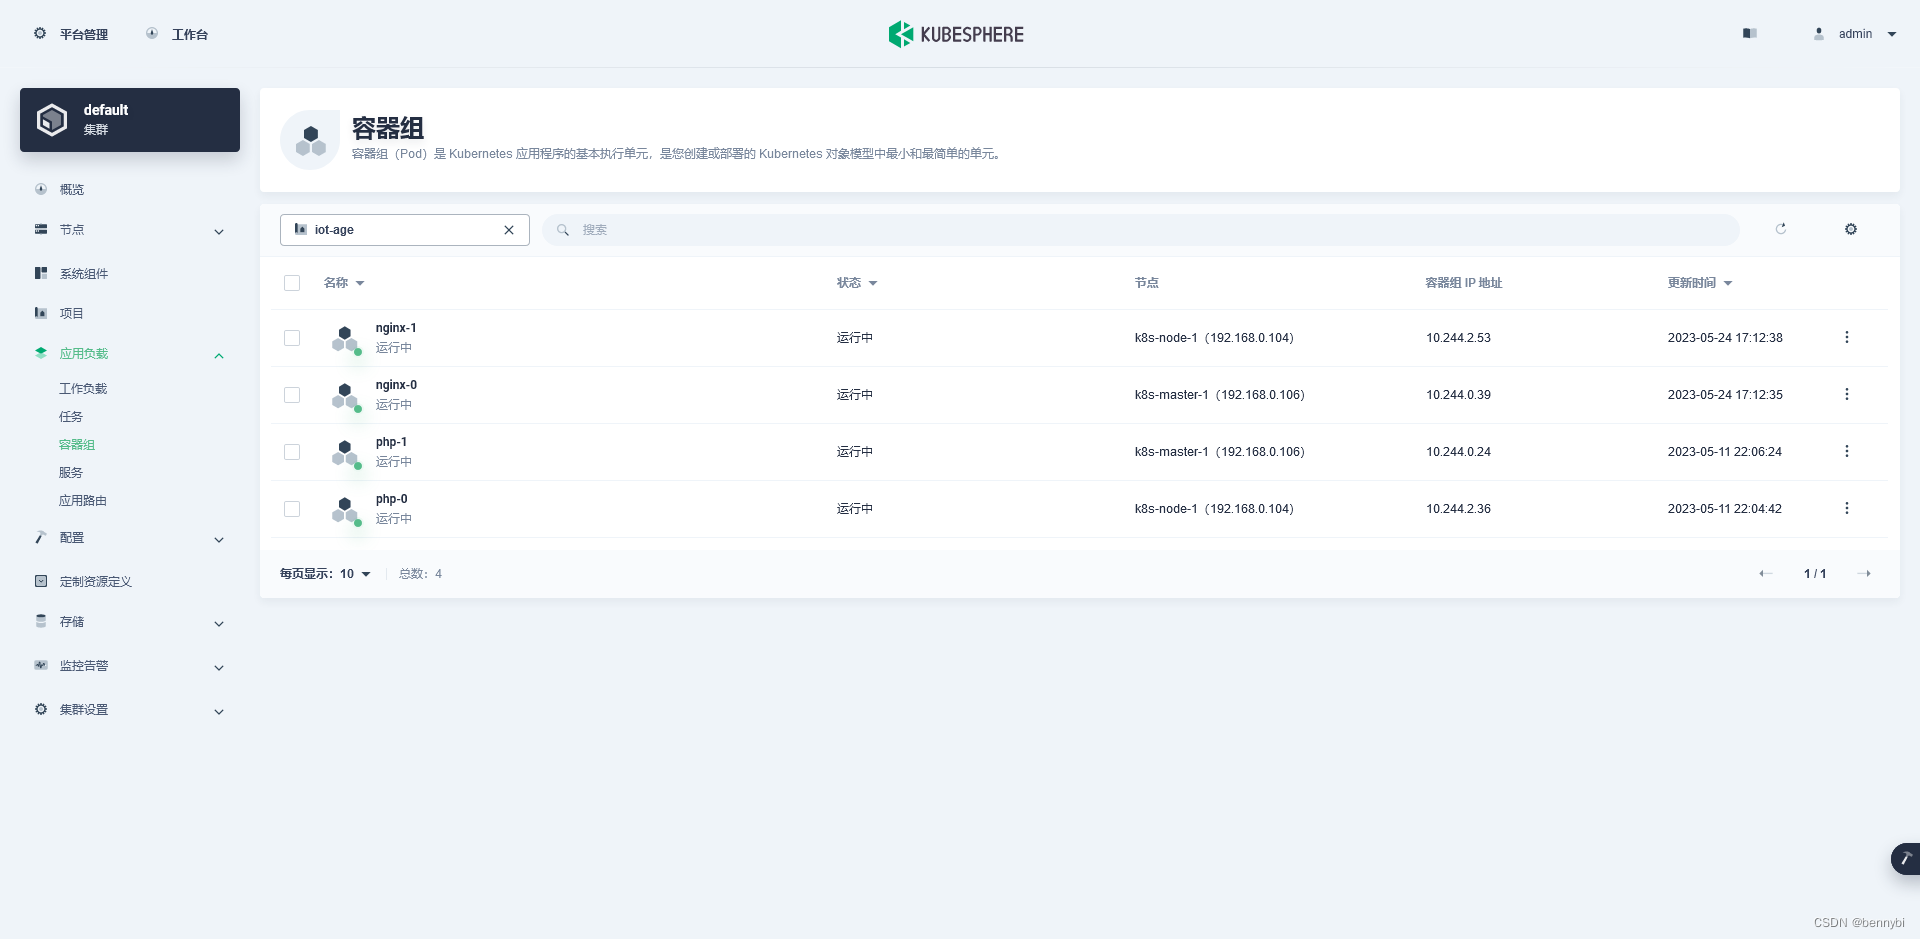
2.2 配置虚拟主机
在KubeSphere后台,去 配置-》配置字典,在nginx-conf配置项中,点编辑设置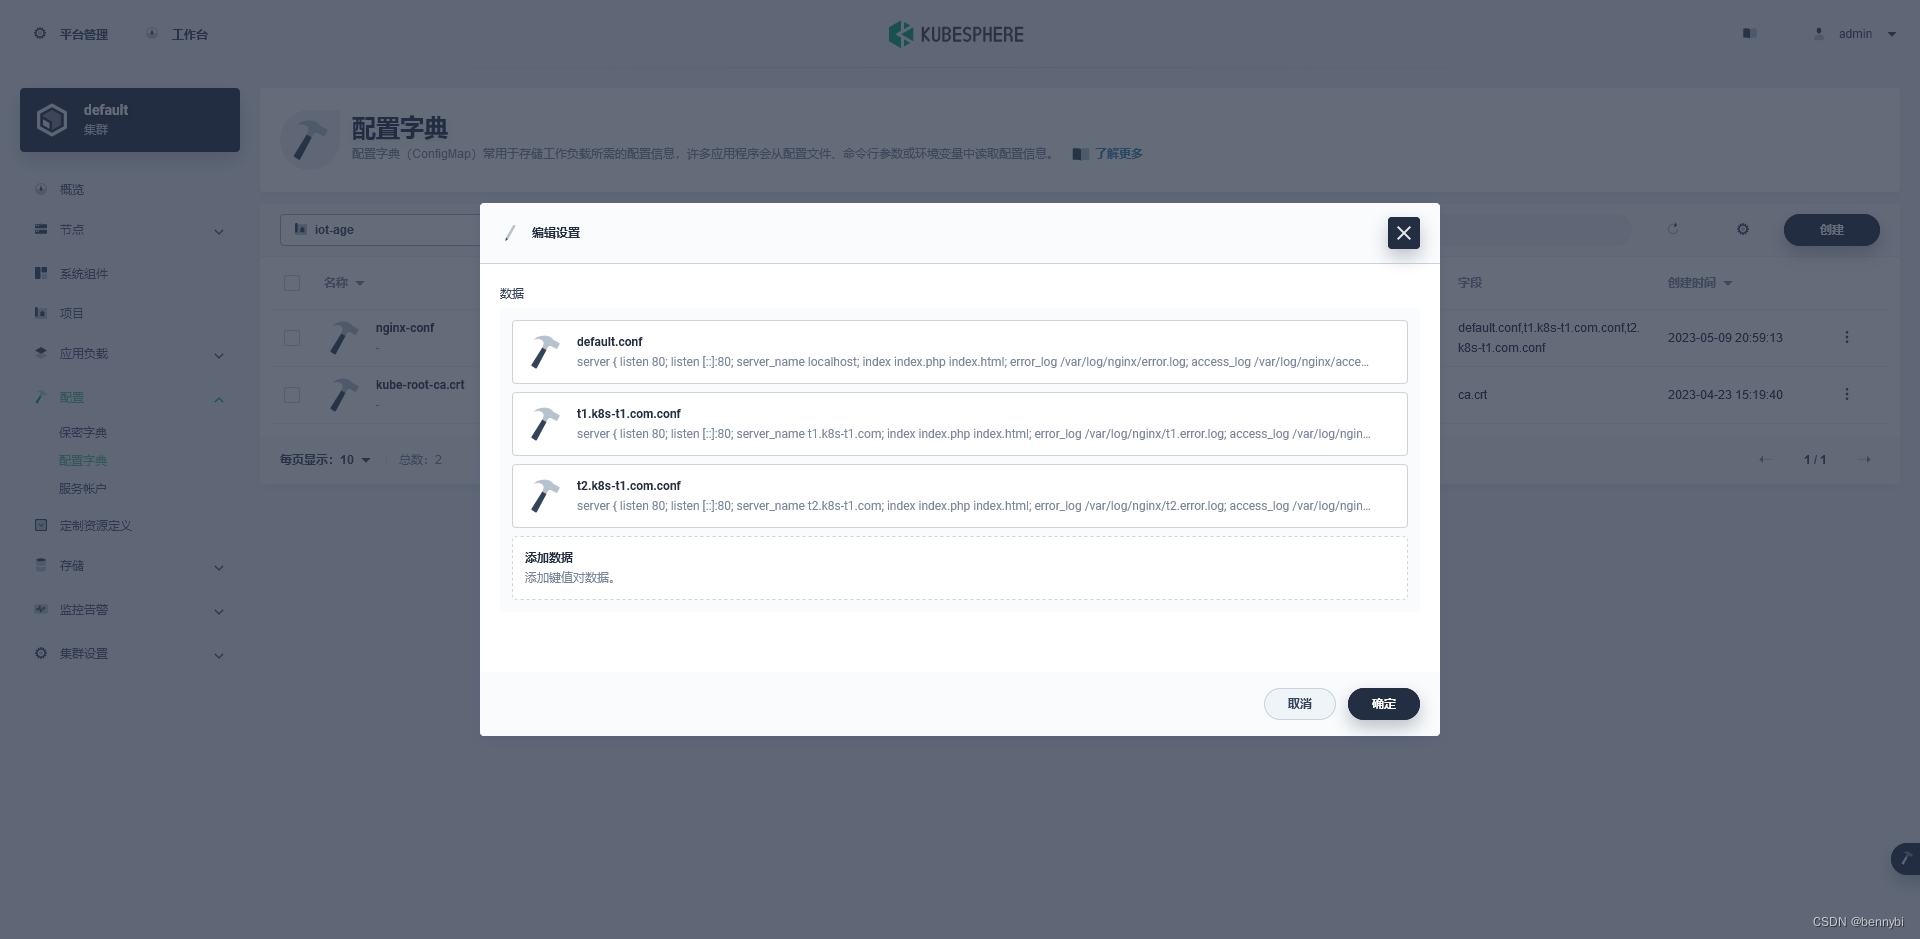
添加数据项,t1.k8s-t1.com.conf & t2.k8s-t1.com.conf
server {
        listen       80;
        listen  [::]:80;
        server_name  t1.k8s-t1.com;

        index index.php index.html;
        error_log  /var/log/nginx/t1.error.log;
        access_log /var/log/nginx/t1.access.log;
        root /var/www/html/t1;

        location ~ .*\.(gif|jpg|jpeg|png|bmp|swf|flv|mp4|ico)$ {
          expires 30d;
          access_log off;
        }

        location / {
            try_files $uri $uri/ /index.php?$query_string;
        }

        location ~ \.php$ {
            try_files $uri =404;
            fastcgi_split_path_info ^(.+\.php)(/.+)$;
            fastcgi_pass   php:9000;
            fastcgi_index  index.php;
            include        fastcgi_params;
            fastcgi_param SCRIPT_FILENAME $document_root$fastcgi_script_name;
            fastcgi_param PATH_INFO $fastcgi_path_info;
        }

        error_page   500 502 503 504  /50x.html;
        location = /50x.html {
            root   /usr/share/nginx/html;
        }
    }
完成后,需重启nginx pods, 可分别访问这两个域名验证结果
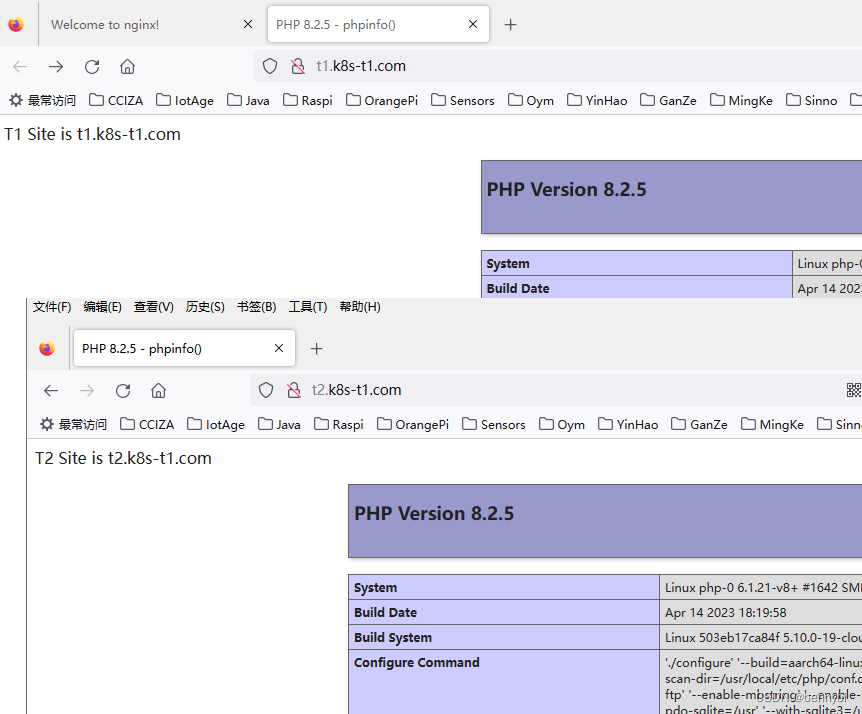
3. Java Springboot App 部署
3.1 在VS Code创建一个springboot-hello项目
注意几点:
- 安装docker desktop, 配合vscode开发工具使用
- 安装vscode插件:Docker/Docker Exploer/Docker Extension Pack
3.2 制作App镜像
修改pom.xml,并输出App
<project xmlns="http://maven.apache.org/POM/4.0.0"
	xmlns:xsi="http://www.w3.org/2001/XMLSchema-instance"
	xsi:schemaLocation="http://maven.apache.org/POM/4.0.0 http://maven.apache.org/xsd/maven-4.0.0.xsd">
	<parent>
		<groupId>org.springframework.boot</groupId>
		<artifactId>spring-boot-starter-parent</artifactId>
		<version>3.0.0</version>
	</parent>

	<modelVersion>4.0.0</modelVersion>
	<groupId>com.itranswarp.learnjava</groupId>
	<artifactId>springboot-hello</artifactId>
	<version>1.0-SNAPSHOT</version>
	<!-- <packaging>war</packaging> -->

	<properties>
		<maven.compiler.source>17</maven.compiler.source>
		<maven.compiler.target>17</maven.compiler.target>
		<java.version>17</java.version>

		<pebble.version>3.2.0</pebble.version>
	</properties>

	<dependencies>
		<dependency>
			<groupId>org.springframework.boot</groupId>
			<artifactId>spring-boot-starter-web</artifactId>
		</dependency>

		<dependency>
			<groupId>org.springframework.boot</groupId>
			<artifactId>spring-boot-starter-tomcat</artifactId>
			<scope>provided</scope>
		</dependency>

		<dependency>
			<groupId>org.springframework.boot</groupId>
			<artifactId>spring-boot-devtools</artifactId>
			<scope>provided</scope>
		</dependency>

		<dependency>
			<groupId>org.springframework.boot</groupId>
			<artifactId>spring-boot-starter-jdbc</artifactId>
		</dependency>

		<!-- 集成Pebble View -->
		<dependency>
			<groupId>io.pebbletemplates</groupId>
			<artifactId>pebble-spring-boot-starter</artifactId>
			<version>${pebble.version}</version>
		</dependency>

		<!-- JDBC驱动 -->
		<dependency>
			<groupId>org.hsqldb</groupId>
			<artifactId>hsqldb</artifactId>
		</dependency>
	</dependencies>
	<build>
		<finalName>app</finalName>
		<plugins>
			<plugin>
				<groupId>org.springframework.boot</groupId>
				<artifactId>spring-boot-maven-plugin</artifactId>
			</plugin>
			<!-- Docker maven plugin -->
			<plugin>
				<groupId>com.spotify</groupId>
				<artifactId>docker-maven-plugin</artifactId>
				<configuration>
					<imageName>${project.artifactId}</imageName>
					<imageTags>
						<tag>1.0.0</tag>
					</imageTags>
					<dockerDirectory>src/main/docker</dockerDirectory>
					<resources>
						<resource>
							<targetPath>/</targetPath>
							<directory>${project.build.directory}</directory>
							<include>${project.build.finalName}.jar</include>
						</resource>
					</resources>
				</configuration>
			</plugin>
			<!-- Docker maven plugin -->
		</plugins>
	</build>
</project>
在项目根目录下编写Dockerfile
FROM schnell18/zulu-java:alpine-jdk17-arm64-0.1.1
ADD ./target/app.jar  /app.jar
ENTRYPOINT ["java","-jar","app.jar"]
连接上自己的注册仓库,推送hub.docker.com,如图:

3.3 部署
springboothello.k8s-t2.com.yaml
# Service
apiVersion: v1
kind: Service
metadata:
  name: springboothello-k8s-t2-com
  namespace: iot-age
spec:
  type: ClusterIP
  #type: NodePort
  sessionAffinity: ClientIP
  sessionAffinityConfig:
    clientIP:
      timeoutSeconds: 10800
  ports:
  - port: 80
    #nodePort: 30301
    protocol: TCP
    targetPort: 8080
  selector:
    app: springboothello-k8s-t2-com

---
# deployment
apiVersion: apps/v1
kind: Deployment
metadata:
  name: springboothello-k8s-t2-com
  namespace: iot-age
spec:
  replicas: 2
  selector:
    matchLabels:
      app: springboothello-k8s-t2-com
  strategy:
    rollingUpdate:
      maxSurge: 25%
      maxUnavailable: 25%
    type: RollingUpdate
  template:
    metadata:
      labels:
        app: springboothello-k8s-t2-com
    spec:
      containers:
      - image: bennybi/springboothello:latest
        imagePullPolicy: Always
        name: springboothello-k8s-t2-com
        ports:
        - containerPort: 8080
          protocol: TCP
        resources:
          limits:
            memory: 512Mi
            cpu: "1"
          requests:
            memory: 512Mi
            cpu: "1"
      restartPolicy: Always
      terminationGracePeriodSeconds: 30

---
# Ingress
apiVersion: networking.k8s.io/v1
kind: Ingress
metadata:
  name: springboothello-k8s-t2-com
  namespace: iot-age
  annotations:
    kubernetes.io/ingress.class: nginx
    nginx.ingress.kubernetes.io/affinity: cookie
    nginx.ingress.kubernetes.io/session-cookie-name: stickounet
    nginx.ingress.kubernetes.io/session-cookie-expires: "172800"
    nginx.ingress.kubernetes.io/session-cookie-max-age: "172800"
spec:
  rules:
    - host: springboothello.k8s-t2.com
      http:
        paths:
        - path: /
          pathType: Prefix
          backend:
            service:
              name: springboothello-k8s-t2-com
              port:
                number: 80
  ingressClassName: nginx
访问截图:
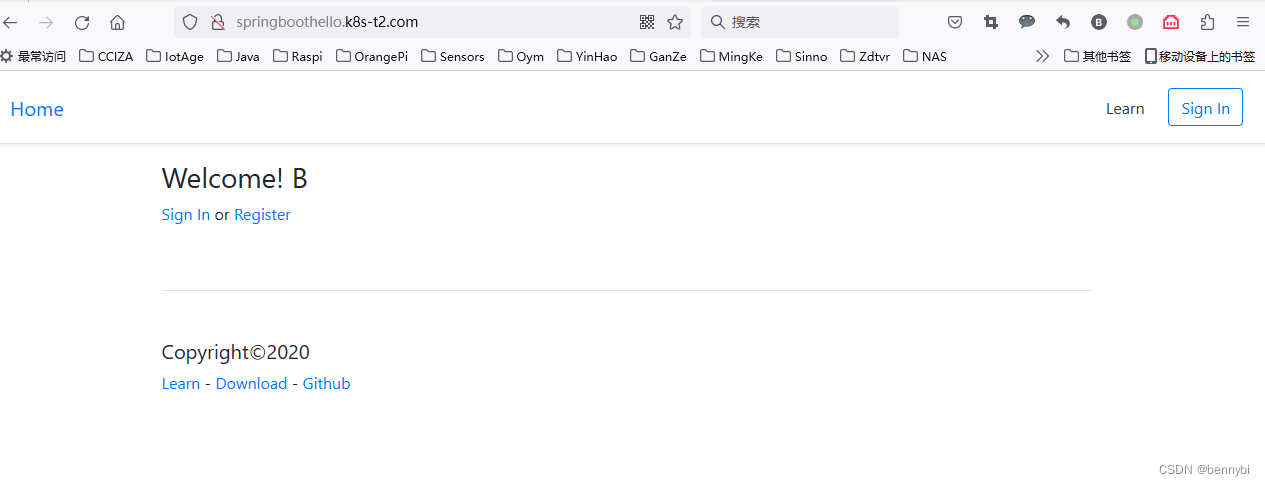
4. 会话Session保持设置
这是当使用phpmyadmin时,遇到错误:
Failed to set session cookie. Maybe you are using HTTP instead of HTTPS to access phpMyAdmin.
我很快意识到这是由于访问请求被分配到不同的php pods上处理,而导致的session不同步引起的,解决办法:设置 ingress, nginx service, php service会话保持(即相同client ip的访问分配到相同pod, 有过期时间)
nginx.yaml
...
spec:
  type: ClusterIP
  sessionAffinity: ClientIP
  sessionAffinityConfig:
    clientIP:
      timeoutSeconds: 10800
php.yaml
...
spec:
  type: ClusterIP
  sessionAffinity: ClientIP
  sessionAffinityConfig:
    clientIP:
      timeoutSeconds: 10800
ingress-nginx.yaml
...
metadata:
  name: ia-web-service1
  namespace: iot-age
  annotations:
    kubernetes.io/ingress.class: nginx
    nginx.ingress.kubernetes.io/affinity: cookie
    nginx.ingress.kubernetes.io/session-cookie-name: stickounet
    nginx.ingress.kubernetes.io/session-cookie-expires: "172800"
    nginx.ingress.kubernetes.io/session-cookie-max-age: "172800"
5. 遇到的问题
-不能用软链方式访问项目目录,在找解决办法
6. 参考
- Kubernetes的Pod研究(3)--Pod设计模式和生命周期_wx6325de70699f3的技术博客_51CTO博客
- 聊聊如何在K8S中实现会话保持_k8s service 会话保持_linyb极客之路的博客-CSDN博客
更多推荐
 已为社区贡献1条内容




所有评论(0)