

一、创建自己的 github 仓库
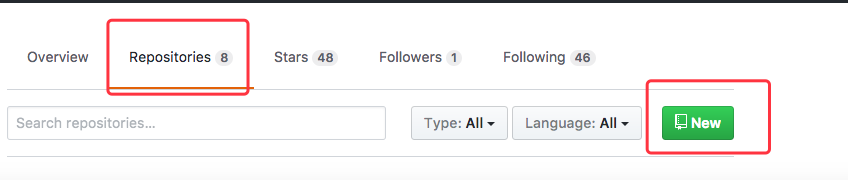
2.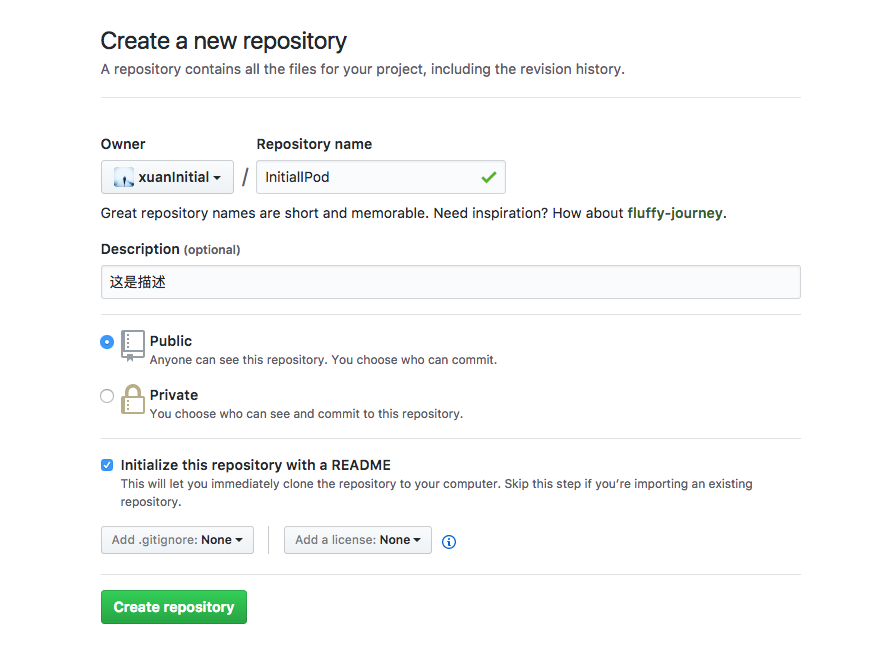
如图所示,我们在 github 上创建一个空的仓库,命名为 initiallPod ,这个仓库是用来存放我们自己所有的私有库的 spec 文件,就如同官方的 https://github.com/CocoaPods/Specs
然后我们就可以执行:
pod repo add initiallPod https://github.com/xuanInitial/initiallPod.git initiallPod 私有 repo 的名称 后面是仓库的 git 地址
3.查看是否创建成功
4.打开隐藏目录,可以使用命令:
//打开隐藏的命令:
defaults write com.apple.finder AppleShowAllFiles -bool true
//关闭隐藏的命令:
defaults write com.apple.finder AppleShowAllFiles -bool false
接着需要重启一下 Finder, 可以按住 option + 右键 Finder 图标选择重启。
如果已经打开忽略这一步
5.然后打开隐藏目录 .cocoapods (这个目录在你的个人目录底下, ~/.cocoapods 或 /Users/[你自己的用户名]/.cocoapods)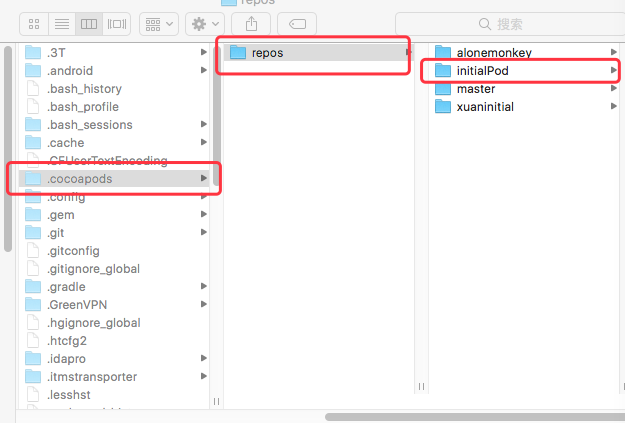
以上操作 是在本地建了一个私有仓库
二、创建静态库
基于pod自动创建
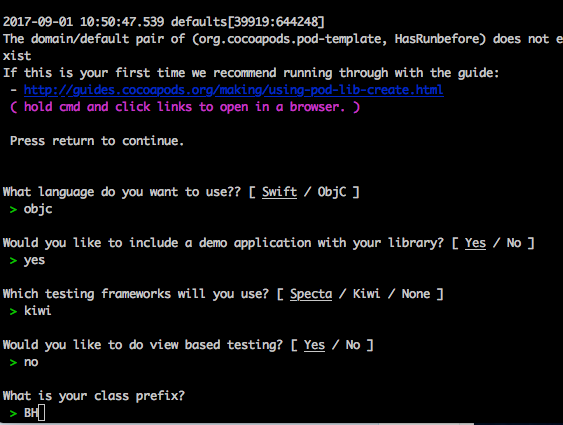
1.执行命令pod lib create xxx。
xxx 代码你要生成的pod的名称
2.打开HttpsRefreshNetWork.podspec文件,修改类库配置信息
HttpsRefreshNetWork.podspec 找到你自己对应的文件
#
# Be sure to run `pod lib lint HttpsRefreshNetWork.podspec' to ensure this is a
# valid spec before submitting.
#
# Any lines starting with a # are optional, but their use is encouraged
# To learn more about a Podspec see http://guides.cocoapods.org/syntax/podspec.html
#

Pod::Spec.new do |s|
  s.name             = 'HttpsRefreshNetWork'   #Pod的名字
  s.version          = '0.1.0'                  #版本号
  s.summary          = 'A short description of HttpsRefreshNetWork.'

# This description is used to generate tags and improve search results.
#   * Think: What does it do? Why did you write it? What is the focus?
#   * Try to keep it short, snappy and to the point.
#   * Write the description between the DESC delimiters below.
#   * Finally, don't worry about the indent, CocoaPods strips it!

  s.description      = <<-DESC
TODO: Add long description of the pod here.
                       DESC

  s.homepage         = 'https://github.com/yxuaninitial@163.com/HttpsRefreshNetWork'  #Pod的地址
  # s.screenshots     = 'www.example.com/screenshots_1', 'www.example.com/screenshots_2'
  s.license          = { :type => 'MIT', :file => 'LICENSE' }
  s.author           = { 'yxuaninitial@163.com' => 'xuaninitial@gmail.com' }  #作者
  s.source           = { :git => '/Users/sky/Desktop/HttpsRefreshNetWork', :tag => '0.1.0' } #代码的本地地址以及tag
  # s.social_media_url = 'https://twitter.com/<TWITTER_USERNAME>'

  s.ios.deployment_target = '8.0'

  s.source_files = 'HttpsRefreshNetWork/Classes/**/*' #本地验证这里填  "**/*"  表示当前目录以及子目录的所有文件

  # s.resource_bundles = {
  #   'HttpsRefreshNetWork' => ['HttpsRefreshNetWork/Assets/*.png']  #这个是资源列表如果没有也注释
  # }

  # s.public_header_files = 'Pod/Classes/**/*.h'   #需要对外导出的头文件  此处为本地验证 如果没有对外文件需要注释掉
   s.frameworks = 'UIKit', 'MapKit'
   s.dependency 'AFNetworking'
end
3.进入Example文件夹,执行pod install,让demo项目安装依赖项并更新配置。
4.添加要封装的代码
注意:
文件存放的位置在Pod/Classes目录下,跟podspec配置要一致。
然后
pod install5.上传你的项目到git
一顿乱操作 然后上传失败.......
找到一个好用的工具
下载地址
安装配置过程略
以下是配置完成后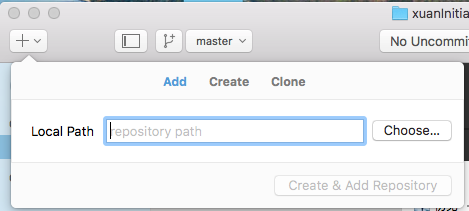
直接添加你的代码就可以上传到github了
三、添加私有的 Repo 安装到你的 CocoaPods 中
cd xxx #你对应的项目文件夹pod lib lint #本地验证你的podspec 是否合法
报错[!] The spec did not pass validation, due to 2 warnings (but you can use --allow-warnings to ignore them).
[!] The validator for Swift projects uses Swift 3.0 by default, if you are using a different version of swift you can use a .swift-version file to set the version for your Pod. For example to use Swift 2.3, run:
echo "2.3" > .swift-version.
然后
pod lib lint --allow-warnings
验证通过然后 添加你的 podspec 到你的 repo
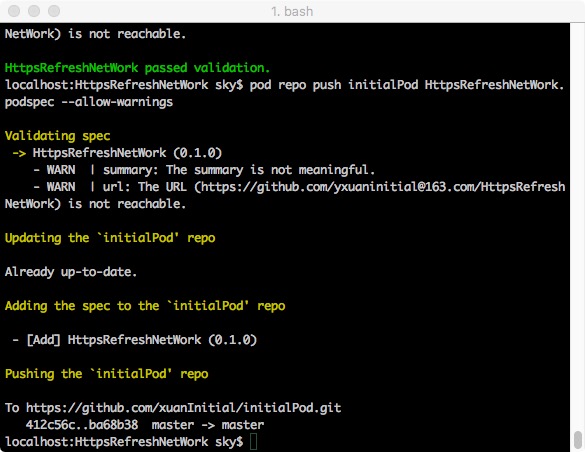
pod repo push initialPod HttpsRefreshNetWork.podspec
一直不成功
Validating spec-> HttpsRefreshNetWork (0.1.0) - WARN | summary: The summary is not meaningful. - WARN | url: The URL (https://github.com/yxuaninitial@163.com/HttpsRefreshNetWork) is not reachable.[!] The HttpsRefreshNetWork.podspec specification does not validate.
通过下面的检查错误 还是第一个报错
pod spec lint HttpsRefreshNetWork.podspec --verbose
最后解决方法
pod repo push initialPod HttpsRefreshNetWork.podspec --allow-warnings
initialPod: 你本地的仓库名称 HttpsRefreshNetWork.podspec:对应的podspec 文件名
--allow-warnings :忽略警告
4.再进入到 .cocoapods 的目录中,可以看到已经发生了变化: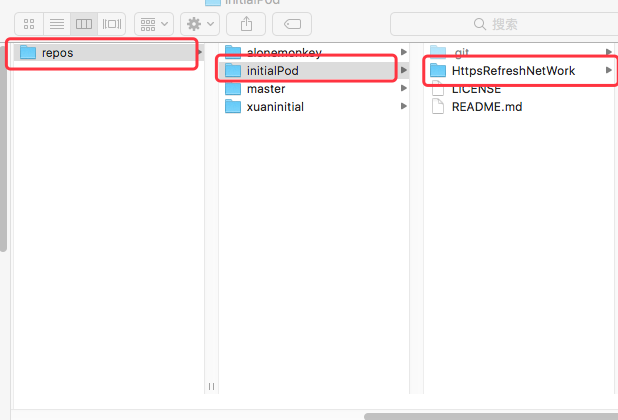
5.然后github仓库里面有了你的最新上传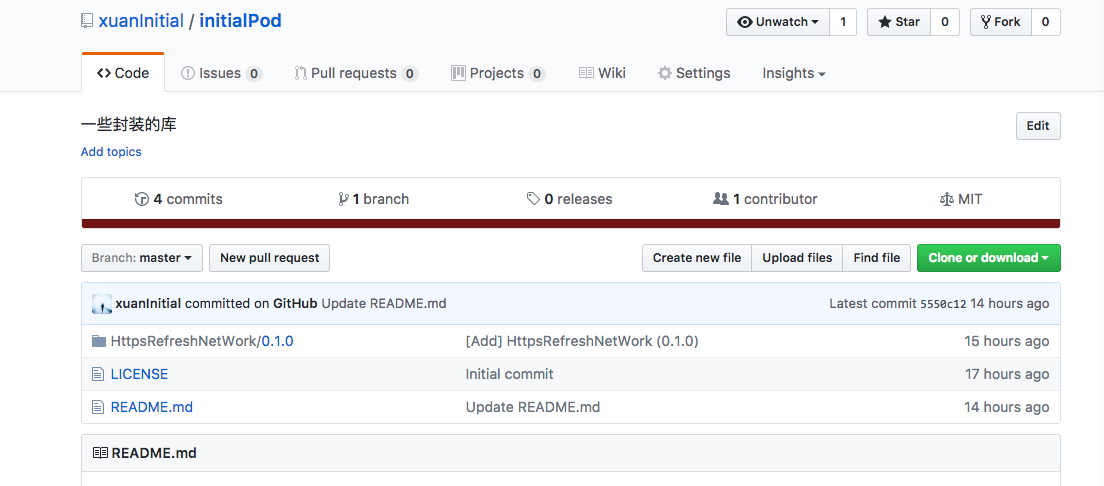
四、使用方法
Podfile文件里面 添加
source 'https://github.com/xuanInitial/initialPod.git'

pod 'HttpsRefreshNetWork' #请求库
可以多个 source 并列添加
source 'https://github.com/CocoaPods/Specs.git'
source 'https://github.com/xuanInitial/initialPod.git'
platform :ios,'8.3'
inhibit_all_warnings!
target 'test' do
pod 'AFNetworking', '~> 3.0'
pod 'Masonry', '~> 0.6.2'
pod 'JSONModel', '~> 1.1.0'
pod 'MJRefresh'
pod 'EAIntroView', '~> 2.9.0'
pod 'PNChart'
pod 'CYLTabBarController'
pod 'MBProgressHUD', '~> 1.0.0'
pod 'FMDB'

pod 'SDWebImage/WebP'

pod 'HttpsRefreshNetWork'
end


 已为社区贡献16条内容

所有评论(0)