
超详细从零开始实现打ab包,ab包上传服务器,从服务器上加载ab包(用nginx搭建文件服务器),实现热补丁功能(基于xLua)
一、创建一个空白U3D项目二、搭建xLua环境2.1从github上下载xLua工具包2.2导入xLua工具包,并配置开发环境首先将xLua/Assets目录下的Plugins和XLua文件夹导入到工程项目中的Assets目录下,其次将xLua文件目录下的Tools文件夹导入到工程中与Assets目录同级的目录即可。点击Edit/Project Settings,在Other Settings下找
前言:
Unity编辑器版本:2019.4.0
以下文件命名和目录最好与本人一致
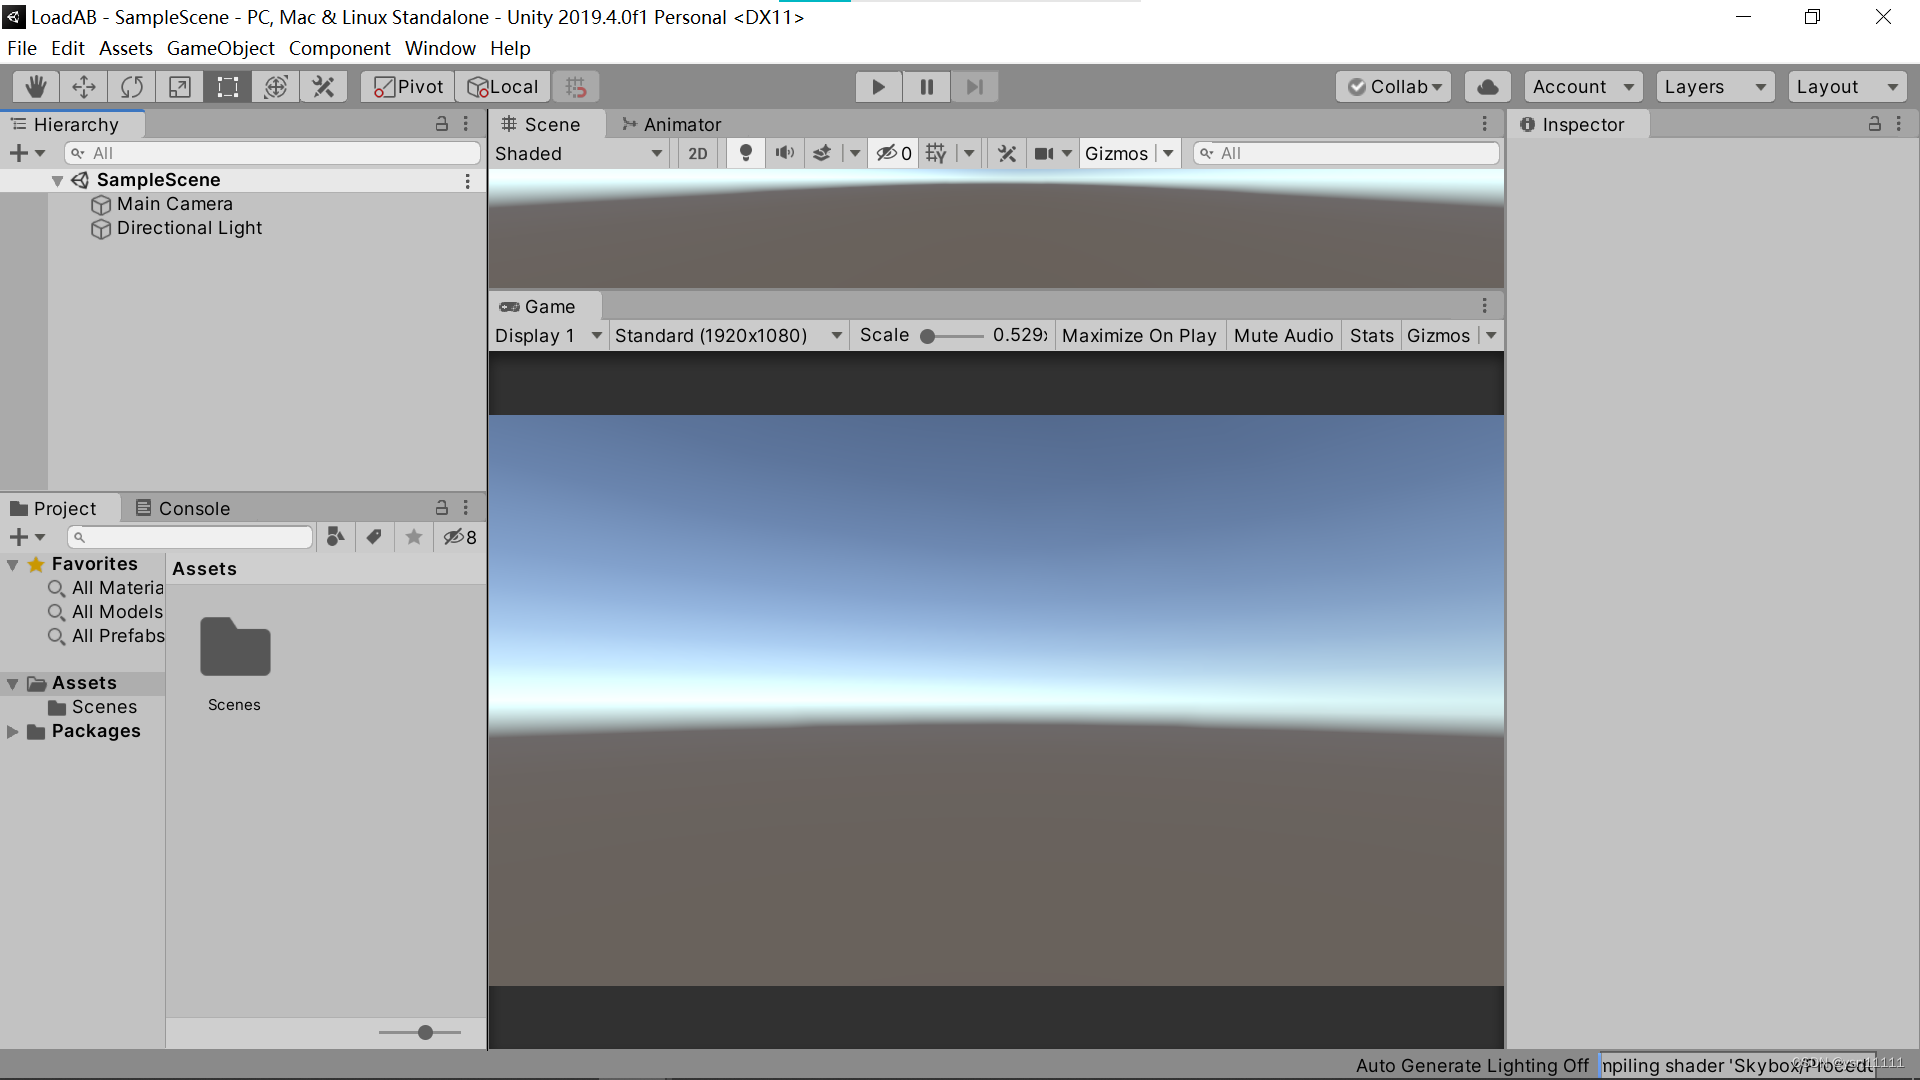
一、创建一个空白U3D项目
二、搭建xLua环境
从github上下载xLua工具包

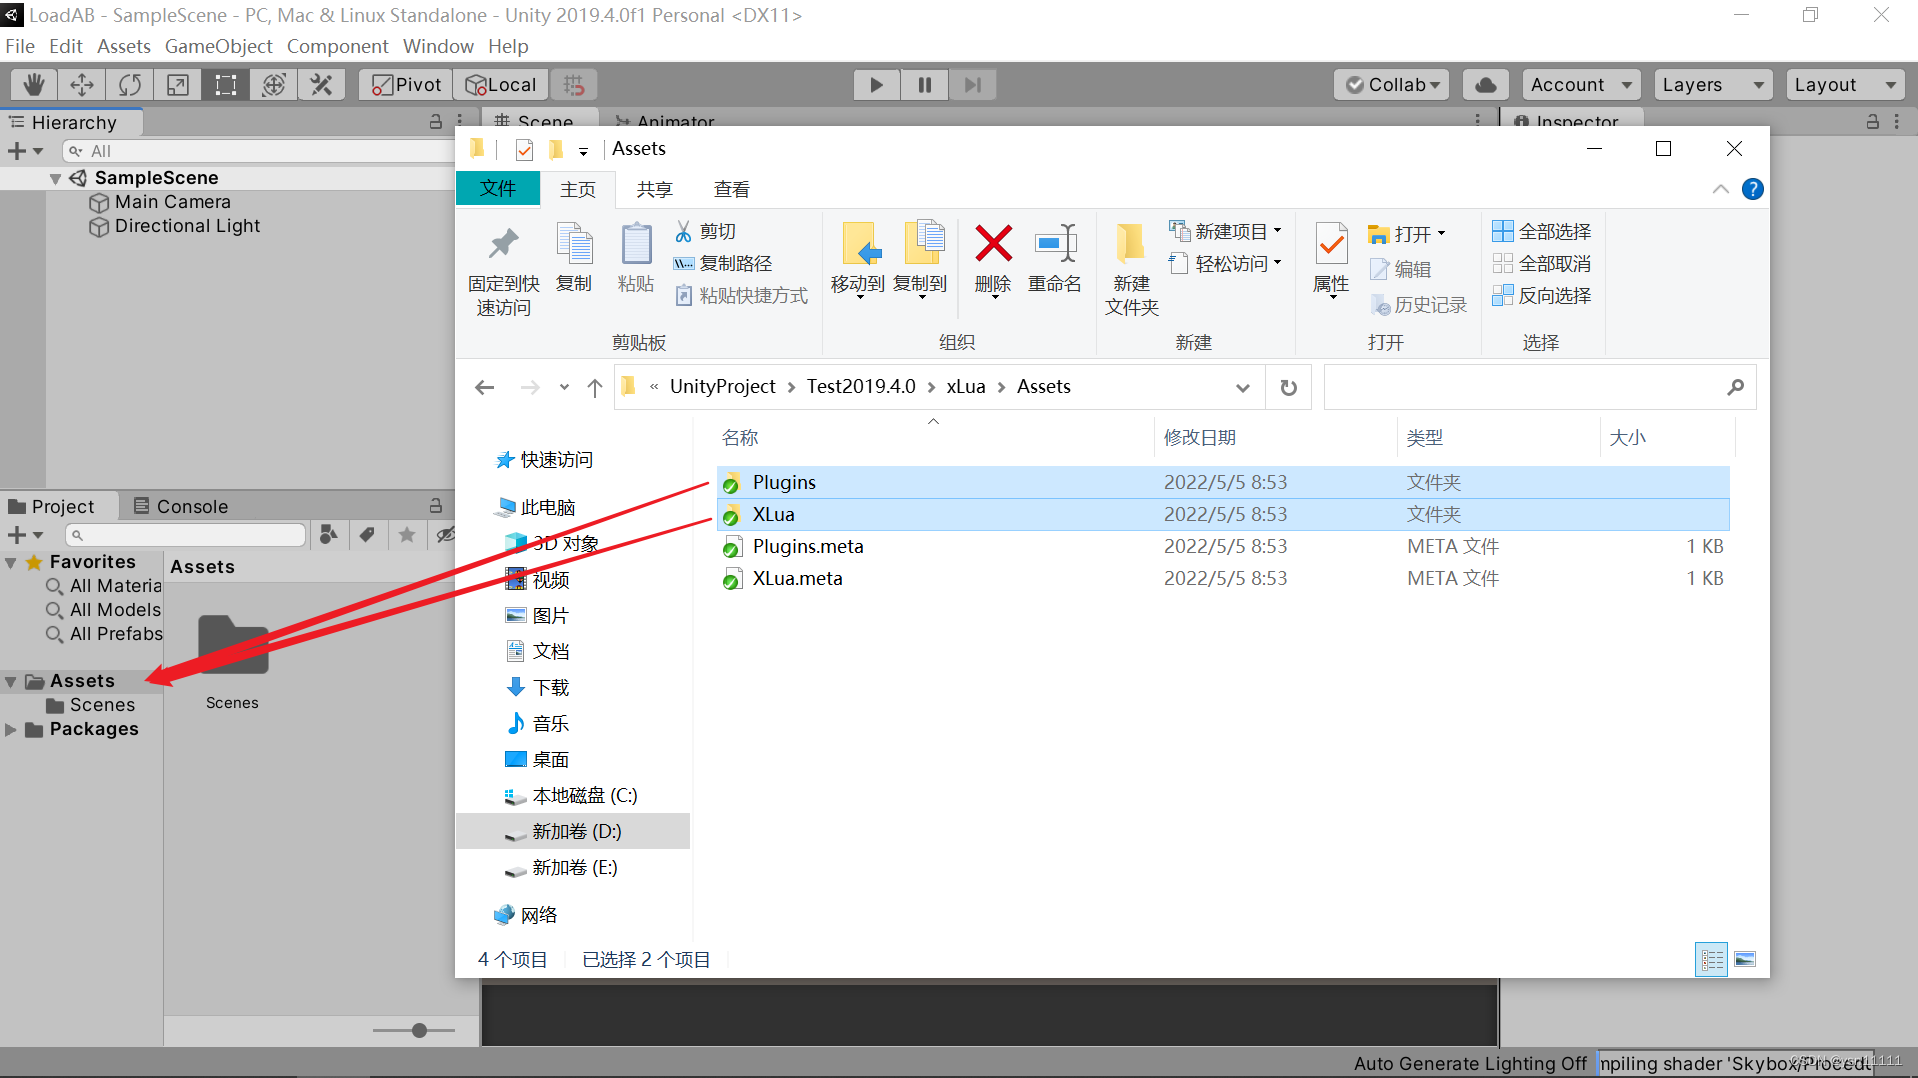
导入xLua工具包,并配置开发环境
首先将xLua/Assets目录下的Plugins和XLua文件夹导入到工程项目中的Assets目录下,
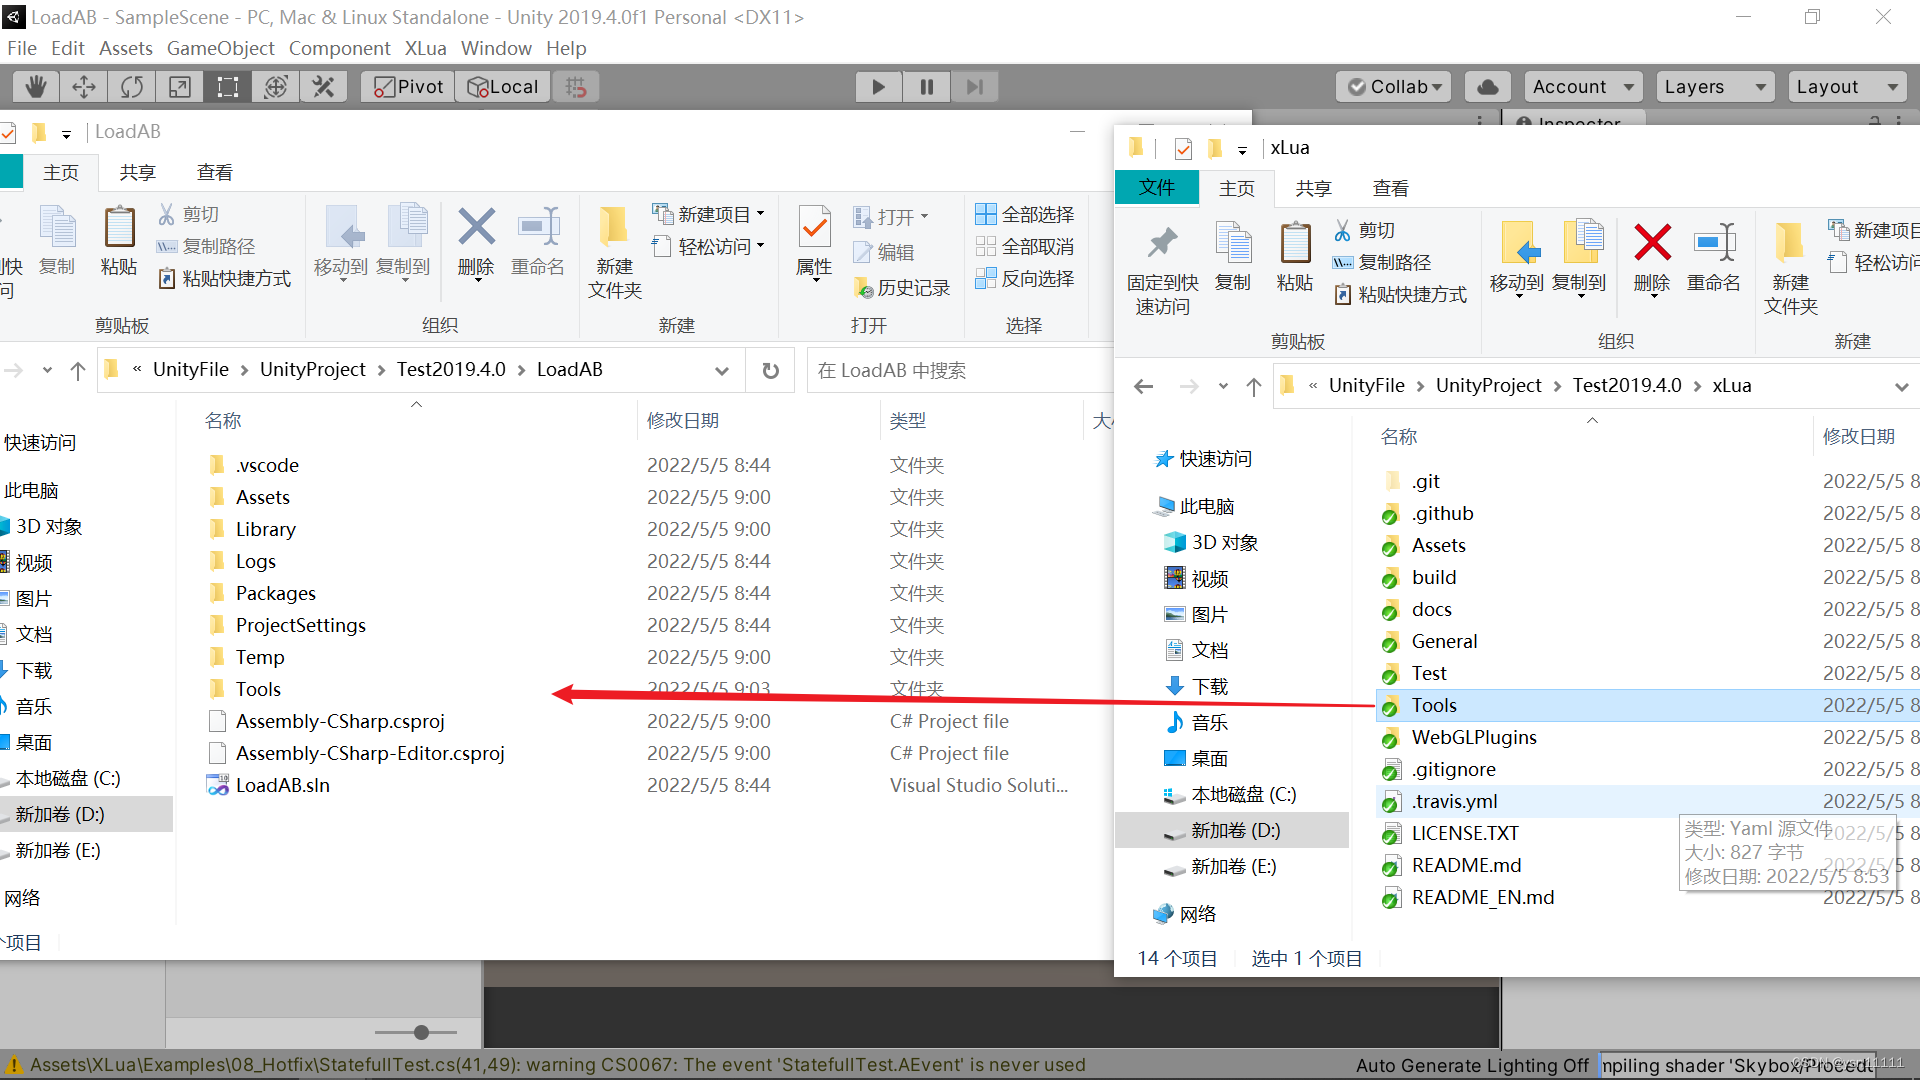
其次将xLua文件目录下的Tools文件夹导入到工程中与Assets目录同级的目录即可。
点击Edit/Project Settings,在Other Settings下找到Scriptng Define Symbols输入HOTFIX_ENABLE并回车(一定要按回车!)
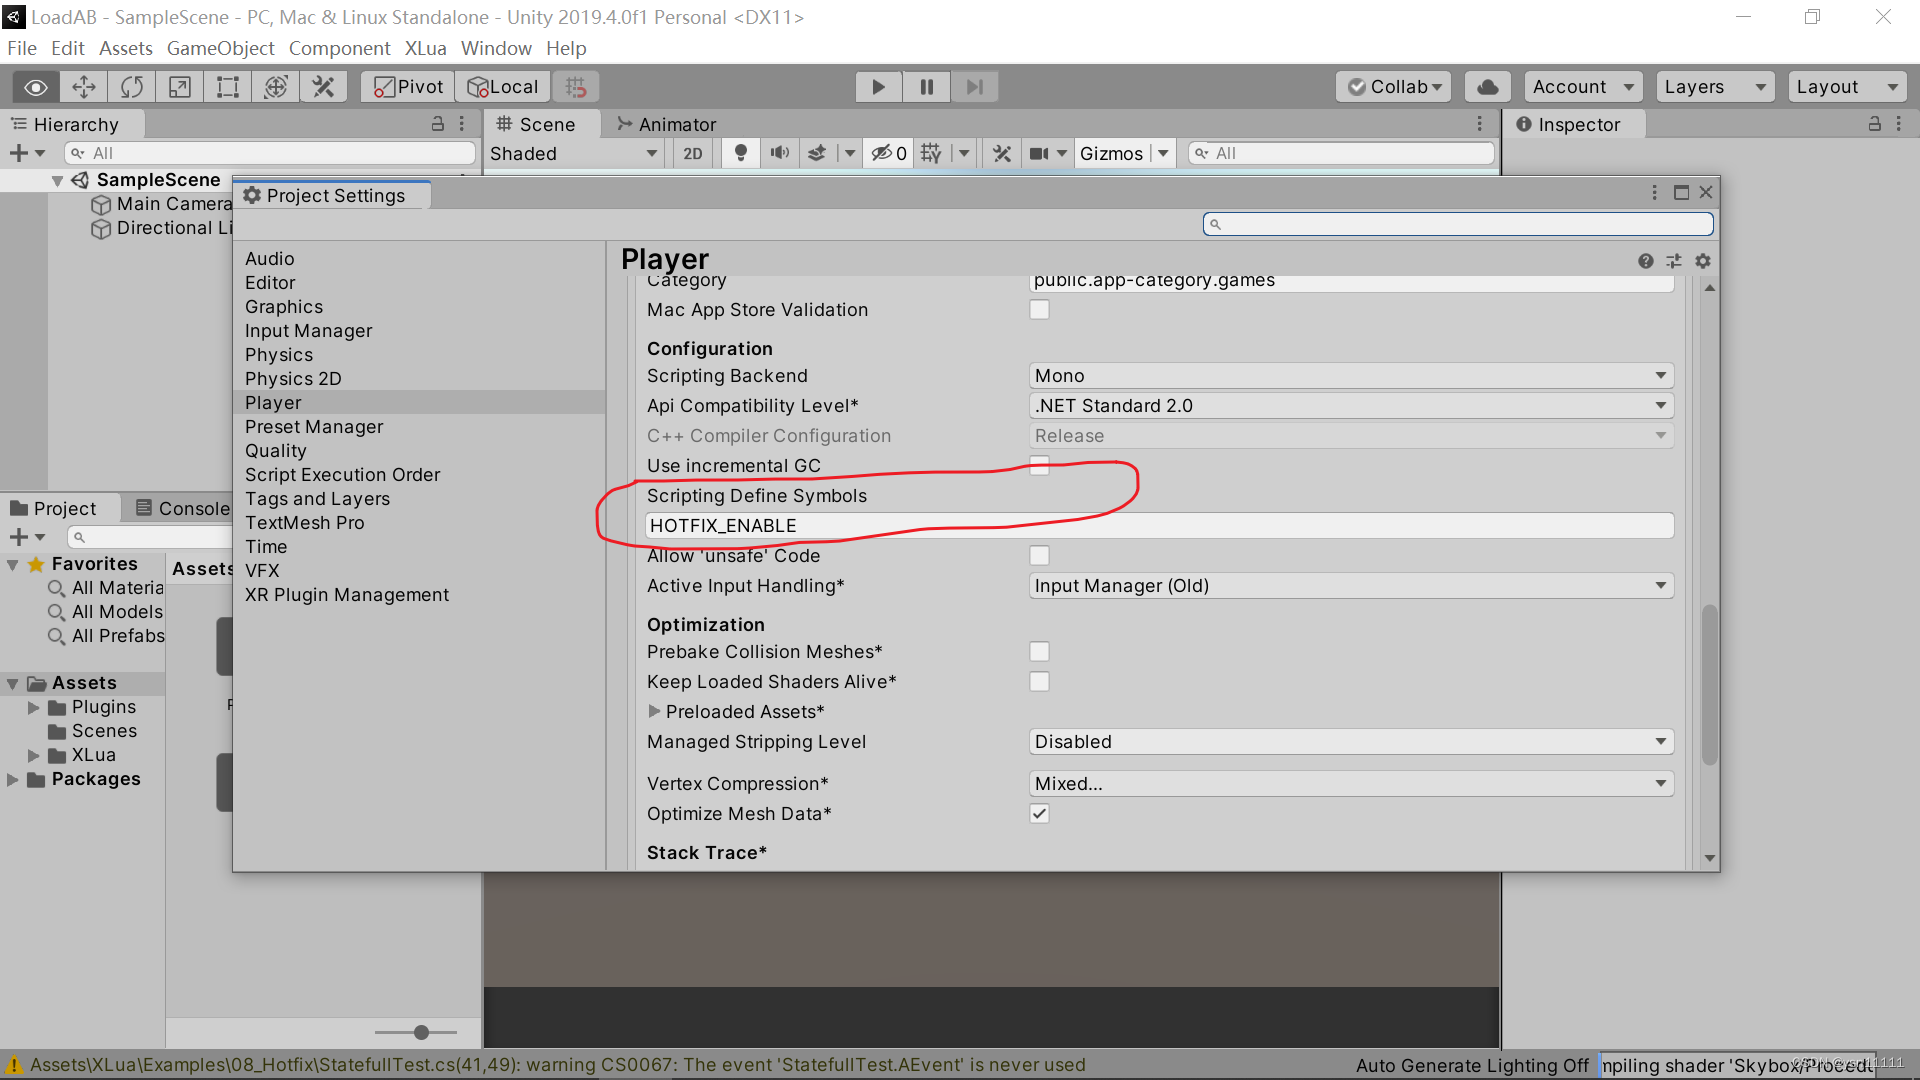
接着看看上方菜单栏里是否有XLua扩展,并有Generate Code,Clear Generated Code,Hotfix Inject In Editor这三个选项,至此XLua配置完毕。

三、搭建一个简单的游戏场景
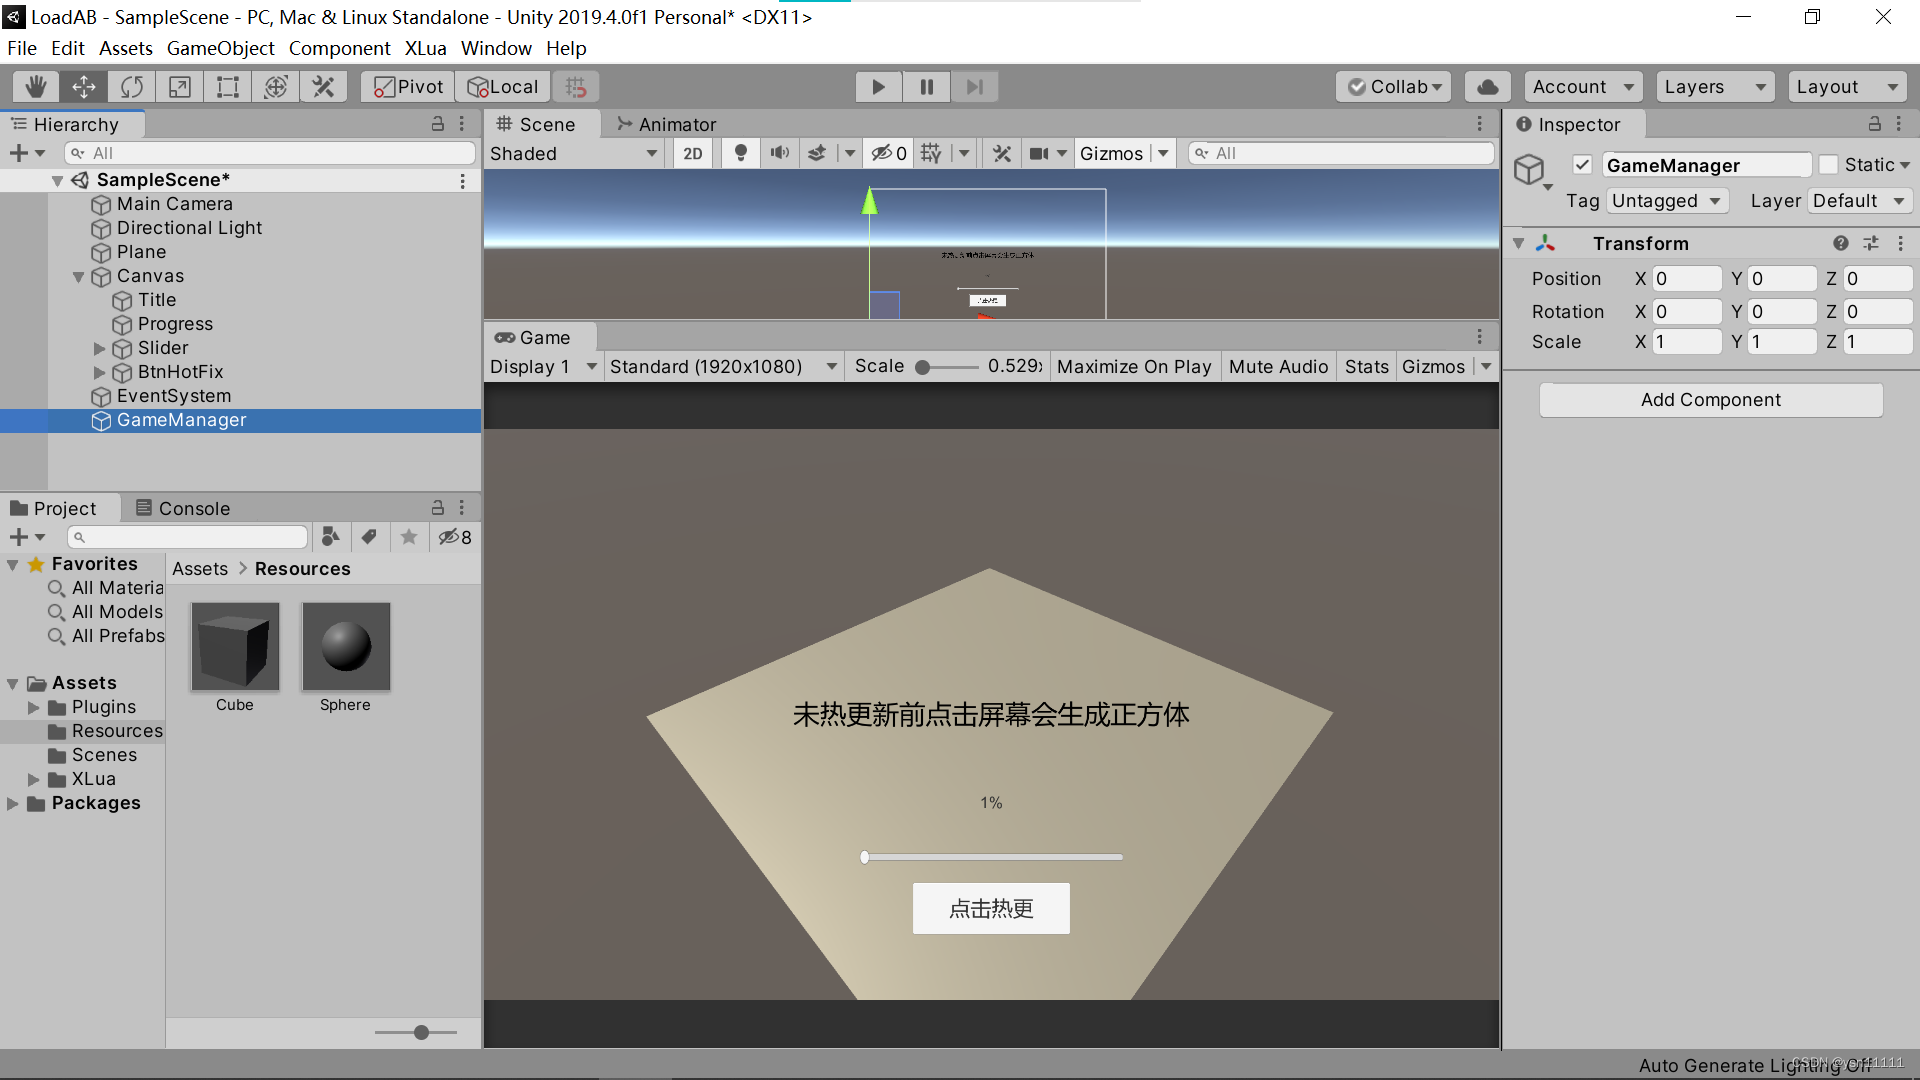
如下搭建一个简易未热更的场景。

新建Resources文件夹,在场景中新建一个Cube,一个Sphere拖入Resources文件夹作预制体,并在场景中创建一个空物体GameManager用来挂脚本。
新建一个Scripts文件夹,在文件夹中新建一个GameScript脚本,此脚本用来实现点击屏幕生成正方体,注意:要打上Hotfix标签,后续会用lua替换掉该脚本中的Update方法
using UnityEngine;
using UnityEngine.EventSystems;
using XLua;
//-----------------------------【游戏脚本】-----------------------------
[Hotfix]
public class GameScript : MonoBehaviour
{
    void Update()
    {
        // 鼠标左键点击
        if (Input.GetMouseButtonDown(0))
        {
            if (EventSystem.current.IsPointerOverGameObject())
            {
                Debug.Log("点击到UGUI的UI界面");
            }
            else
            {
                //创建 cube  (后面会通过热更 lua脚本替换掉这里,使之生成Sphere)
                GameObject cubeGo = Resources.Load("Cube") as GameObject;
                // 在鼠标点击的地方实例cube
                Ray ray = Camera.main.ScreenPointToRay(Input.mousePosition);
                RaycastHit hit;
                if (Physics.Raycast(ray, out hit))
                {
                    Debug.Log(hit.point);
                    GameObject cube =
                        GameObject.Instantiate(cubeGo, hit.point + new Vector3(0, 1, 0), transform.rotation) as
                            GameObject;
                }
            }
        }
    }
    //射线 - 用于xlua调用 避免重载问题
    public static bool RayFunction(Ray ray, out RaycastHit hit)
    {
        return Physics.Raycast(ray, out hit);
    }
}
新建一个XLuaManager脚本用来执行Lua脚本,在新建之前导入一下单例模板
using System.Collections;
using System.Collections.Generic;
using UnityEngine;
// 实现普通的单例模式
// where 限制模板的类型, new()指的是这个类型必须要能被实例化
public abstract class Singleton<T> where T : new() {
private static T _instance;
private static object mutex = new object();
public static T instance {
get {
if (_instance == null) {
lock (mutex) { // 保证我们的单例,是线程安全的;
if (_instance == null) {
_instance = new T();
}
}
}
return _instance;
}
}
}
// Monobeavior: 声音, 网络
// Unity单例
public class UnitySingleton<T> : MonoBehaviour
where T : Component {
private static T _instance = null;
public static T Instance {
get {
if (_instance == null) {
_instance = FindObjectOfType(typeof(T)) as T;
if (_instance == null) {
GameObject obj = new GameObject();
_instance = (T)obj.AddComponent(typeof(T));
obj.hideFlags = HideFlags.DontSave;
// obj.hideFlags = HideFlags.HideAndDontSave;
obj.name = typeof(T).Name;
}
}
return _instance;
}
}
public virtual void Awake() {
DontDestroyOnLoad(this.gameObject);
if (_instance == null) {
_instance = this as T;
}
else {
GameObject.Destroy(this.gameObject);
}
}
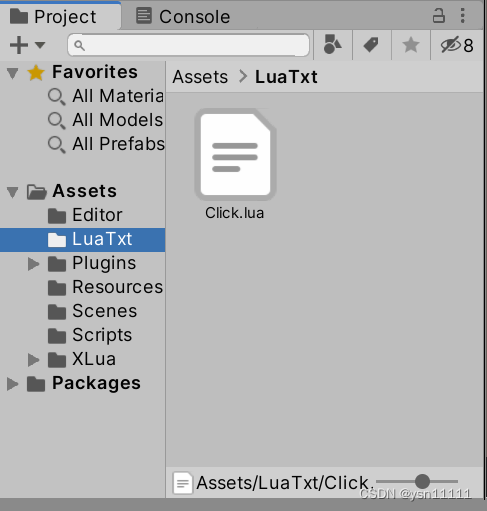
}新建XLuaManager脚本,并在Assets目录下新建一个LuaTxt文件夹,lua脚本必须以.txt后缀命名,不然没法把lua脚本打成ab包。
using System.Collections;
using System.Collections.Generic;
using System.IO;
using UnityEditor;
using UnityEngine;
using XLua;
public class XLuaManager : UnitySingleton<XLuaManager>
{
private static string luaScriptsFolder = "LuaTxt";
private LuaEnv env = null;
public override void Awake()
{
base.Awake();
this.InitLuaEnv();
}
public byte[] LuaScriptLoader(ref string filePath)
{
string newPath = Application.dataPath + @"/" +luaScriptsFolder+@"/" + filePath + ".lua.txt";
Debug.Log("执行脚本路径:" + newPath);
string txtString = File.ReadAllText(newPath);
return System.Text.Encoding.UTF8.GetBytes(txtString);
}
private void InitLuaEnv()
{
this.env = new LuaEnv();
//添加我们自定义的lua代码装载器
this.env.AddLoader(LuaScriptLoader);
}
public void EnterGame()
{
this.env.DoString("require(\"Click\")");
}
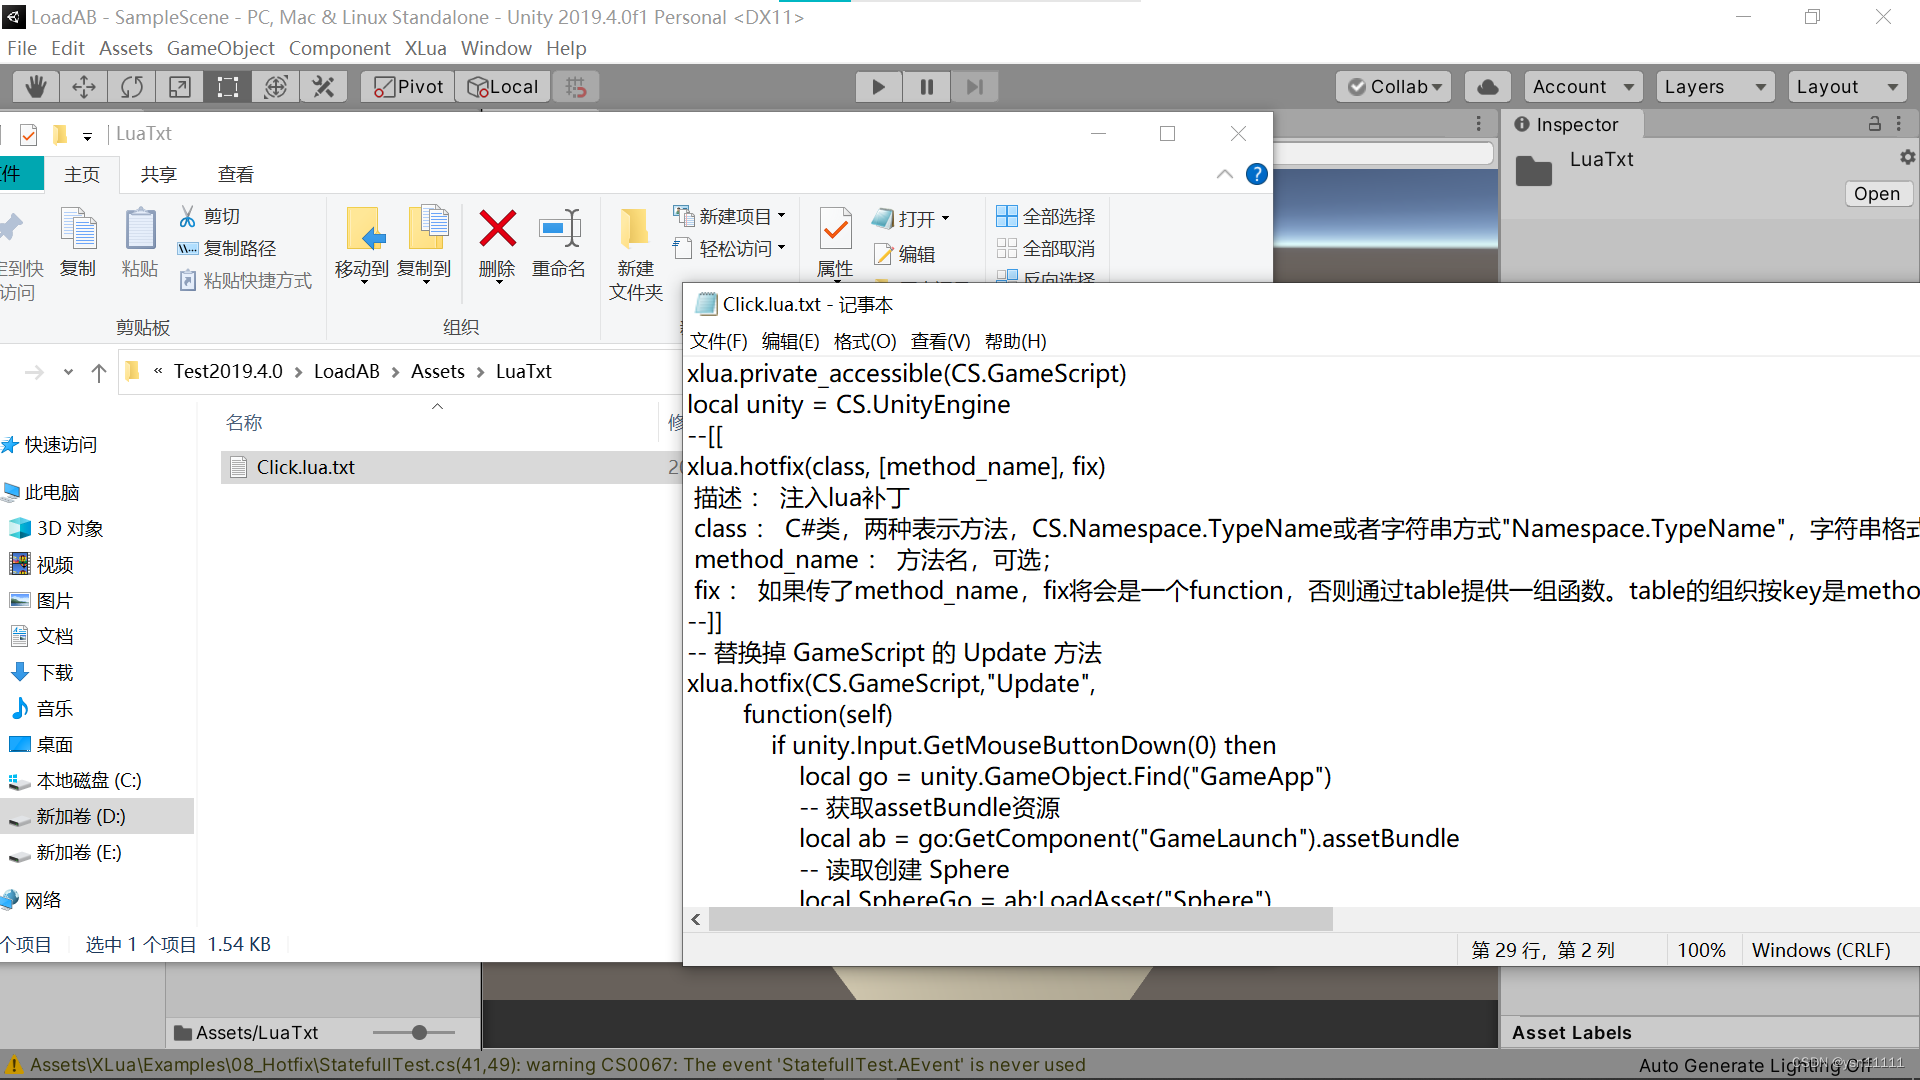
}在LuaTxt文件夹下新建一个txt,以Click.lua.txt命名,并将以下代码复制到txt中
xlua.private_accessible(CS.GameScript)
local unity = CS.UnityEngine
--[[
xlua.hotfix(class, [method_name], fix)
 描述 : 注入lua补丁
 class : C#类,两种表示方法,CS.Namespace.TypeName或者字符串方式"Namespace.TypeName",字符串格式和C#的Type.GetType要求一致,如果是内嵌类型(Nested Type)是非Public类型的话,只能用字符串方式表示"Namespace.TypeName+NestedTypeName";
 method_name : 方法名,可选;
 fix : 如果传了method_name,fix将会是一个function,否则通过table提供一组函数。table的组织按key是method_name,value是function的方式。
--]]
-- 替换掉 GameScript 的 Update 方法
xlua.hotfix(CS.GameScript,"Update",
        function(self)
            if unity.Input.GetMouseButtonDown(0) then
                local go = unity.GameObject.Find("GameManager")
                -- 获取assetBundle资源
                local ab = go:GetComponent("GameManager").assetBundle
                -- 读取创建 Sphere
                local SphereGo = ab:LoadAsset("Sphere")
                -- 在鼠标点击的位置实例Sphere
                local ray = unity.Camera.main:ScreenPointToRay (unity.Input.mousePosition)
                local flag,hit = CS.GameScript.RayFunction(ray)
                if flag then
                    print(hit.transform.name)
                    local sphere = unity.GameObject.Instantiate(SphereGo)
                    sphere.transform.localPosition = hit.point + unity.Vector3(0,1,0)
                end
            end
        end
)
新建GameMagager脚本,将UnityWebRequest www = UnityWebRequestAssetBundle.GetAssetBundle(@"http://服务器的公网IP/sphere.unity3d");这行代码的服务器的公网IP填入。
using System.Collections;
using System.Collections.Generic;
using UnityEngine;
using UnityEngine.Networking;
using System.IO;
using System;
using UnityEngine.UI;
public class GameManager : UnitySingleton<GameManager>
{
    public Slider slider;
    public Text progressText;//进度显示
    [HideInInspector]
    public AssetBundle assetBundle;
    public override void Awake()
    {
        base.Awake();
        this.gameObject.AddComponent<XLuaManager>();
        this.gameObject.AddComponent<GameScript>();
    }
    IEnumerator GameStart()
    {
        yield return checkHotUpdate();
        XLuaManager.Instance.EnterGame();
    }
    IEnumerator checkHotUpdate()
    {
        UnityWebRequest www = UnityWebRequestAssetBundle.GetAssetBundle(@"http://服务器的公网IP/sphere.unity3d");
        www.SendWebRequest();
        while (!www.isDone)
        {
            slider.value = www.downloadProgress;//下载进度
            progressText.text = Math.Floor(www.downloadProgress * 100) + "%";
            yield return 1;
        }
        // 下载完成
        if (www.isDone)
        {
            progressText.text = 100 + "%";
            slider.value = 1;
            // 隐藏UI(等待1s)
            yield return new WaitForSeconds(1);
            GameObject.Find("Canvas").SetActive(false);
        }
        if (www.isNetworkError || www.isHttpError)
        {
            Debug.Log("DownLoad Err: " + www.error);
        }
        else
        {
            assetBundle = DownloadHandlerAssetBundle.GetContent(www);
            Debug.Log(assetBundle.name);
            TextAsset hot = assetBundle.LoadAsset<TextAsset>("Click.lua");
            string newPath = Application.dataPath+"/LuaTxt" + @"/Click.lua.txt";
            if (!File.Exists(newPath))
            {
                // Create后如果不主动释放资源就会被占用,下次打开会报错,所以一定要加上 .Dispose()
                File.Create(newPath).Dispose();
            }
            // 写入文件
            File.WriteAllText(newPath, hot.text);
            Debug.Log("下载资源成功!new Path : " + newPath);
        }
    }
    public void BtnHot()
    {
        StartCoroutine(GameStart());
    }
}
并挂在GameManager空物体上,并将slider和progresstext赋值

再给按钮添加监听,监听函数是GameManager里面的BtnHot()函数

四、打ab包
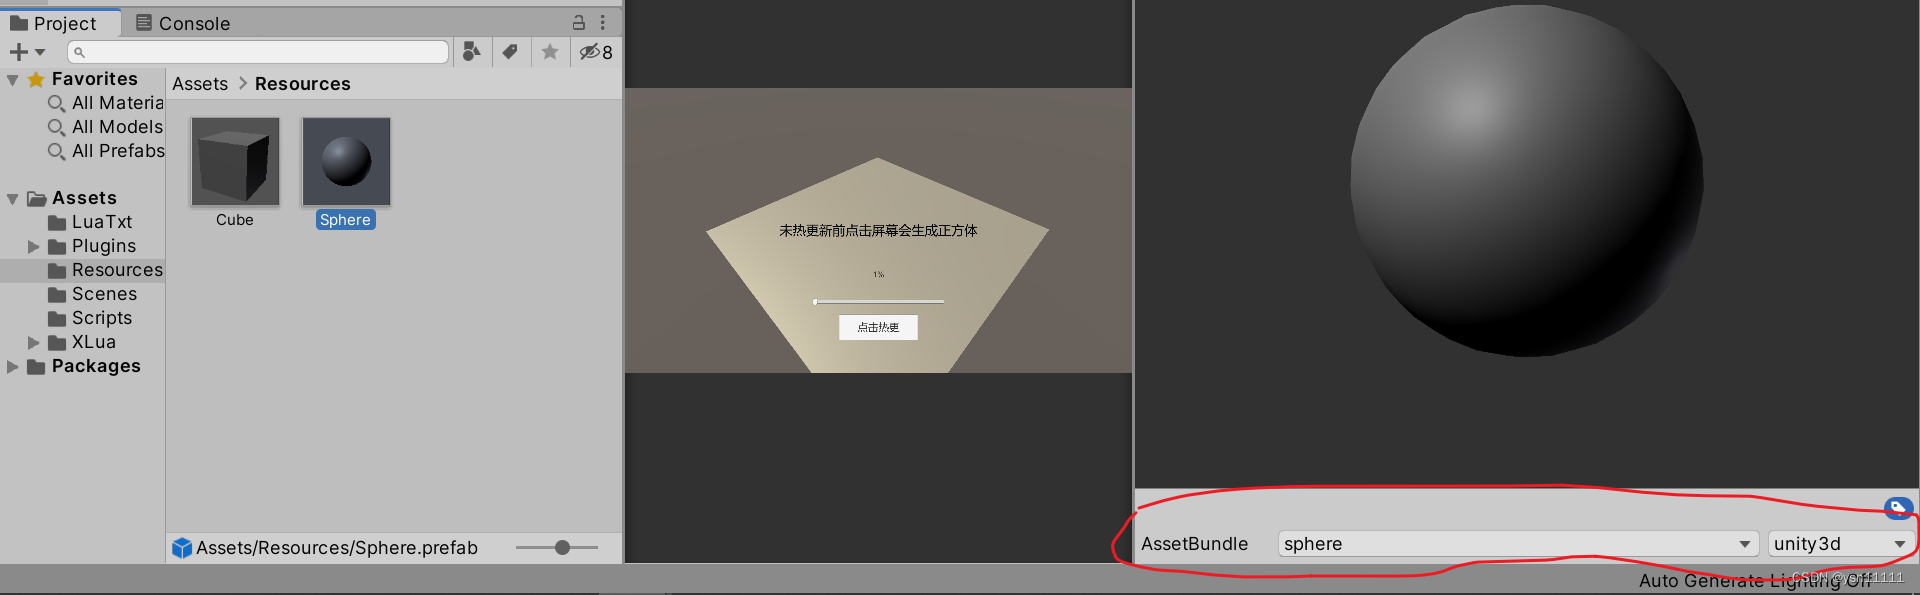
为了方便,我们将Click.lua.txt和Sphere球打成一个ab包,我们需要用球替换正方体(注意输入名称后要按下回车)

在Assets目录下新建一个Editor文件夹(很重要不然后续打包会报错),在Editor文件夹下新建一个CreatAssetBundle脚本用来打ab包
using UnityEditor;
using System.IO;

public class CreateAssetBundle
{
    [MenuItem("AssetBundles/BuildAssets")]
    static void BuildAllAssetBundles()
    {
        string dir = "AssetBundles";
        if (Directory.Exists(dir) == false)
        {
            Directory.CreateDirectory(dir);
        }
        BuildPipeline.BuildAssetBundles(dir, BuildAssetBundleOptions.None, BuildTarget.StandaloneWindows64);
    }
}
点击AssetBundles下的BuildAssets

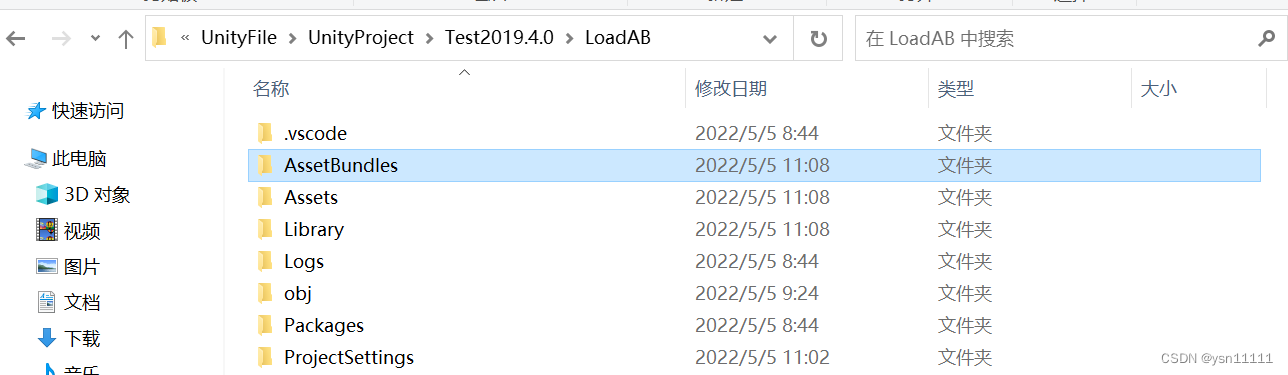
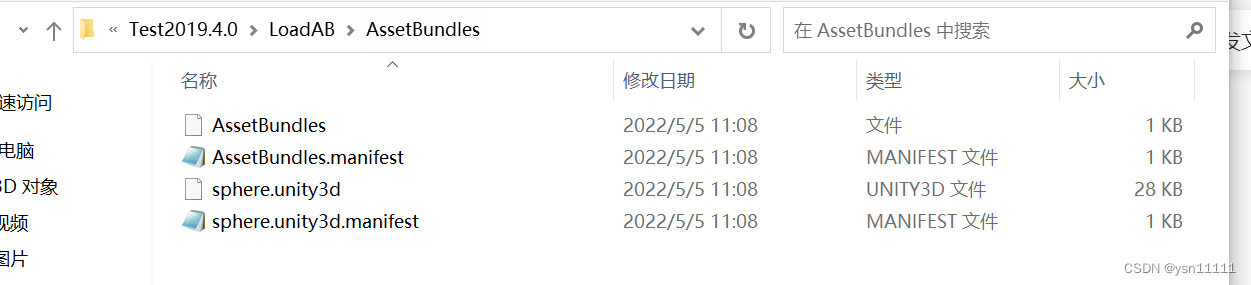
这时你会发现在Assets同级的目录下有个AssetBundles文件夹,文件夹里面就是ab包啦
如果打包报错如下
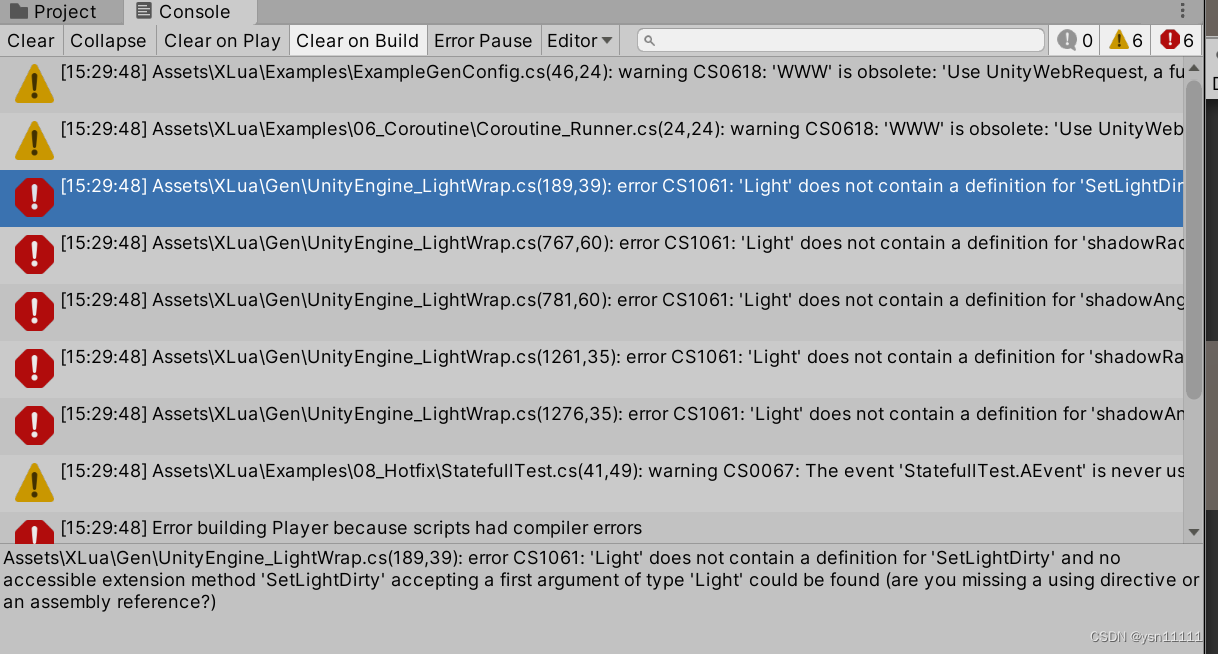
请参考链接https://blog.csdn.net/u014513152/article/details/106085418
五、上传ab包到服务器
准备工作:去官网下载Xshell Xftp
网站地址:https://www.xshell.com/zh/xshell/
服务器:这里是用的腾讯云轻量级服务器(请提前申请一个)
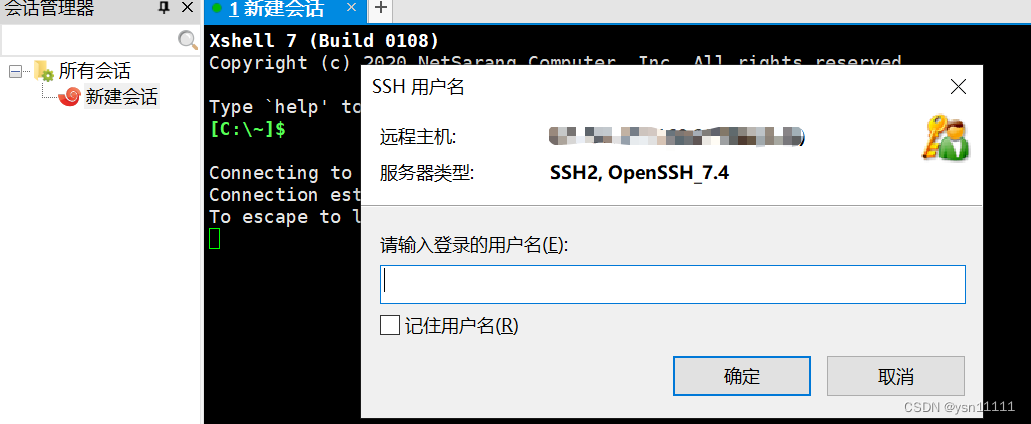
启动Xshell,新建会话,主机填写你服务器的ip地址

填写用户名,并填写密码

登陆成功后,点击窗口下的传输新建文件会自动打开Xftp,将刚才打包好的AssetBundles拖入到右边。
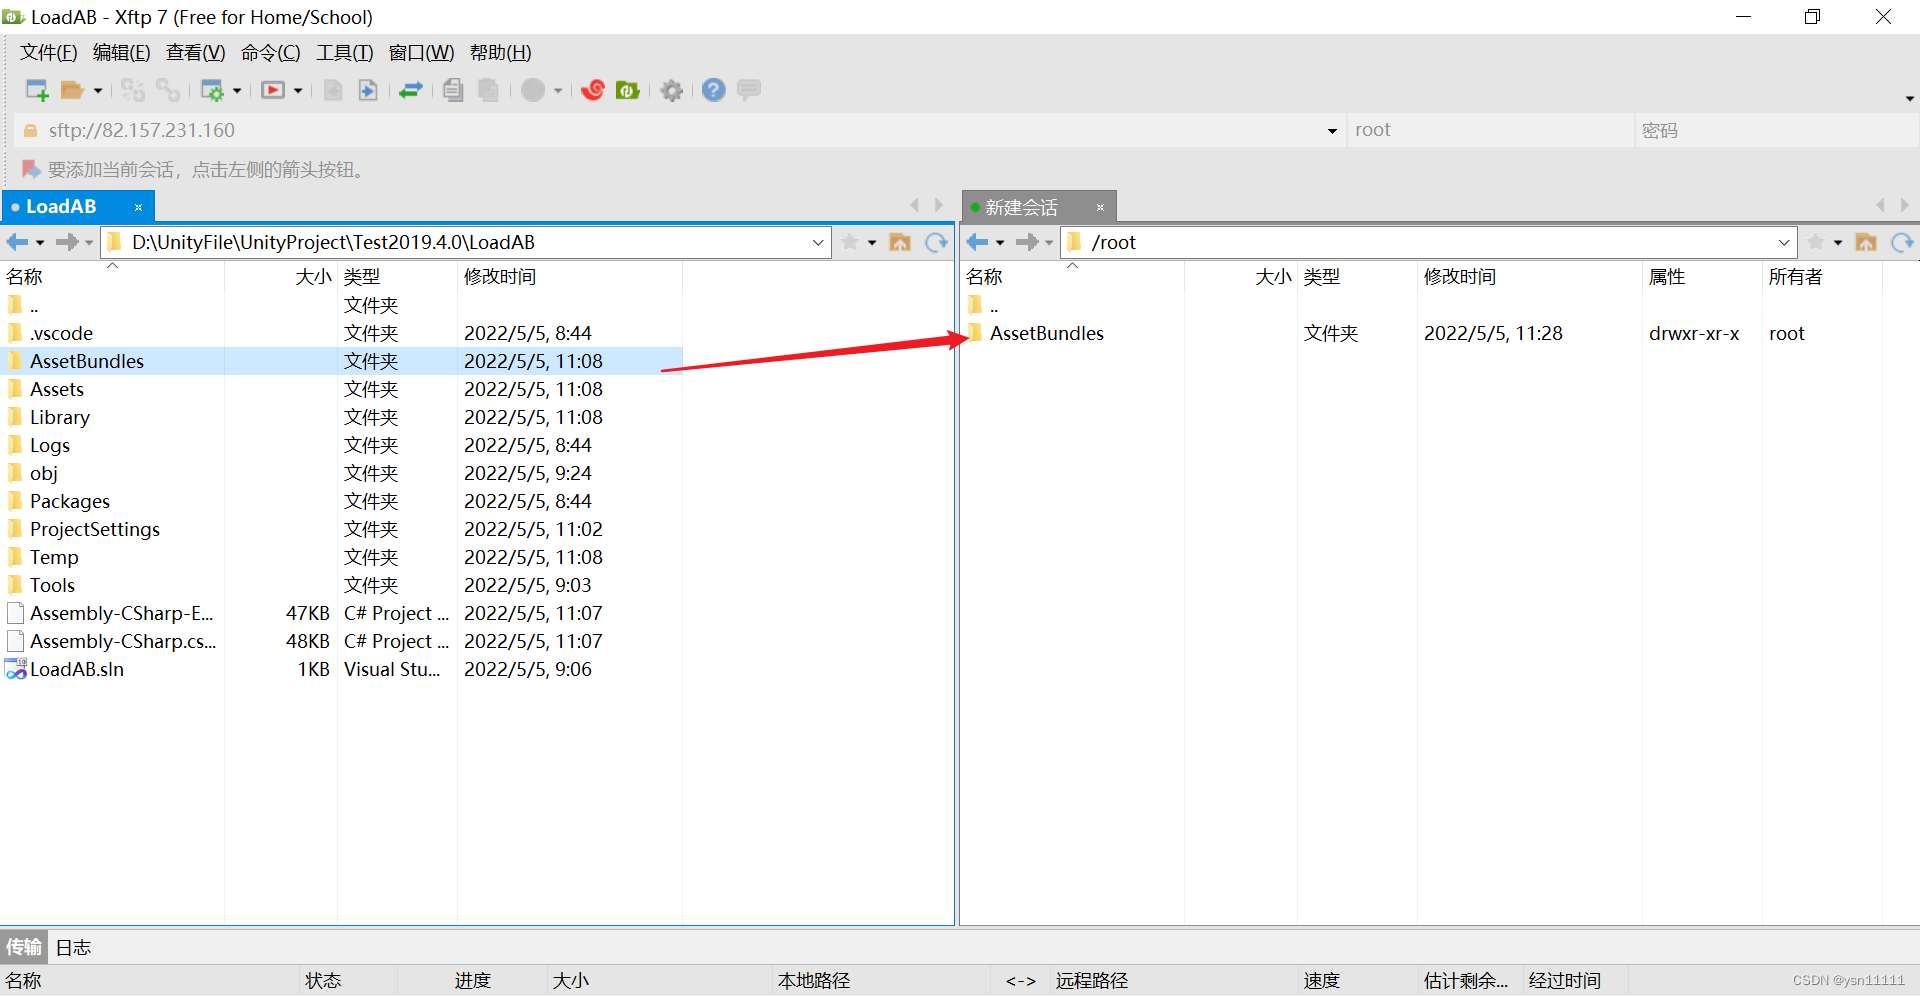 至此,ab包上传成功
六、nginx新建文件服务器
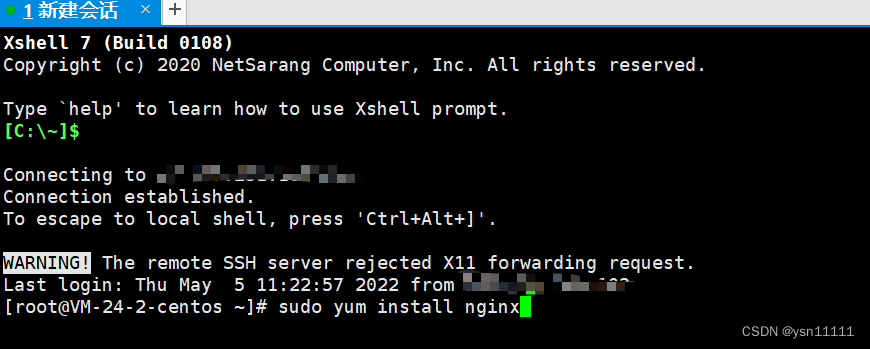
首先回到刚才登陆成功的Xshell页面,下载nginx
输入sudo yum install nginx(本人是用yum下载,下载失败请百度)
修改nginx默认配置文件
找到/etc/nginx/nginx.conf配置文件右击用记事本打开

可参考本人的修改后的配置文件信息,最主要是在server里面配置location,端口号设置为80。
user  root;
worker_processes  1;

#error_log  logs/error.log;
#error_log  logs/error.log  notice;
#error_log  logs/error.log  info;

#pid        logs/nginx.pid;


events {
    worker_connections  65535;
}


http {
    include       mime.types;
    default_type  application/octet-stream;

    #log_format  main  '$remote_addr - $remote_user [$time_local] "$request" '
    #                  '$status $body_bytes_sent "$http_referer" '
    #                  '"$http_user_agent" "$http_x_forwarded_for"';

    #access_log  logs/access.log  main;

    sendfile        on;
    #tcp_nopush     on;

    #keepalive_timeout  0;
    keepalive_timeout  200;

    #gzip  on;

 server {
       listen 80;
       server_name  localhost;
               location / {
	root  /root/AssetBundles;
	autoindex on;
	charset utf-8;
        }
}

}
到此,nginx搭建文件服务器完毕
七、测试前准备工作
回到Xshell页面,输入nginx -c /etc/nginx/nginx.conf 启动nginx(保证Unity测试时,nginx是打开的)
在浏览器输入你的服务器的公网ip,查看是否能看到ab包,如果看到则nginx搭建文件服务器成功!!!

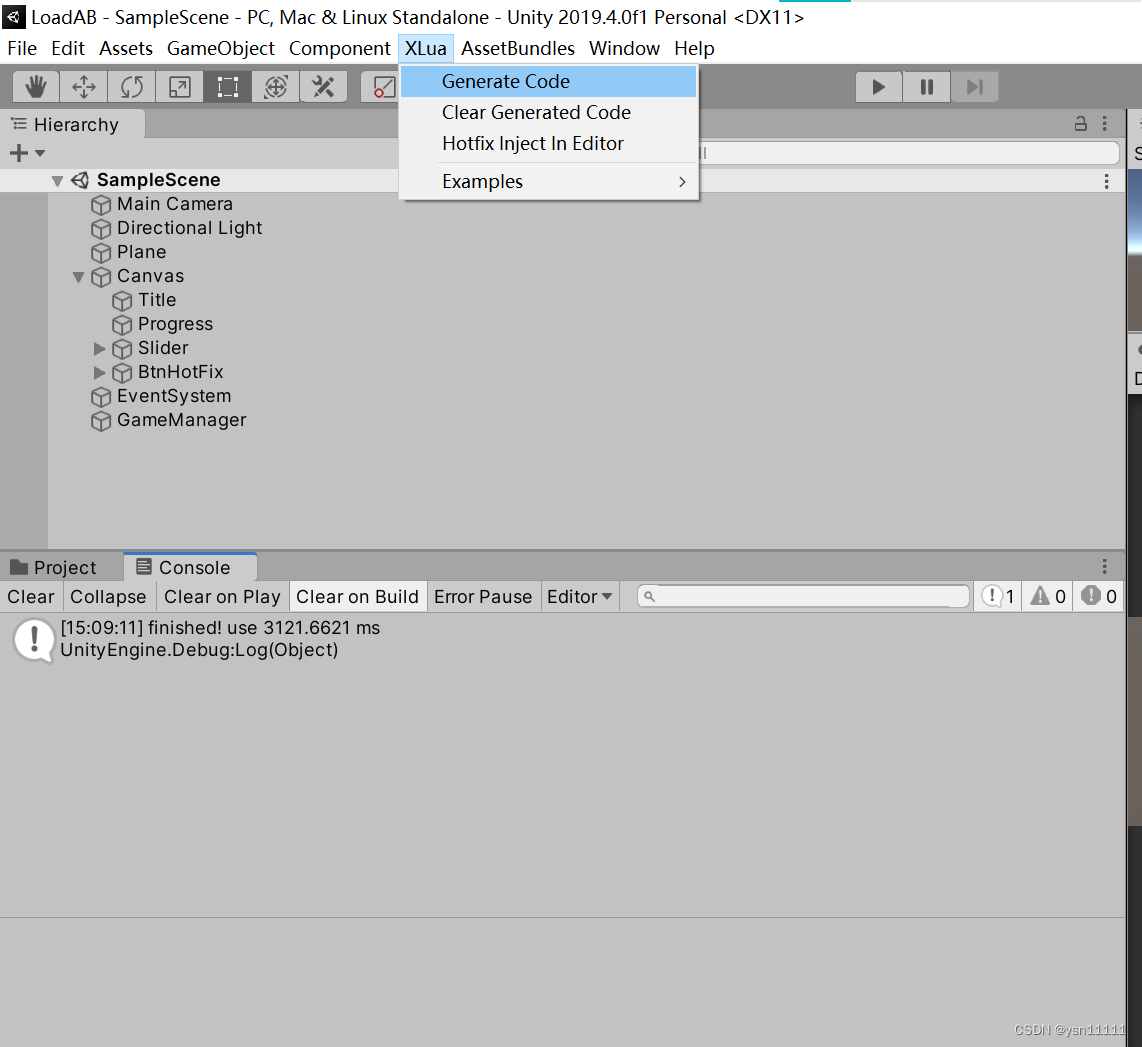
回到U3d,点击XLua下的Generate Code生成代码, Console面板中出现finished!表示生成完毕
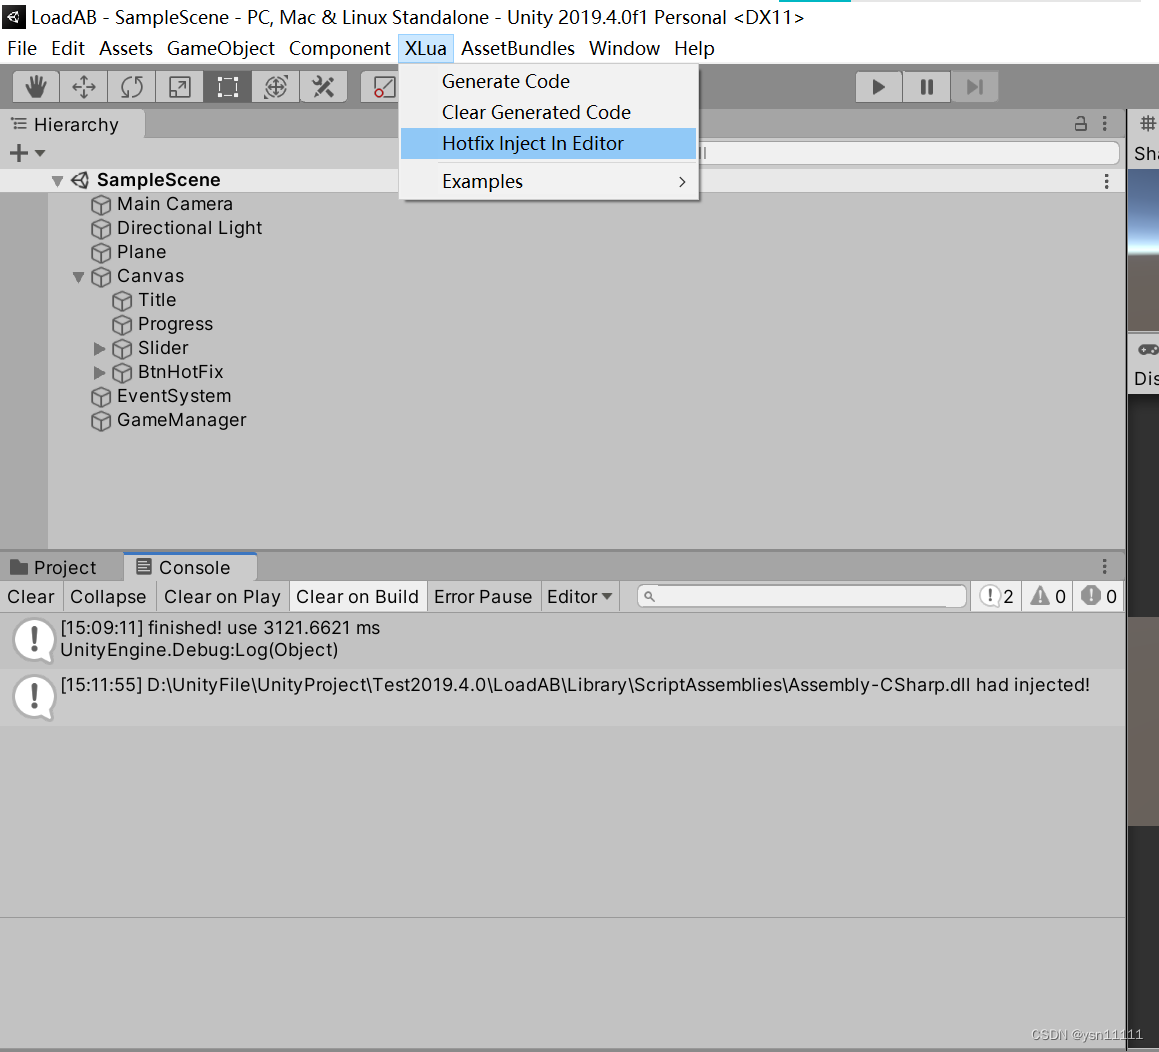
再点击Xlua下的Hotfix Inject In Editor将代码注入到编辑器中,底下出现had injected!表示注入完毕。
将LuaTxt下的Click.lua.txt删除,Resources下的Sphere预制体删除,当然不删也可以,删了只是为了证明你调用的是服务器上的ab包,不是工程现有的文件。
八、测试
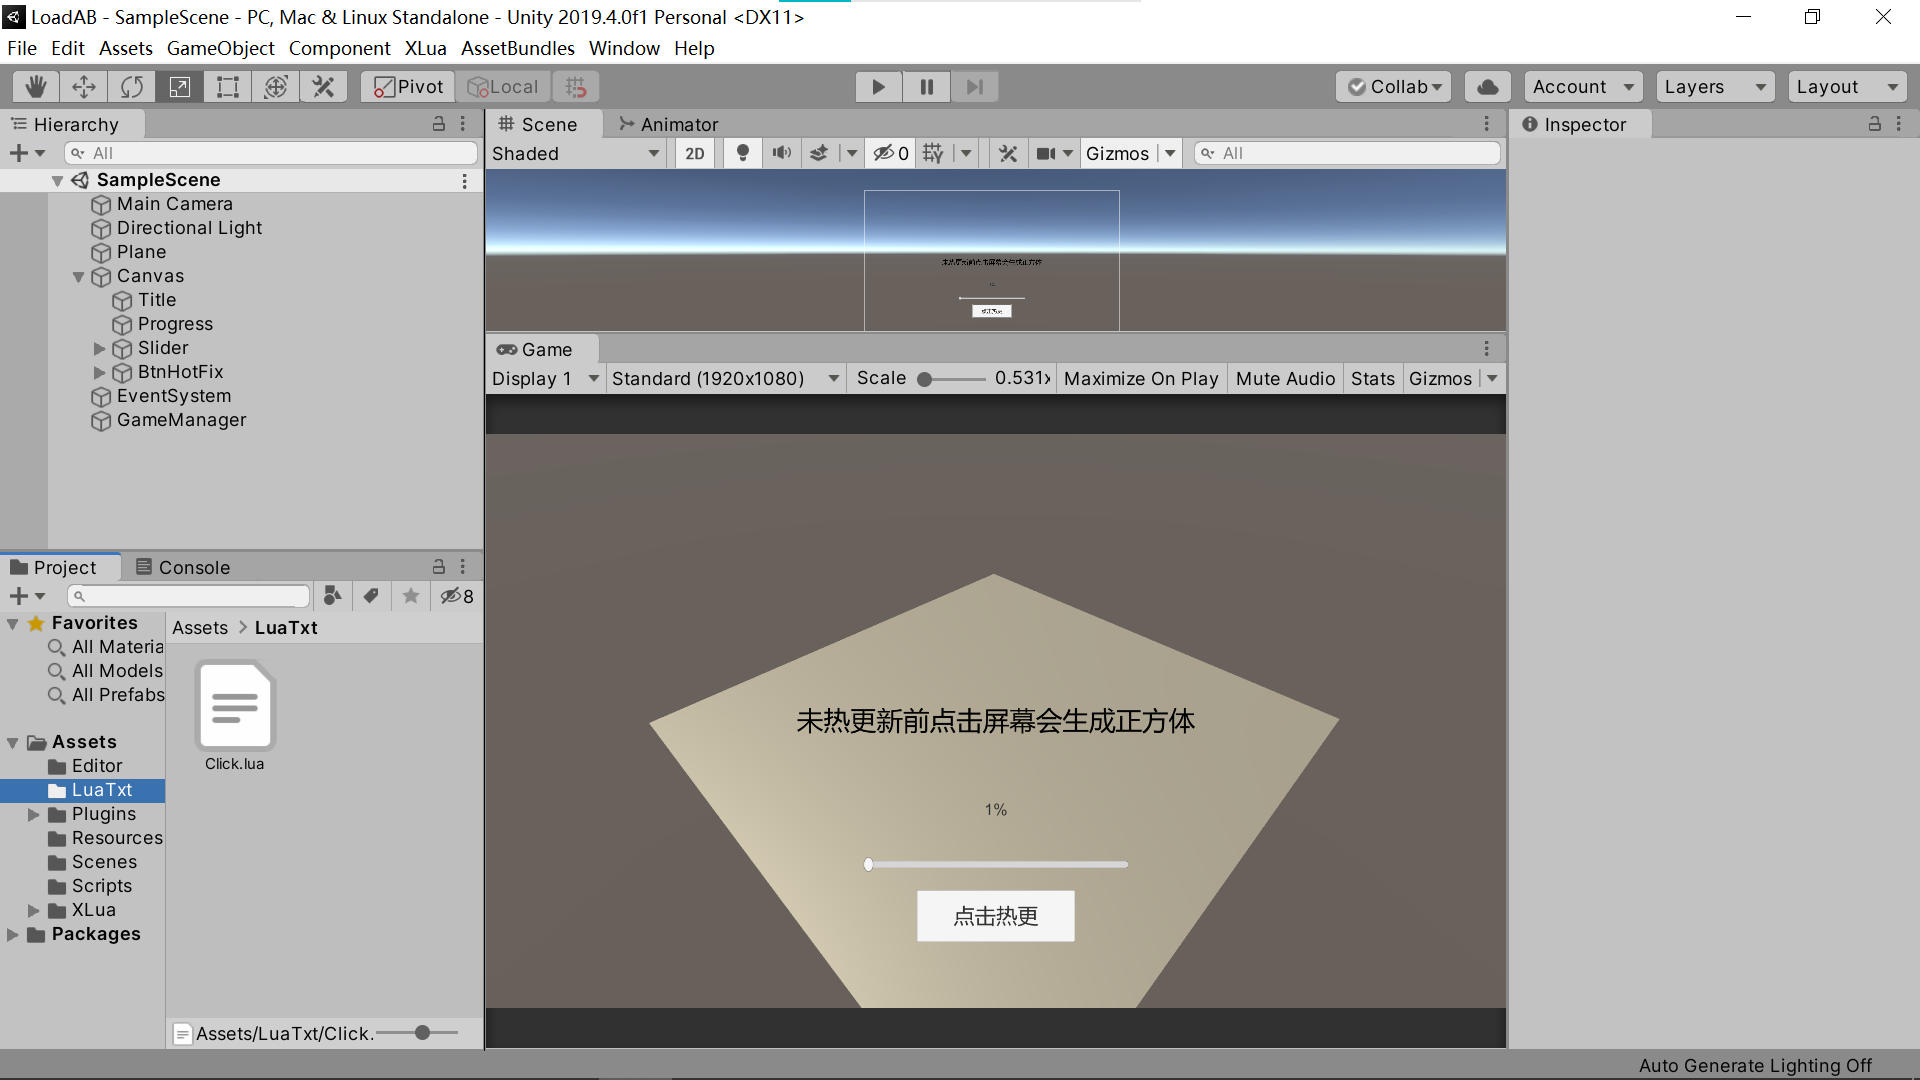
测试,点击运行,这是未进行热更时的状况,点击屏幕会出现正方体。

再重新运行,先点击热更按钮,等进度条加载到100%,再点击地面,就会出现圆球啦,
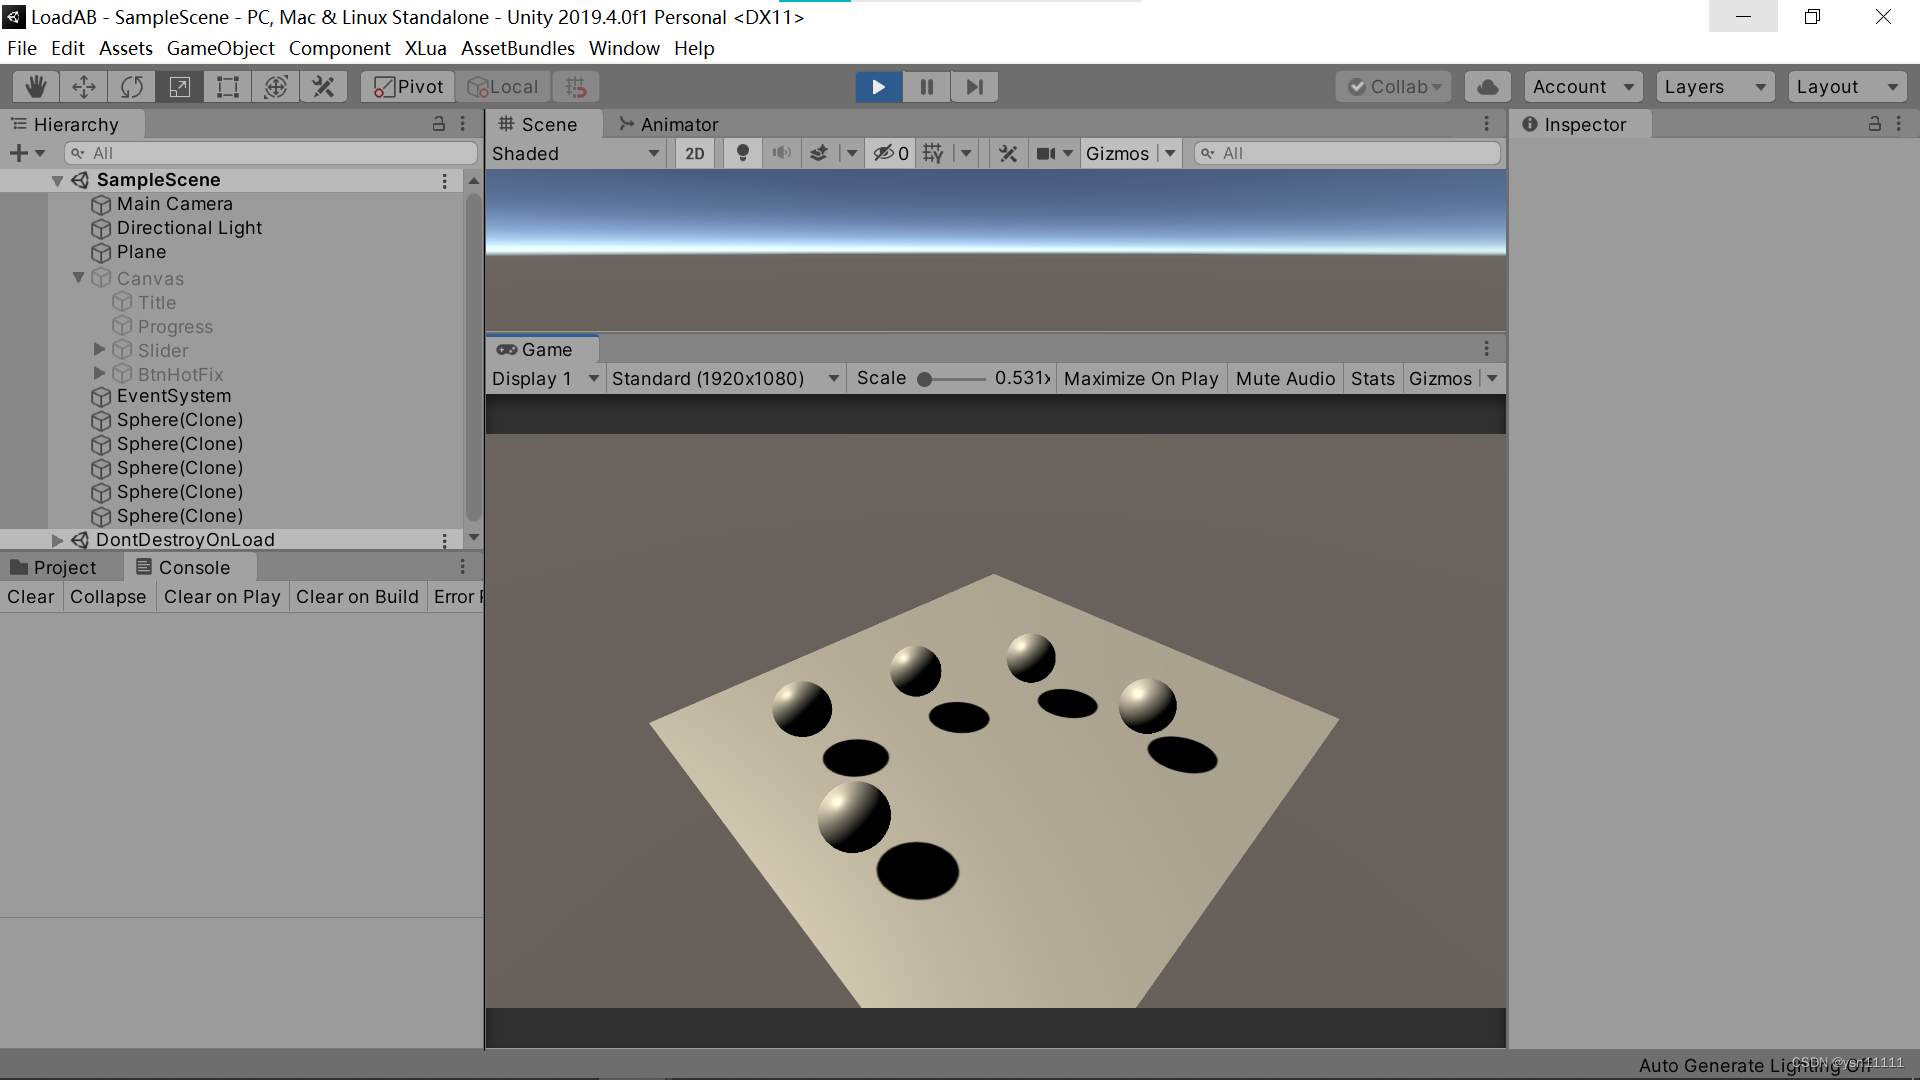
并且在LuaTxt可以看到从服务器上下载下来的Click.lua.txt文件
本文参考链接https://blog.csdn.net/weixin_33918788/article/details/112710709

瓜分20万奖金 获得内推名额 丰厚实物奖励 易参与易上手
更多推荐


 6
6 0
0- 0


 已为社区贡献1条内容

所有评论(0)