
中医特色社区护理系统-中文章管理
系统的完成一个elementui+vue+mybatis项目
今天主要完成了
- 中医生文章管理界面
- 文章阅读界面
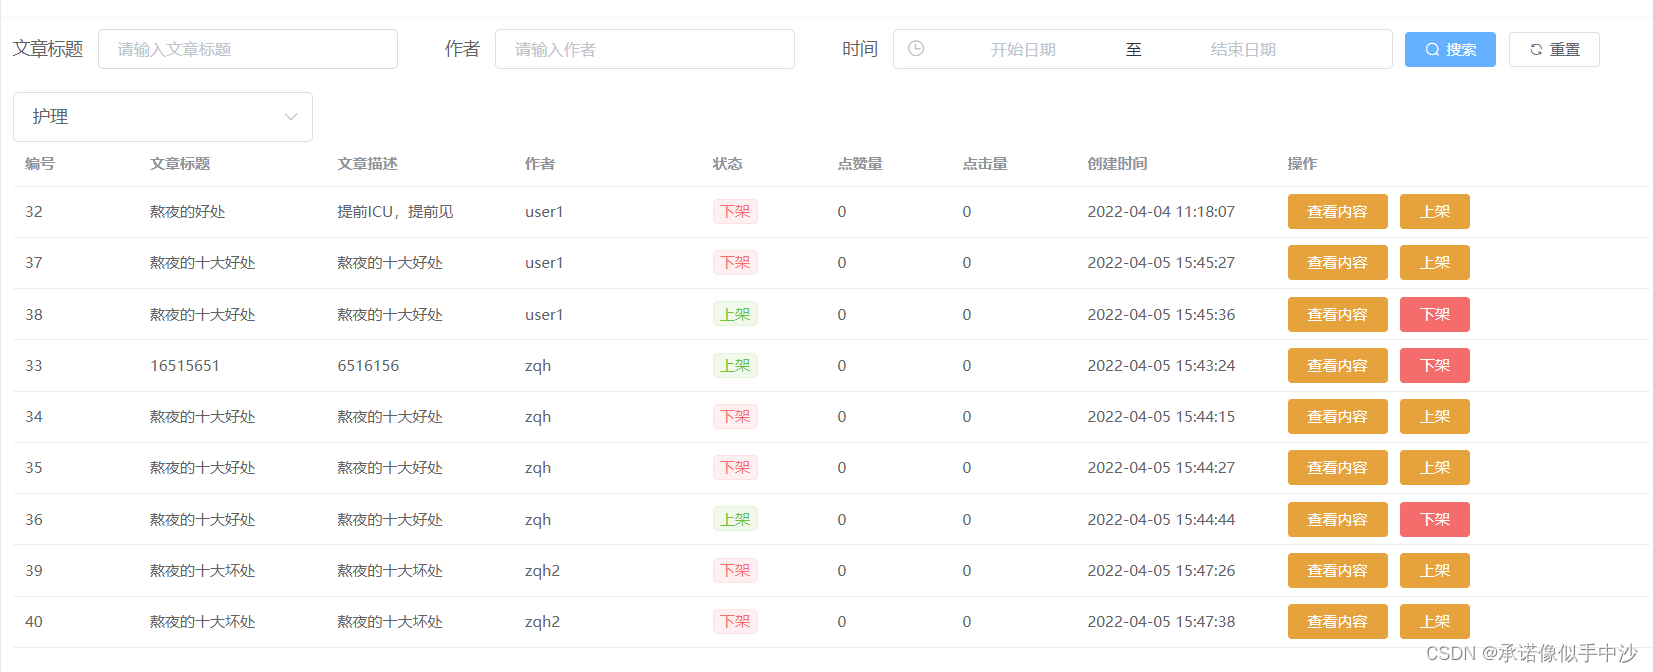
- 后台文章查询界面

 今天又是写接口布前端的一天
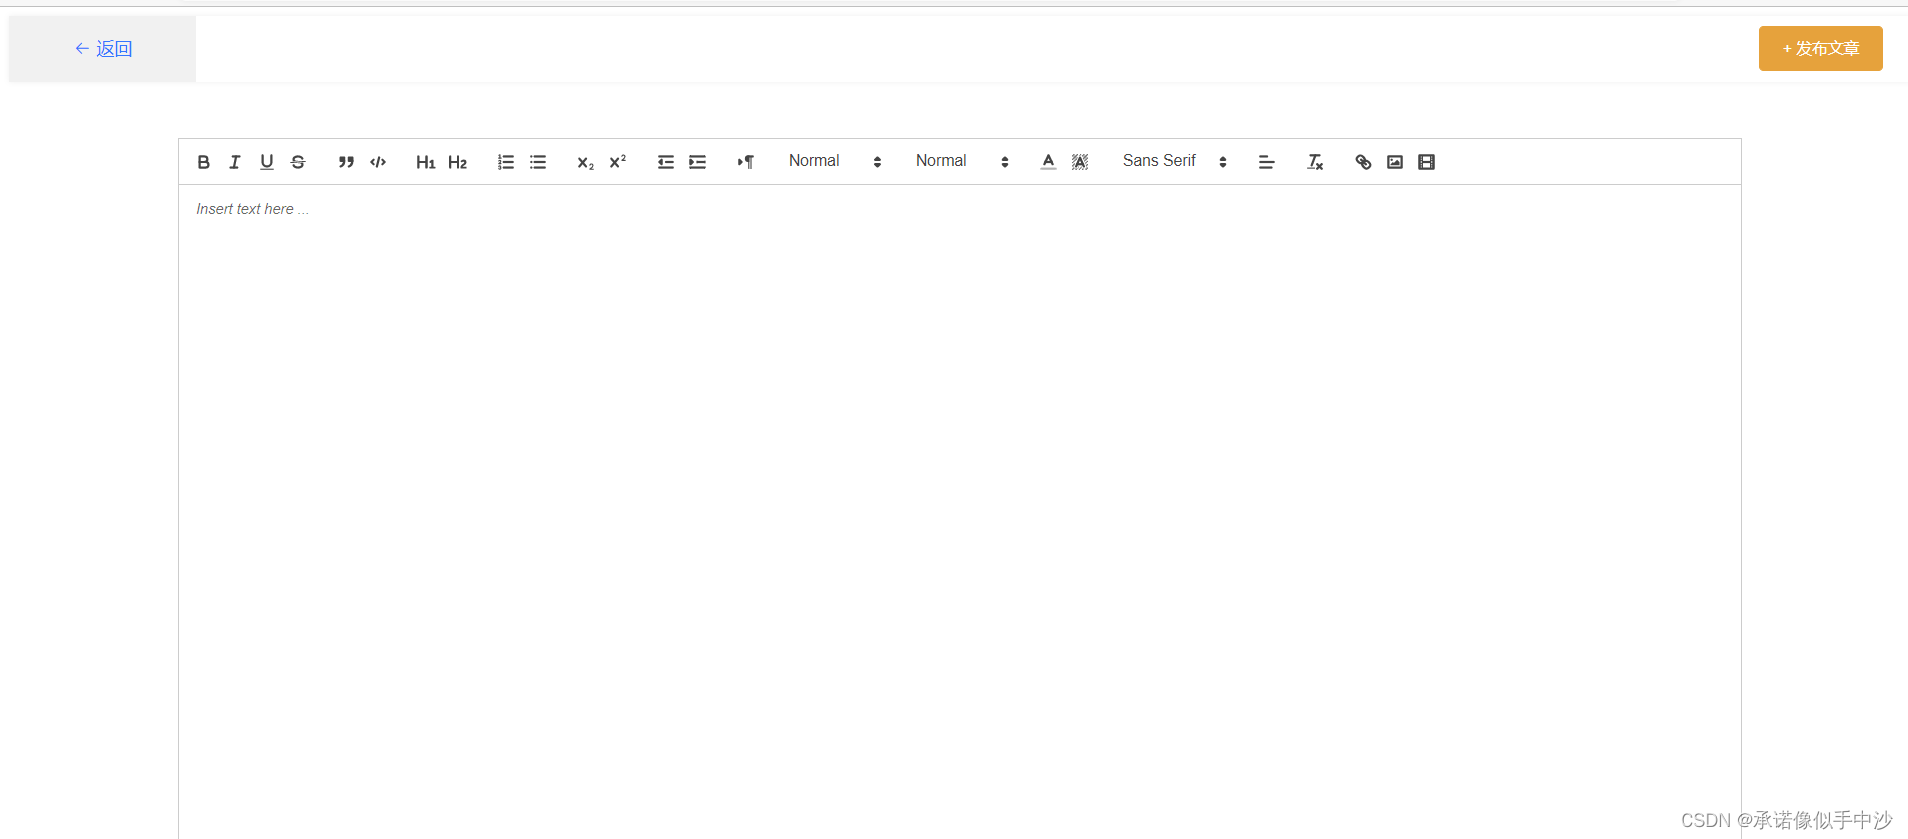
- 首先今天开始写的就是文章撰写的界面,使用的是富文本编辑器,我的前段采用的是vue框架所以直接搜的vue框架对应的quill这个大佬写的很好可以看一下 我就是在全局直接引用这个quill 引入后就是这样的界面。vue框架就是在main.js里面直接加这些
import VueQuillEditor from 'vue-quill-editor'
// require styles
import 'quill/dist/quill.core.css'
import 'quill/dist/quill.snow.css'
import 'quill/dist/quill.bubble.css'
Vue.use(VueQuillEditor)

然后布局一下
包括后面的发布文章按钮的东西
<template>
  <div>
    <el-row id="article-top">
      <a href="#/article-admin" class="back"> <i class="el-icon-back"></i> 返回</a>
      <div class="action">
        <el-button type="warning" @click="handleAddArticleCheck">+ 发布文章</el-button>
      </div>
    </el-row>
    <el-row  id="article-editor">
      <quill-editor v-model="article.article_content"
        style="height: 600px; margin-bottom: 10px"></quill-editor>
    </el-row>
    <!-- 发布文章对话框:开始 -->
    <el-dialog title="提示" width="35%" :visible.sync="publishArticleDialogVisible">
      <el-form :model="article" :rules="articleRules" ref="articleRef">
        <el-form-item  prop="article_title" label='请输入文章标题' >
          <el-input v-model="article.article_title"></el-input>
        </el-form-item>
        <el-form-item  prop="article_describe" label='请输入文章描述' >
          <el-input v-model="article.article_describe"></el-input>
        </el-form-item>
        <el-form-item label="文章分类"  prop="article_category">
          <el-select placeholder="请选择文章分类" clearable
            v-model="article.article_category" style="width: 240px">
            <el-option label="护理" value="1"/>
            <el-option label="养生" value="2"/>
          </el-select>
        </el-form-item>
      </el-form>
      <div slot="footer">
        <el-button @click="publishArticleDialogVisible = false">取 消</el-button>
        <el-button type="primary" @click="handleConfirmPublishArticle">确 定</el-button>
      </div>
    </el-dialog>
    <!-- 发布文章对话框:结束 -->
  </div>
</template>

<script>
import { addArticle } from '../../api/doctor/article'
export default {
  name: 'ArticleAdd',
  data () {
    return {
      publishArticleDialogVisible: false, // 控制发布文章对话框显示
      article: {
        author_id: '',
        article_content: '',
        article_title: '',
        article_describe: '',
        article_category: '1'
      },
      articleRules: {
        article_title: [
          { required: true, message: '请输入文章标题', trigger: 'blur' }
        ],
        article_describe: [
          { required: true, message: '请输入文章描述', trigger: 'blur' }
        ],
        article_category: [
          { required: true, message: '请选择分类', trigger: 'blur' }
        ]
      }
    }
  },
  created () {
    this.article.author_id = this.$store.state.user.userinfo.user_id
    console.log(this.article)
  },
  methods: {
    handleConfirmPublishArticle () {
      this.$refs.articleRef.validate((valid) => {
        if (valid) {
          this.$confirm(`确定新增文章:${this.article.article_title}`, '询问', {
            confirmButtonText: '确定',
            cancelButtonText: '取消',
            type: 'warning'
          }).then(() => {
            return addArticle(this.article)
          }).then(() => {
            this.publishArticleDialogVisible = false
            this.$message({ type: 'success', message: '添加成功!' })
            this.$router.go(-1)
          }).catch(error => {
            console.log(error)
          })
        } else {
          return false
        }
      })
    },
    /**
     * 检测文章内容是否为空
     */
    handleAddArticleCheck: function () {
      if (this.article.article_content === '') {
        this.$notify({
          title: '警告',
          message: '内容不能为空',
          type: 'warning'
        })
      } else {
        this.publishArticleDialogVisible = true
      }
    }
  }
}
</script>

<style lang="less" scoped>
#article-top {
  height: 7vh;
  display: flex;
  position: relative;
  box-shadow: 0 0px 5px 0 #efefef;
  .back {
    text-align: center;
    width: 10%;
    height: 7vh;
    line-height: 7vh;
    text-decoration: none;
    background-color: #f1f1f1;
    color: #3377ff;
    cursor: pointer;
  }
  .action {
    background-color: #fff;
    width: 90%;
    display: flex;
    padding-right: 25px;
    justify-content: flex-end;
    align-items: center;
  }
}
#article-editor {
  padding: 50px 150px;
}
</style>
发布文章需要添加addArticle 请求 前端请求如下
export function addArticle (data) {
  return request({
    url: '/front/addArticle',
    method: 'post',
    data: data
  })
}
实体类Article
package bysj.bysj.model;

import lombok.Data;

import java.util.Date;

@Data
public class Article {
    private Integer article_id;
    private String article_title;
    private String article_describe;
    private String article_content;
    private String article_status;
    private Integer good_number;
    private Integer click_number;
    private Integer author_id; // 作者ID
    private Date    create_time;
    private UserDoctor userDoctor;
    private Integer article_category;
    private ArticleCategory  category;
}
后端的xml文件
    <insert id="addArticle">
        insert into article (article_title, article_describe, article_content, author_id, create_time, article_category)
        values(#{article_title}, #{article_describe}, #{article_content}, #{author_id}, #{create_time}, #{article_category})
    </insert>
接口
Boolean addArticle(Article article);
controller层
    @PostMapping("front/addArticle")
    public AjaxResult addArticle (HttpServletRequest request, @RequestBody Article article) {
        try {
            String token = request.getHeader("Authorization");
            try {
                Claims claims = JwtUtils.checkToken(token);
                if (claims == null) {
                    return AjaxResult.error(50012, "未传输 token");
                }
            } catch (ExpiredJwtException e) {
                return AjaxResult.error(50013, "token 已过期");
            } catch (Exception e) {
                return AjaxResult.error(50014, "无效 token");
            }
            article.setCreate_time(new Date());
            Boolean addArticleResult = articleMapper.addArticle(article);
            if (addArticleResult) {
                return AjaxResult.success(200, "发布文章成功", addArticleResult);
            } else {
                return AjaxResult.error(5010, "发布文章失败");
            }
        } catch (Exception e) {
            e.printStackTrace();
            return AjaxResult.error(5010, "发布文章失败");
        }
    }
添加文章的接口结束
接下来写的是文章的展示界面 这个不知道为啥前段请求到了 但是确实没有复制到前端对应的名称的赋值,这里先粘一下代码明天改
前端代码
这是 article-read界面
<template>
  <article-show :article="article_data"/>
</template>

<script>
import { findArticleByArticleId } from '../../api/article'
import ArticleShow from '../../components/article-show'
export default {
  name: 'ArticleRead',
  data () {
    return {
      article_data: ''
    }
  },
  components: { ArticleShow },
  created () {
    findArticleByArticleId({ article_id: this.$route.params.article_id }).then(res => {
      this.article_data = res.data
    })
  }
}
</script>

<style lang="less" scoped>

</style>
这是article-show的界面 将此作为一个小组件放在component调用
<template>
  <article id="article-show">
    <header id="header">
      <h1>{{ article.article_title }}</h1>
      <div class="article-meta">
        <ul>
          <li>作者:<span>{{ article.userDoctor.user_name }}</span></li>
          <li>分类:<span>{{ article.category.category_name }}</span></li>
          <li>浏览:<span>{{ article.click_number }}</span></li>
          <li>发布时间:<span>{{ article.create_time }}</span></li>
        </ul>
      </div>
    </header>
    <div id="content">
      <quill-editor :value="article.article_content" @focus="onEditorFocus($event)"
        style="height: 600px; margin-bottom: 10px"></quill-editor>
    </div>
  </article>
</template>

<script>
export default {
  name: 'ArticleShow',
  props: {
    article: {
      type: Object
    }
  },
  methods: {
    onEditorFocus (editor) { // 富文本获得焦点时的事件
      editor.enable(false) // 在获取焦点的时候禁用
    }
  }
}
</script>

<style lang="less" scoped>
#article-show {
  padding: 0 150px;
  /deep/ .ql-toolbar {
    display: none !important;
  }
  /deep/ .ql-container {
    border: none !important;
  }
}
#header {
  h1 {
    text-align: center; margin: 0;
    font-size: 28px; font-weight: 600; color: #34495e;
  }
  .article-meta {
    display: flex; justify-content: center;
    color: #999999; font-size: 12px;
    ul {
      display: flex; list-style-type: none;
      li {
        margin-right: 25px;
      }
    }
  }
}
</style>
此模块里面写的请求 findArticleByArticleId
实体类还是上面的文章类
xml文件
    <select id="findArticleByArticleId"
            resultMap="articleMap">
    select *
    from user_doctor, article
    where user_doctor.user_id = article.author_id
    and article.article_id = #{article_id}
    </select>
对应的mapper接口 Article findArticleByArticleId(String article_id);
controller 层
    @GetMapping("front/findArticleByArticleId")
    public AjaxResult findArticleByArticleId (@RequestParam String article_id) {
        try {
            Article article = articleMapper.findArticleByArticleId(article_id);
            System.out.println(article.getArticle_category());
            ArticleCategory articleCategory = articleCategoryMapper.findArticleCategoryById(article.getArticle_category());
            System.out.println(articleCategory);
            article.setCategory(articleCategory);
            return AjaxResult.success(200, "根据文章id获取文章信息成功", article);
        } catch (Exception e) {
            e.printStackTrace();
            return AjaxResult.error(5020, "根据文章id获取文章信息失败");
        }
    }
通过id获取文章内容及其他作者结束
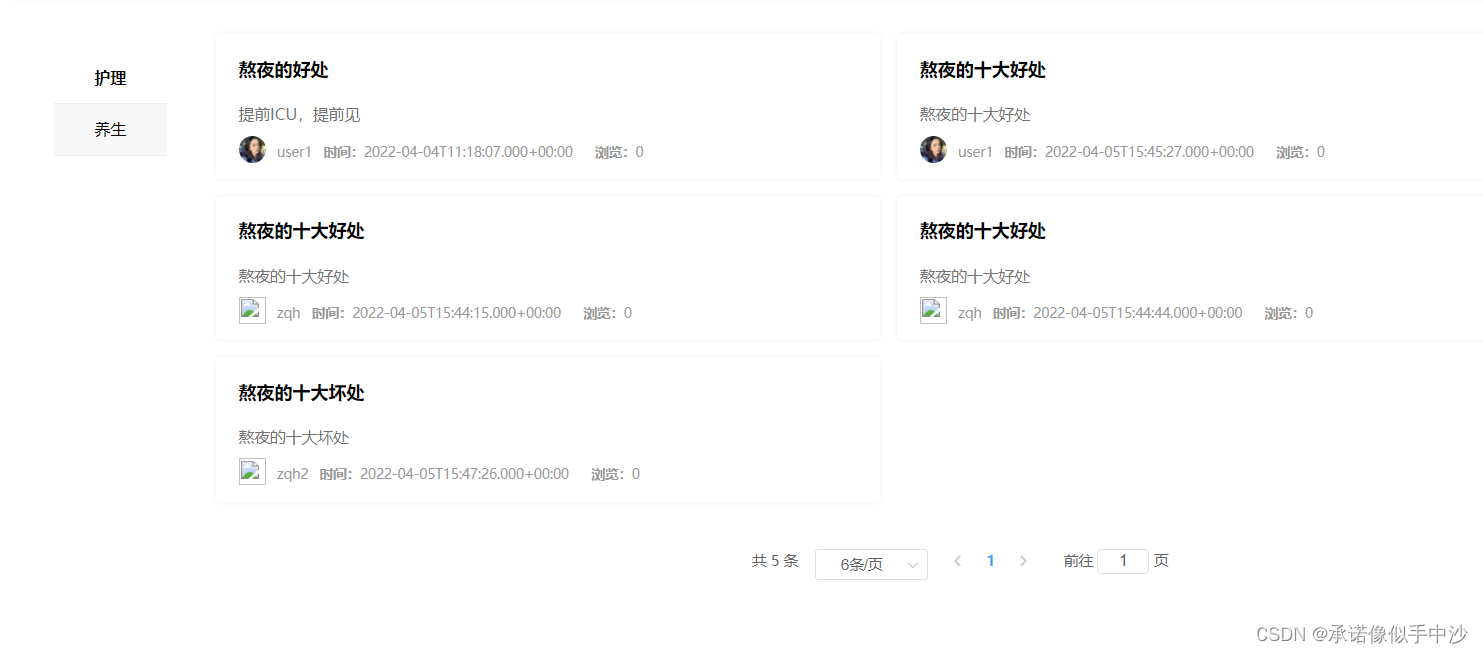
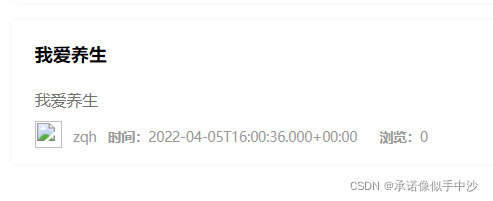
接下来写的是 文章展示界面 是真正的文章界面 article.vue
 也就是这个界面 这里面也是集成了一个小部件卸载了component里面就是article-card 可以看见所有的文章都是以小卡片的形式展现出来,可以封装成一个小工具
<template>
    <div class="article-card">
        <a href="#" @click="handleClick">
            <h1 class="article-card-title">{{ ArticleData.article_title }}</h1>
        </a>
        <a href="#">
            <p class="article-card-desc">{{ ArticleData.article_describe }}</p>
        </a>
        <div class="article-card-msg">
            <span class="author">
              <a href="#">
                  <img class="author-avatar" :src="ArticleData.userDoctor.avatar" alt="">
              </a>
              <span class="author-nickname">{{ ArticleData.userDoctor.user_name }}</span>
            </span>
            <span class="other">
                <span class="other-date">
                    <label>时间:</label>
                    <span>{{ ArticleData.create_time }}</span>
                </span>
                <span class="other-pv">
                    <label>浏览:</label>
                    <span>{{ ArticleData.click_number }}</span>
                </span>
                <!-- <span class="other-category">
                    <label>类别:</label>
                    <span>程序人生</span>
                </span> -->
            </span>
        </div>
    </div>
</template>

<script>
export default {
  name: 'ArticleCard',
  props: {
    ArticleData: {
      type: Object
    }
  },
  methods: {
    handleClick () {
      this.$emit('readArticle', this.ArticleData.article_id)
    }
  }
}
</script>

<style lang="less" scoped>
a {
  text-decoration: none;
}
.article-card {
    width: 590.5px; padding: 10px; margin-bottom: 15px; margin-left: 15px;
    box-sizing: border-box; background-color: #fff;
    border-radius: 5px; box-shadow: 0 0 5px 0 #efefef;
    display: flex; flex-direction: column;
    .article-card-title {
        font-size: 16px; font-weight: 600; color: #000;
        padding: 10px; margin: 0;
    }
    .article-card-title:hover {
      color: #00a4dc;
    }
    .article-card-desc {
        font-size: 14px; font-weight: 400; color: #737373;;
        padding: 10px; margin: 0;
    }
    .article-card-msg {
        display: flex; padding: 0 10px; margin: 0;
        .author {
            display: flex;
            align-items: center;
            .author-avatar {
                width: 24px;
                height: 24px;
                border-radius: 50%;
            }
            .author-nickname {
                font-size: 12px;
                font-weight: 400;
                color: #999;
                margin-left: 10px;
            }
        }
        .other {
            font-size: 12px;
            color: #999;
            display: flex;
            align-items: center;
            .other-date {
                margin: 0 10px;
                label {
                    font-weight: 600;;
                }
            }
            .other-pv {
                margin: 0 10px;
                label {
                    font-weight: 600;;
                }
            }
            .other-category {
                margin: 0 10px;
                label {
                    font-weight: 600;;
                }
            }
        }
    }
}
</style>
上面的就是card的样式及接口调用
<template>
  <div id="article-wrapper">
    <el-row id="article-category">
      <aside>
        <ul>
          <li :class="{ active: currentSelet === '1' }" @click="handleChange('1')">护理</li>
          <li :class="{ active: currentSelet === '2' }" @click="handleChange('2')">养生</li>
        </ul>
      </aside>
      <div id="article-container">
        <article-card @readArticle="handleReadArticle" v-for="item in articleList" :article-data="item" :key="item.article_id"></article-card>
      </div>
    </el-row>
    <el-row id="pagination">
      <!-- 分页:开始 -->
      <el-pagination v-if="page.listTotal !== '0'"
        small :page-sizes="[6, 12, 18]" :page-size="page.pageSize"
        layout="total, sizes, prev, pager, next, jumper" :total="page.listTotal"
        @size-change="handleSizeChange" @current-change="handleCurrentChange">
      </el-pagination>
      <!-- 分页:结束 -->
    </el-row>
  </div>
</template>

<script>
import ArticleCard from '../../components/article-card'
import { findArticleByCategory, findArticleTotalByCategory } from '../../api/article'
export default {
  name: 'Article',
  components: { ArticleCard },
  data () {
    return {
      articleList: [],
      currentSelet: '1',
      page: { // 分页数据
        article_category: '1',
        pageNum: 1,
        pageSize: 6,
        listTotal: 0
      }
    }
  },
  created () {
    this.fetchArticleList()
  },
  methods: {
    handleSizeChange (newPageSize) {
      this.page.pageSize = newPageSize
      this.fetchArticleList()
    },
    handleCurrentChange (newPageNum) {
      this.page.pageNum = newPageNum
      this.fetchArticleList()
    },
    handleChange (category) {
      this.currentSelet = category
      this.page.article_category = category
      this.page.pageNum = 1
      this.page.pageSize = 6
      this.fetchArticleList()
    },
    fetchArticleList () {
      findArticleTotalByCategory({ article_category: this.page.article_category }).then(res => { // Promise 链式处理
        console.log(res)
        this.page.listTotal = res.data
        return findArticleByCategory(this.page)
      }).then(res => {
        this.articleList = res.data
        console.log(res) // for debug
      }).catch(error => {
        console.log(error)
      })
    },
    handleReadArticle (id) {
      this.$router.push({ name: 'ArticleRead', params: { article_id: id } })
    }
  }
}
</script>

<style lang="less" scoped>
#article-wrapper {
  padding-top: 25px;
  #article-category {
    display: flex;
    ul {
      width: 100px; position: fixed;
      li {
        padding: 10px 25px;
        text-align: center;
        line-height: 25px;
        overflow: hidden;
        background-color: #f8f8f8;
        font-weight: 400;
        font-size: 14px;
        border-bottom: 1px solid #eee;
        cursor: pointer;
      }
      li.active {
        background-color: #fff;
        font-weight: bold;
      }
    }
    #article-container {
      width: 80%; margin: 0 auto;
      display: flex; flex-wrap: wrap; justify-content: flex-start;
    }
  }
  #pagination {
    text-align: center; padding-top: 25px;
  }
}
</style>
上面是文章展示界面的前段代码及样式,这里还添加了旁边两个的分类显示(养生和护理) 这两个不是在后台数据库获取的,是写死的,但是前段的文章是根据这两个进行分类展示的涉及的接口有 findArticleByCategory findArticleTotalByCategory findAllArticle
实体类 创建了一个 articlecategory类
package bysj.bysj.model;

public class ArticleCategory {
    private  Integer category_id;
    private  String  category_name;
}
mapper层实现的接口
    Integer findArticleTotalByCategory(String article_category);

    List<Article> findArticleByCategory(String article_category);
    List<Article> findAllArticle();
xml文件
    <select id="findArticleTotalByCategory"
            resultType="java.lang.Integer">
    select  count(*)  from article
    where article.article_category = #{article_category}
    </select>
        <select id="findAllArticle"
            resultMap="articleMap">
    select *
    from user_doctor, article
    where user_doctor.user_id = article.author_id
    </select>
    <select id="findArticleByArticleId"
            resultMap="articleMap">
    select *
    from user_doctor, article
    where user_doctor.user_id = article.author_id
    and article.article_id = #{article_id}
    </select>
controller层
前台后台都要用这两个接口带是后台需要token验证所以在前台请求加上个front
    @GetMapping("front/findArticleTotalByCategory")
    public AjaxResult frontFindArticleTotalByCategory (@RequestParam String article_category) {
        try {
            return AjaxResult.success(200, "根据分类获取文章列表总数成功", articleMapper.findArticleTotalByCategory(article_category));
        } catch (Exception e) {
            return AjaxResult.error(5019, "根据分类获取文章列表总数失败");
        }
    }

    @GetMapping("front/findArticleByArticleId")
    public AjaxResult findArticleByArticleId (@RequestParam String article_id) {
        try {
            Article article = articleMapper.findArticleByArticleId(article_id);
            System.out.println(article.getArticle_category());
            ArticleCategory articleCategory = articleCategoryMapper.findArticleCategoryById(article.getArticle_category());
            System.out.println(articleCategory);
            article.setCategory(articleCategory);
            return AjaxResult.success(200, "根据文章id获取文章信息成功", article);
        } catch (Exception e) {
            e.printStackTrace();
            return AjaxResult.error(5020, "根据文章id获取文章信息失败");
        }
    }
前台文展示界面结束
然后接下来写的后台文章查询界面
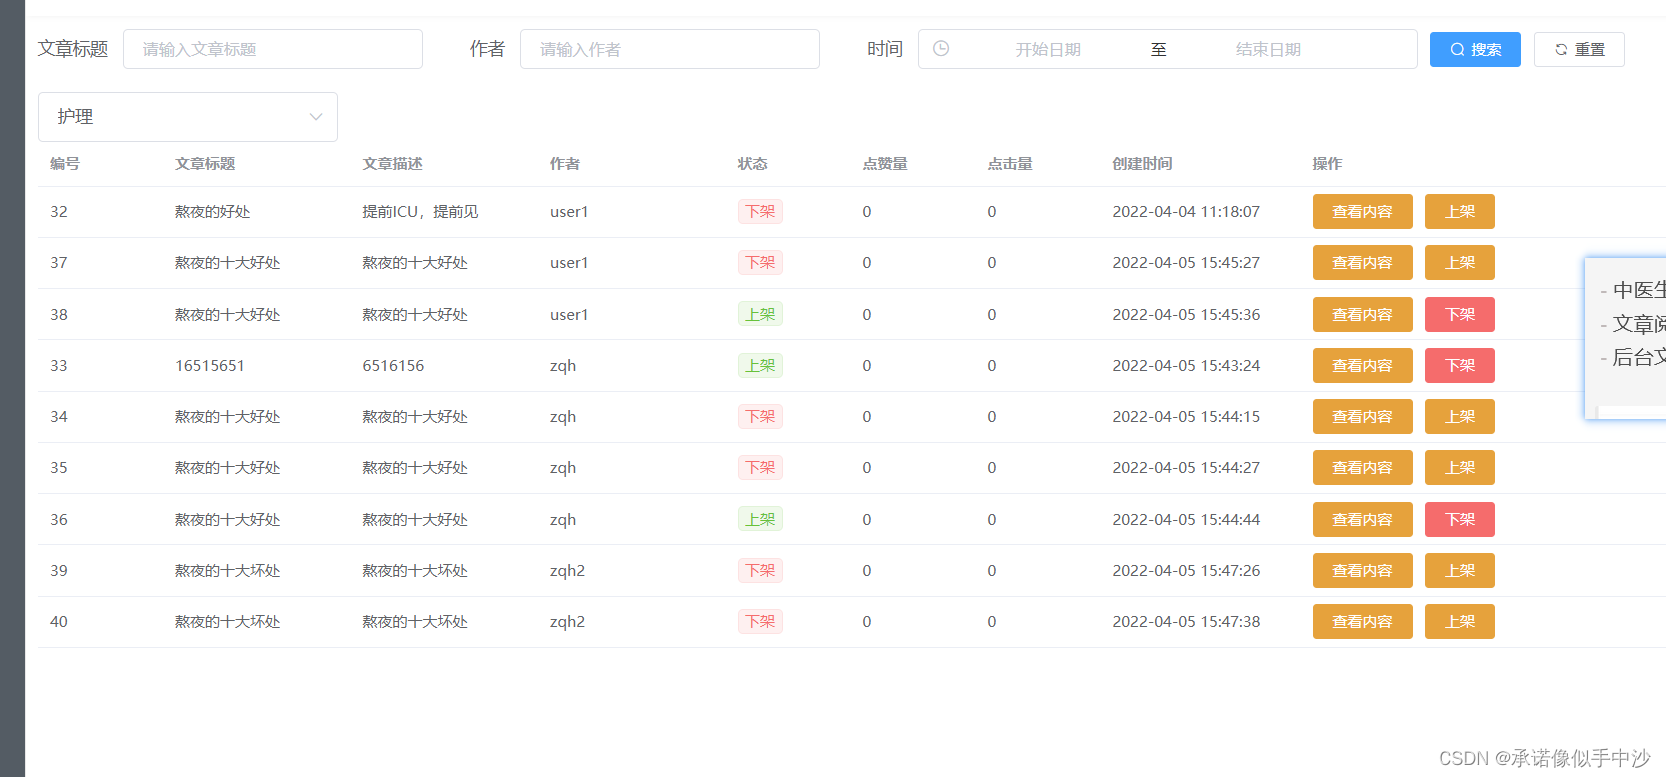
前台借鉴了前面中医生管理端的一个搜索框 还有展示列表和下面的分页栏
下拉框里面是文章分类直接定死为养生和护理,然后通过这两个直接将文分类也就是根据文章的类型获取文章findArticleByCategory 同时分页需要文章总数findArticleTotalByCategory 最后上面的多值搜索需要一个queryArticleByParams 一共三个接口 请求类型一样所以共用一个mapper层和xml文件 queryArticleByParams 需要一个新的实体类 Queryarticle
package bysj.bysj.model.util;
import lombok.Data;
import java.util.Date;
@Data
public class QueryArticle {
private String article_title;
private String article_category;
private String author_name;
private Date beginTime;
private Date endTime;
}
mapper为
List<Article> queryArticleByParams(QueryArticle queryArticle);
xml为
```java
<select id="queryArticleByParams"
parameterType="bysj.bysj.model.util.QueryArticle"
resultMap="articleMap">
select *
from user_doctor, article
where user_doctor.user_id = article.author_id
<if test="article_title != null">
and article.article_title like concat('%', #{article_title}, '%')
</if>
<if test="author_name != null">
and user_doctor.user_name like concat('%', #{author_name}, '%')
</if>
<if test="author_name != null">
and article.article_category = #{article_category}
</if>
<if test="beginTime != null">
and date_format(article.create_time, '%y%m%d') >= date_format(#{beginTime}, '%y%m%d')
</if>
<if test="endTime != null">
and date_format(article.create_time, '%y%m%d') <= date_format(#{endTime}, '%y%m%d')
</if>
</select>
 controller层


```java
    @PostMapping("queryArticleByParams") // 此处 post 实际充当 get 使用
    public AjaxResult  queryArticleByParams (HttpServletRequest request, @RequestBody QueryArticle queryArticle) {

        try {
            String token = request.getHeader("Authorization");
            try {
                Claims claims = JwtUtils.checkToken(token);
                if (claims == null) {
                    return AjaxResult.error(50012, "未传输 token");
                }
            } catch (ExpiredJwtException e) {
                return AjaxResult.error(50013, "token 已过期");
            } catch (Exception e) {
                return AjaxResult.error(50014, "无效 token");
            }
            List<Article> articleList =  articleMapper.queryArticleByParams(queryArticle);
            return AjaxResult.success(200, "查询中医生成功", articleList);
        } catch (Exception e) {
            e.printStackTrace();
            return AjaxResult.error(5005, "查询中医生失败");
        }
    }
剩下的两个请求
@GetMapping("findArticleByCategory")
    public AjaxResult findArticleByCategory (HttpServletRequest request,@RequestParam String article_category, @RequestParam Integer pageNum, @RequestParam Integer pageSize) {
        try {
            String token = request.getHeader("Authorization");
            try {
                Claims claims = JwtUtils.checkToken(token);
                if (claims == null) {
                    return AjaxResult.error(50012, "未传输 token");
                }
            } catch (ExpiredJwtException e) {
                return AjaxResult.error(50013, "token 已过期");
            } catch (Exception e) {
                return AjaxResult.error(50014, "无效 token");
            }
            PageHelper.startPage(pageNum, pageSize);
            List<Article> articleList =  articleMapper.findArticleByCategory(article_category);
            return AjaxResult.success(200, "根据分类获取文章列表成功", articleList);
        } catch (Exception e) {
            e.printStackTrace();
            return AjaxResult.error(5010, "根据分类获取文章列表失败");
        }
    }
    @GetMapping("findArticleTotalByCategory")
    public AjaxResult findArticleTotalByCategory (HttpServletRequest request, @RequestParam String article_category) {
        try {
            String token = request.getHeader("Authorization");
            try {
                Claims claims = JwtUtils.checkToken(token);
                if (claims == null) {
                    return AjaxResult.error(50012, "未传输 token");
                }
            } catch (ExpiredJwtException e) {
                return AjaxResult.error(50013, "token 已过期");
            } catch (Exception e) {
                return AjaxResult.error(50014, "无效 token");
            }
            return AjaxResult.success(200, "根据分类获取文章列表总数成功", articleMapper.findArticleTotalByCategory(article_category));
        } catch (Exception e) {
            return AjaxResult.error(5019, "根据分类获取文章列表总数失败");
        }
    }
后套文章管理界面结束 今天进度比较多 写完已经一点了 加油!!!

瓜分20万奖金 获得内推名额 丰厚实物奖励 易参与易上手
更多推荐


 0
0 0
0- 0


 已为社区贡献1条内容

所有评论(0)