
【Qt】 Fractal Designer 5.5 - Help(中文版)
Fractal Designer 5.4© Teddy van Jerry这是 Teddy van Jerry 开发的依据 MIT Licence 的开源软件。Version 5.4.3目前仅支持 Windows 和 Linux。(在 Win 10 和 Ubuntu 20 上测试)目录Fractal Designer 5.4源代码应用程序下载安装说明查看最新版What is new in this
Fractal Designer 5.5
© Teddy van Jerry
这是 Teddy van Jerry 开发的依据 MIT Licence 的开源软件。
- Version 5.5.3
- 目前仅支持 Windows 和 Linux。(在 Win 10, Win 11 和 Ubuntu 20 上测试)
目录
- Fractal Designer 5.5
- 源代码
- 应用程序下载
- 安装说明
- 查看最新版
- What is new in this version
- 使用说明
- Windows 11
- English Help
- See also
源代码
https://github.com/Teddy-van-Jerry/Fractal_Designer
git 克隆命令
git clone https://github.com/Teddy-van-Jerry/Fractal_Designer.git
应用程序下载
GitHub
https://github.com/Teddy-van-Jerry/Fractal_Designer/releases/tag/v5.5.3
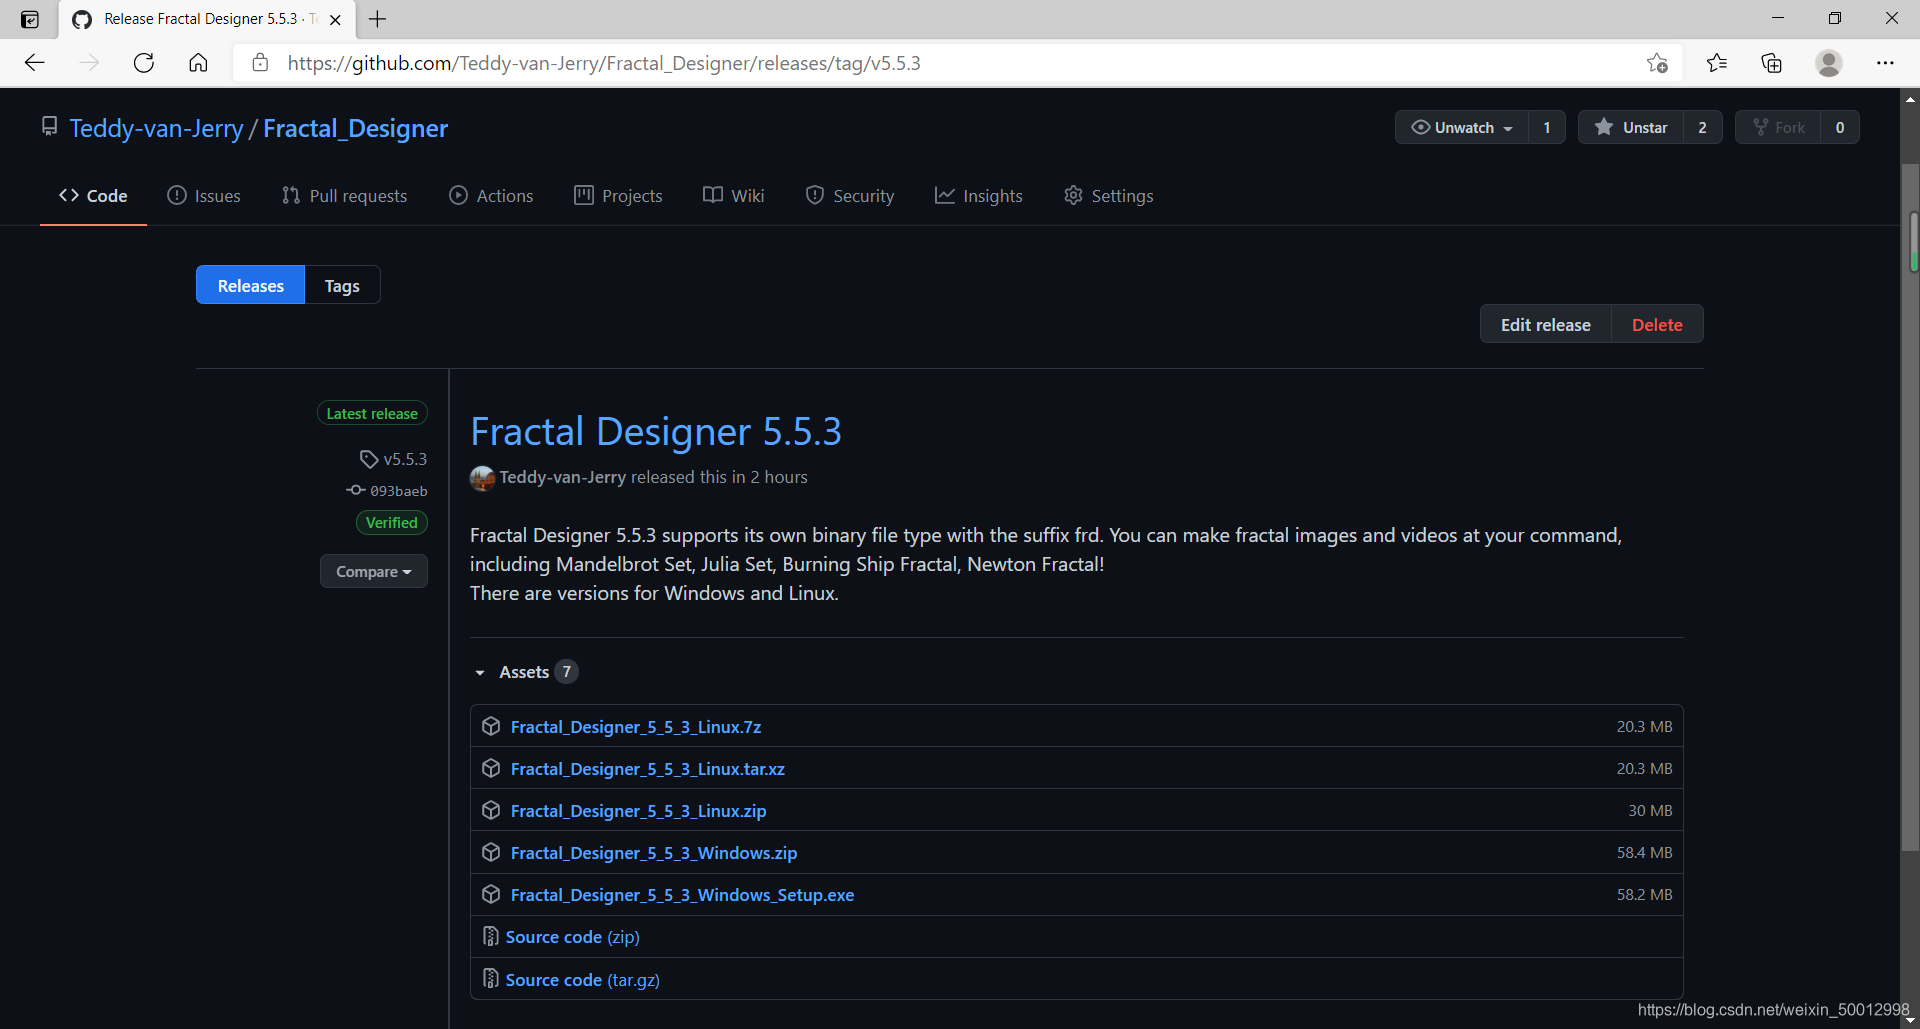
第 1/2/3 个:软件 Linux 压缩文件
第 4 个:软件 Windows 压缩文件
第 5个:软件 Windows Setup 安装程序
第 6/7 个:软件源代码
安装说明
【Qt】 Fractal Designer 5.5 - 安装说明 - Windows
【Qt】 Fractal Designer 5.5 - 安装说明 - Linux
查看最新版
【Qt】 Fractal Designer - Latest Version
What is new in this version
- 新增了 Burning Ship Fractal(燃烧船分形)和 Generalized Newton Fractal(广义牛顿迭代分形)。
使用说明
Tip
1 部分图片仍然沿老版本的。
2 以 Windows 版本为例,Linux 版本效果基本一致
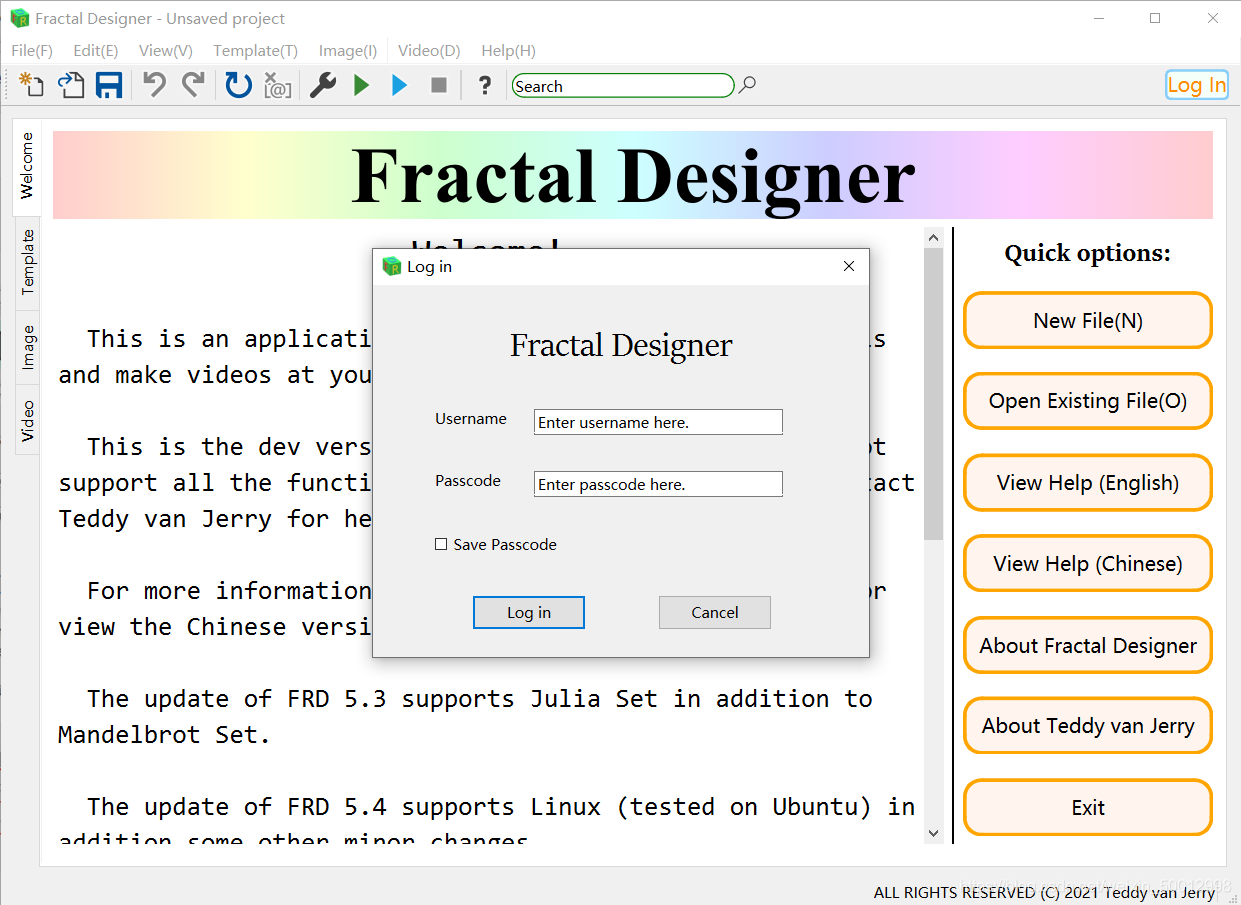
Step 1 - 登录
打开程序,右上角选择登录(Log in):
Username: CSDN
Passcode: Southeast61
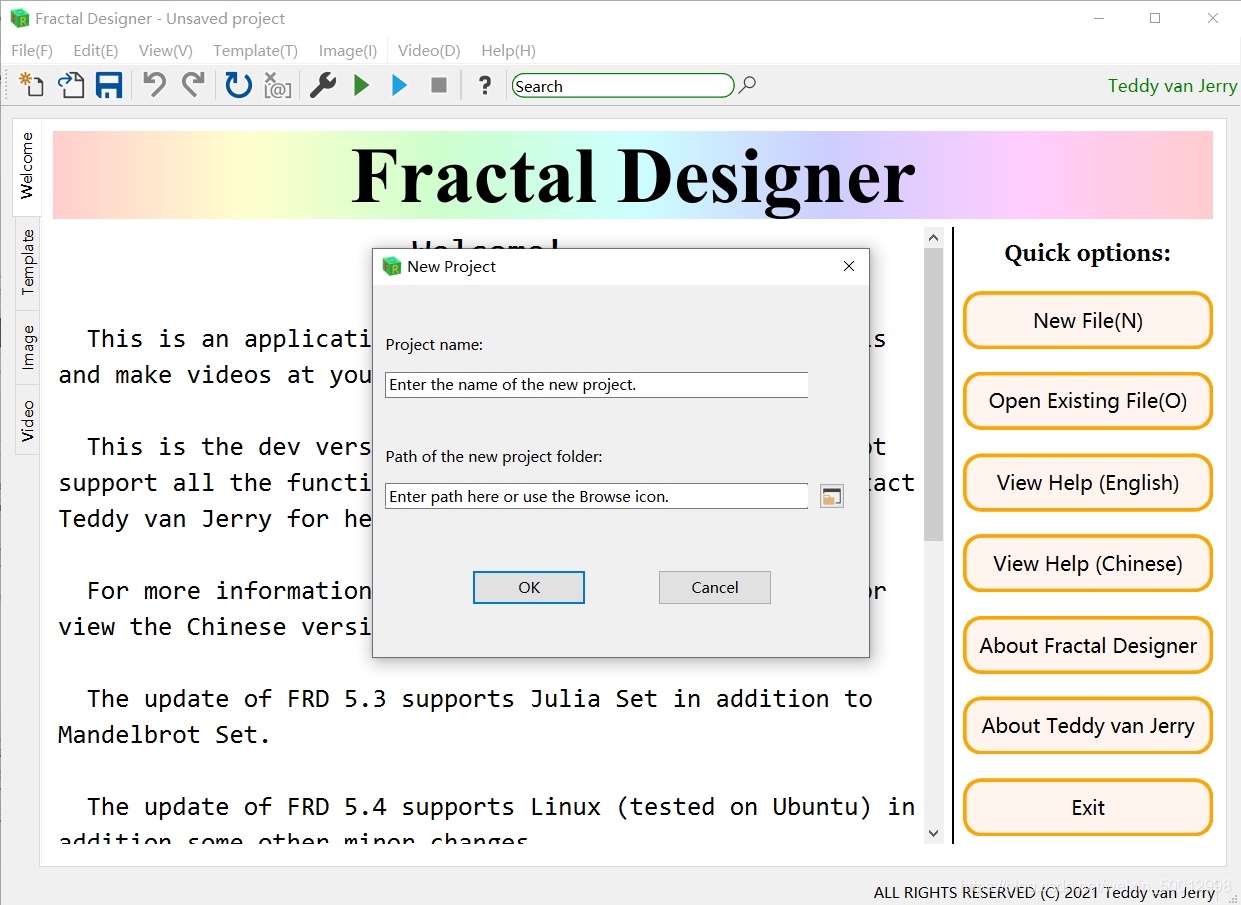
Step 2A - 新建项目
点击 File(F) 中的 New 新建(或者工具栏第一个图标,Ctrl + N),设置文件名和路径。
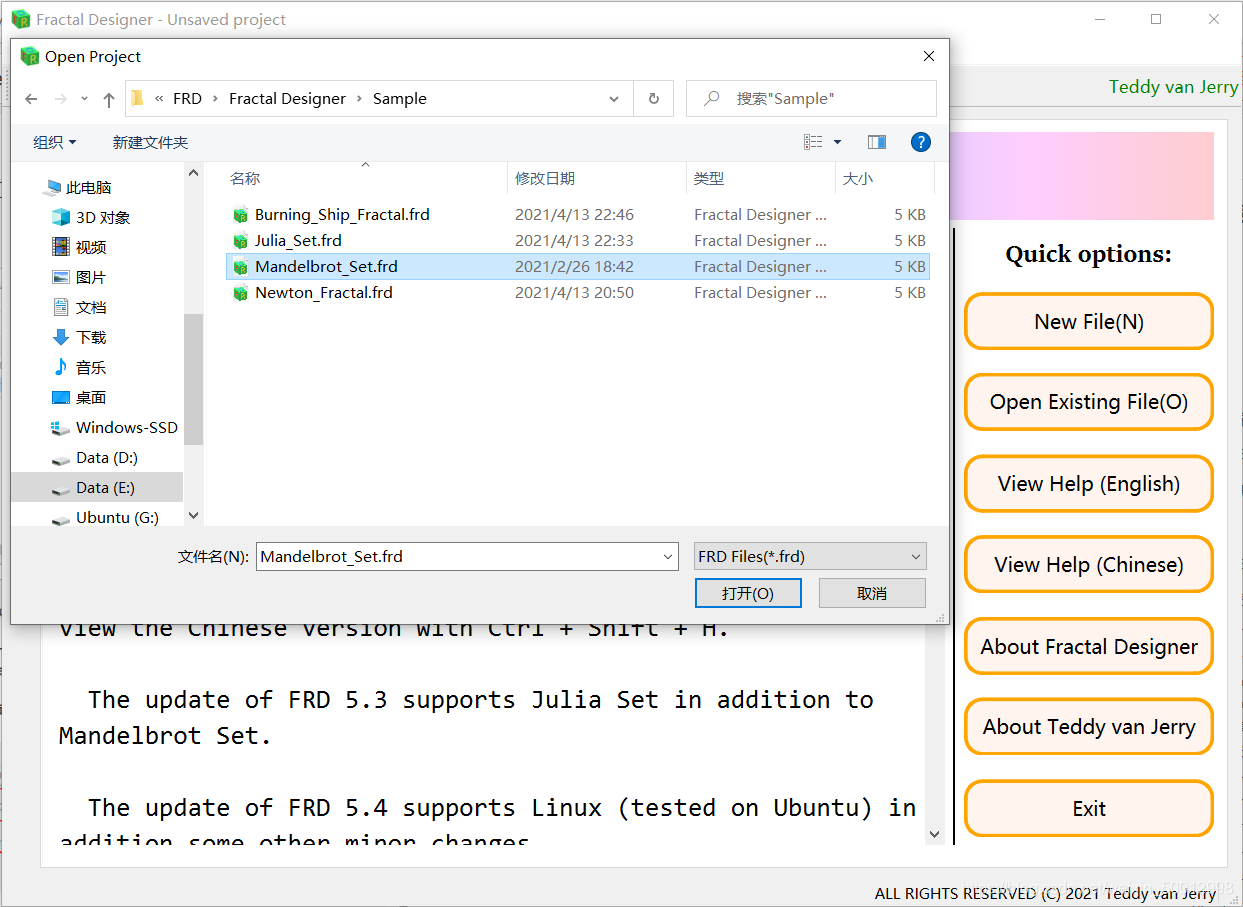
Step 2B - 打开项目
2B.1 - Fractal Designer 内打开
点击 File(F) 中的 Open 打开(或者工具栏第二个图标,Ctrl + O),设置文件名和路径。
2B.2 - Fractal Designer 外打开
Tip: 仅适用于 Windows。
双击 .frd 文件即可。(注意必须在 PC 上运行过一次 Fractal Designer 后才成立)。
2B.3 - 错误提醒
若出现这样的提示:

可能文件被损坏或篡改(或者随意修改后缀为 frd),也有可能是文件名的不规范命名。建议不出现中文、空格。
Step 3 - 选择模板
Fractal Designer 5.5 提供四种模板,Mandelbrot Set, Julia Set, Burning Ship Fractal, Generalized Newton Fractal。
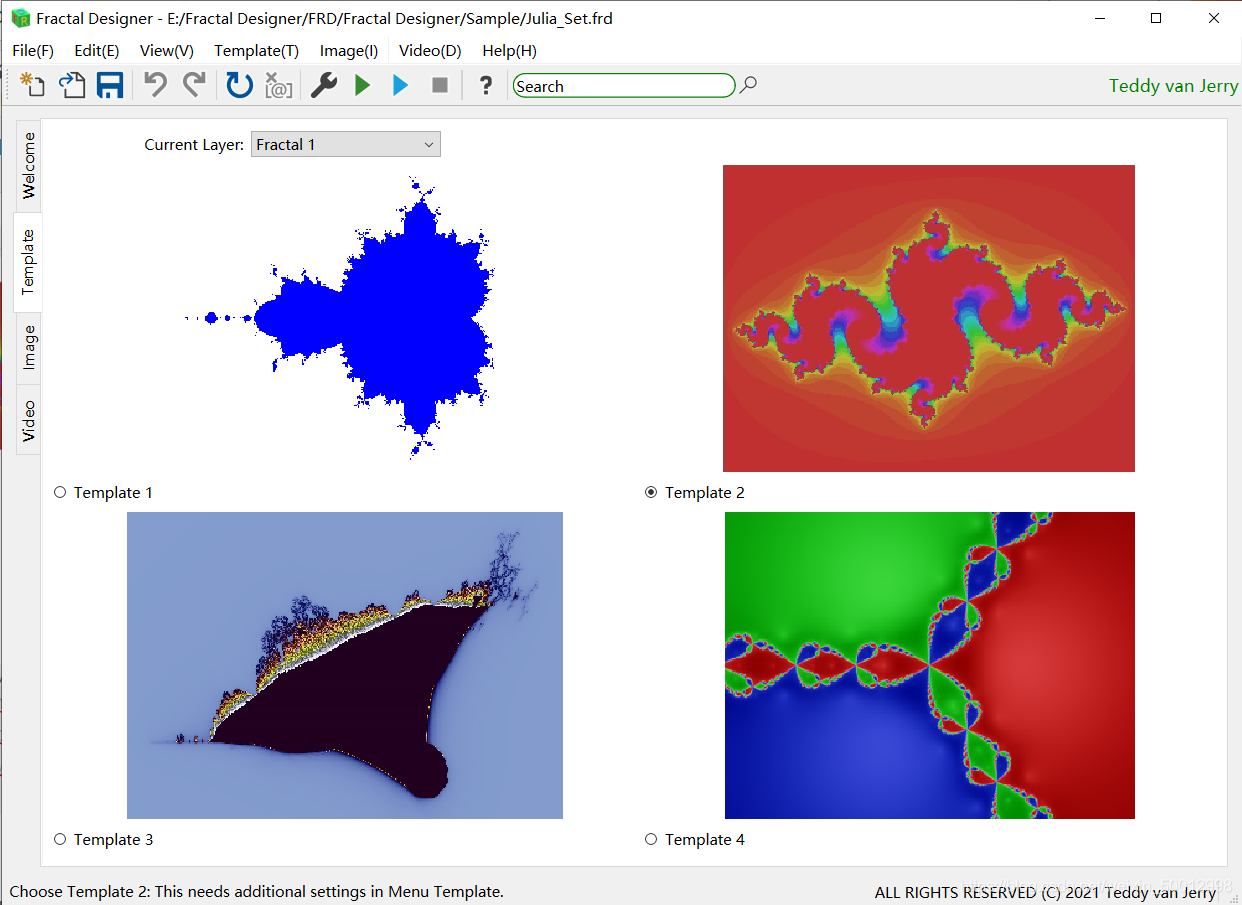
3.1 - Template 1
Mandelbrot Set
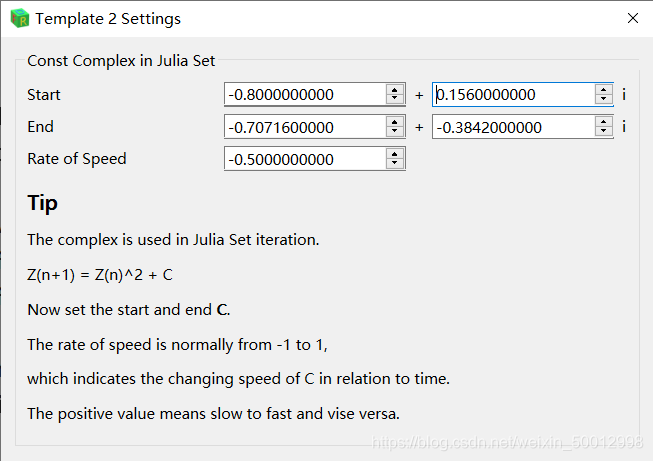
3.2 - Template 2
Julia Set
需要额外设置信息,在 Template->Additional template settings->Template 2
3.3 - Template 3
Burning Ship Fractal
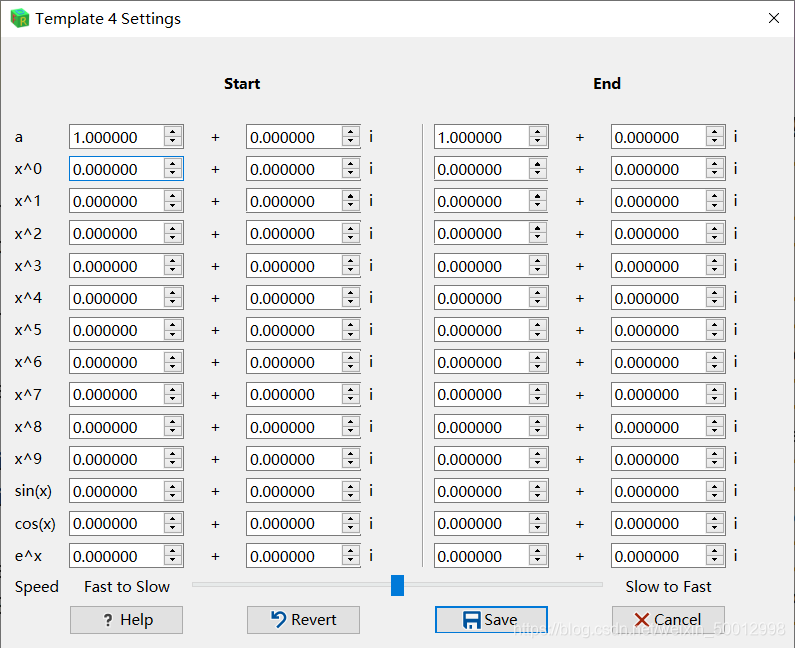
3.4 - Template 4
Generalized Newton Fractal
需要额外设置信息,在 Template->Additional template settings->Template 4
Step 4 - 设置迭代信息
分别为判断收敛和发散的临界模长和最大迭代次数。可点击 Default 设置为默认值。(Template 4 不设置最小模长而是迭代精度)

Step 5 - 设置颜色信息
翻到第二页 DEFINE COLOURS,点击 Customize 按钮设置。
Convergent 收敛点,Unconvergent 发散点。分别设置红、绿、蓝、透明,范围均是 0 到 255。设置中的 t 范围是 0 到 1。A 值 0 为 透明,255 为不透明。设置完后记得点击 Save 保存。保存后的公式将在框内呈现。
Caution: 制作完成的视频不支持透明色,即背景是黑色的,所以设置透明色时需谨慎。

目前不支持 TXT 导入和默认值。
设置完成后可以点击刷新(View 菜单下的 Preview Refresh,Ctrl + F5)预览。拖动预览图片下的进度条或者修改旁边的数值后刷新可查看不同 t 对应的图片效果。
Tip: 可以在 View 菜单下 Preview Settings → \rightarrow →Settings → \rightarrow →Auto Refresh 中设置自动刷新,每次改变 t 的值都会自动刷新。

Tip: 记得保存(工具栏第三个图标,Ctrl + S)
Step 6 - 设置路径信息
6.1 - 设置的基本操作
在表格中设置信息即可。Add 添加一条,Remove 删除一条,Delete 全部删除。
| 符号 | 含义 |
|---|---|
| t | 时间比例 (0 到 1) |
| x | 中心点横坐标 X |
| y | 中心点纵坐标 Y |
| angle | 旋转角度(以逆时针为正方向) |
| width | 图片宽度(必须为正值) |
| v rate | 旋转加速度(正值为先慢后快,范围 0 到 1) |

Tip: 不合法的信息将会用红色标出。
Tip: 点击 Uniform Motion 可重设时间,使之成为匀速状态。
Tip: 点击表格头可以排序。(利用好这个特性可以方便的插入删除一个关键节点)
6.2 - 路径工具(Route Tool)的使用
点击 Image(I) 菜单下的 Route Tool 或者工具栏的扳手图标(Ctrl + T),进入路径工具。

基本操作:
- Centre Coordinate 画面中心点坐标
- Size 界面宽度
- Angle 旋转角度
- t 时间
- Axis Colour 坐标轴颜色(默认透明)
- 左下方 Coordinate 显示鼠标所在位置坐标
- 点击 View(Shift + V)查看图片
- 双击图片上一点可以设置为中心坐标(需另外点击 View)
- 鼠标滚轮可以改变大小(需另外点击 View)
- 可以直接拖动图片以调整位置
- 点击 Save Point (Ctrl + S) 可以直接将点信息存至 Route Info 中
- 可以在 Settings -> Width/Size 中设置 Route Info 中保存的 width 与 Route Tool 中 size 的对应关系
Step 7 - 设置图片信息
- 图片尺寸(宽 X 高)
- 帧率(默认 24)
- 视频总时长(默认 1 分钟,最长 59 分 59 秒)
- 图片存储路径
- 图片前缀

Step 8 - 生成图片
Tip: 此步骤一定要先登录,并且已保存。
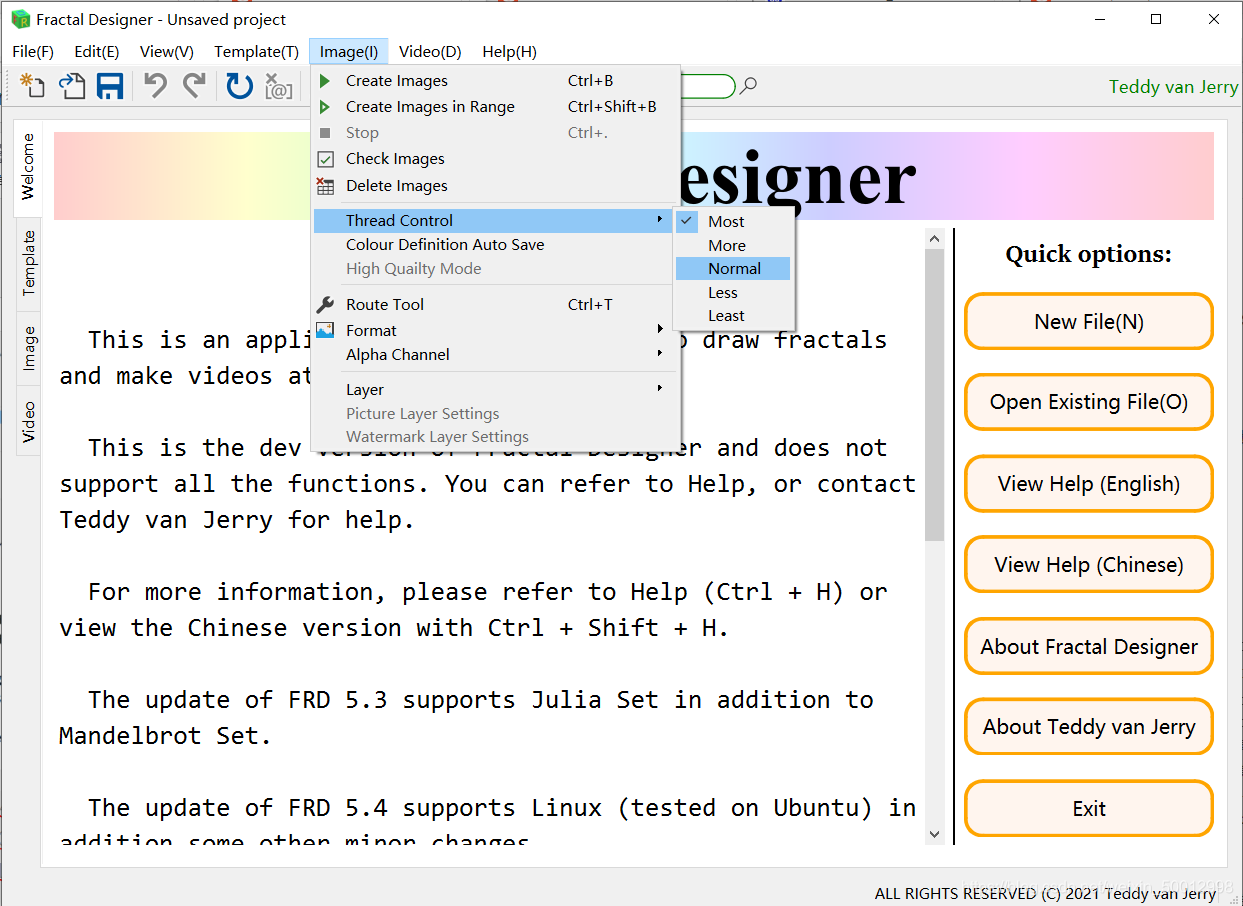
8.1 - 前期准备
选择生成视频过程线程数量,默认为系统最佳性能线程数(例如 Teddy van Jerry 为 12 线程)。可以在 Image -> Thread Control 中选择调整。(Most 即默认,CPU 占用率将达到 100%)
8.2 - 直接生成
点击绿三角按钮(Image 菜单下 Create Images,Ctrl + B)开始生成图片。此过程较慢。

8.3 - 自定义帧范围
选择 Image 菜单下的 Create Images in Range(Ctrl + Shift + B),选择生成的帧范围。帧序号的最大范围是
[
0
,
总
帧
数
−
1
]
[0, 总帧数-1]
[0,总帧数−1]。

点击 Go,开始生成。
8.4 - 强制停止生成
选择 Image 菜单下的 Stop(红方块,Ctrl + .)。
8.5 - 生成结束效果

此时,可以检查有没有漏帧或者有坏帧,如果有,可以使用自定义帧范围生成缺少的帧。
检查是否漏帧可以用 Image 菜单下的 Check Images。
Step 9 - 设置视频信息
视频格式目前不可设定,一定是 mp4 格式。
9.1 - 视频基本信息
Path: 设置视频所在路径
File Name: 视频文件的名称(不含 .mp4 后缀)

Caution: 视频所在路径不建议含有 1.mp3, 2.mp3, …, BGM.mp3,否则可能会被生成视频过程中的临时文件覆盖。
Tip: 若路径中存在同名文件,会征求意见是否覆盖。
9.2 - 背景音乐添加
点击 Add Music 加入一个 mp3 文件。可添不止一个 mp3 文件,将会按照顺序排列。若要循环播放,可以多次添加同一个 mp3 文件。点击 Delete Music,将所有添加的 mp3 信息删除。
Step 10 - 生成视频
10.1 - 正常状态
点击蓝色三角按钮(Video 菜单下的 Create Video,Ctrl + R)。
Tip: 使用此功能需要先登录。
该过程持续不会超过三十分钟,一般用时比视频时长略短。期间界面将失去控制,请耐心等待。
如果正常在结束时会有这样的提示:

10.2 - 错误情况解决
如果没有成功生成视频,可能的原因是 PC 上 PowerShell 或 shell 的执行权限问题。
解决办法:
- 修改电脑 PowerShell 或 shell 的执行权限
- 根据错误提示,按照顺序运行视频预计生成路径上的 PowerShell 或 shell 代码(右击,以 PowerShell 运行)。
可能状态:(均在提示框中有英文指导)
- 不存在 增加 temp 的 mp4 文件:先运行 Create_Video.ps1/sh,等完成后,运行 Add_Music.ps1/sh。
- 存在 增加 temp 的 mp4 文件:直接运行 Add_Music.ps1/sh。
Step 11 - 视频效果
(之前设计的参数非常简单,使用者可以设计自己的更为复杂的参数)
【Fractal Designer】 03 - v 5.0 - Mandelbrot
【Fractal Designer】 04 - v 5.3 - Julia
【Fractal Designer】 05 - v 5.5 - Burning Ship
【Fractal Designer】 06 - v 5.5 - Newton Fractal
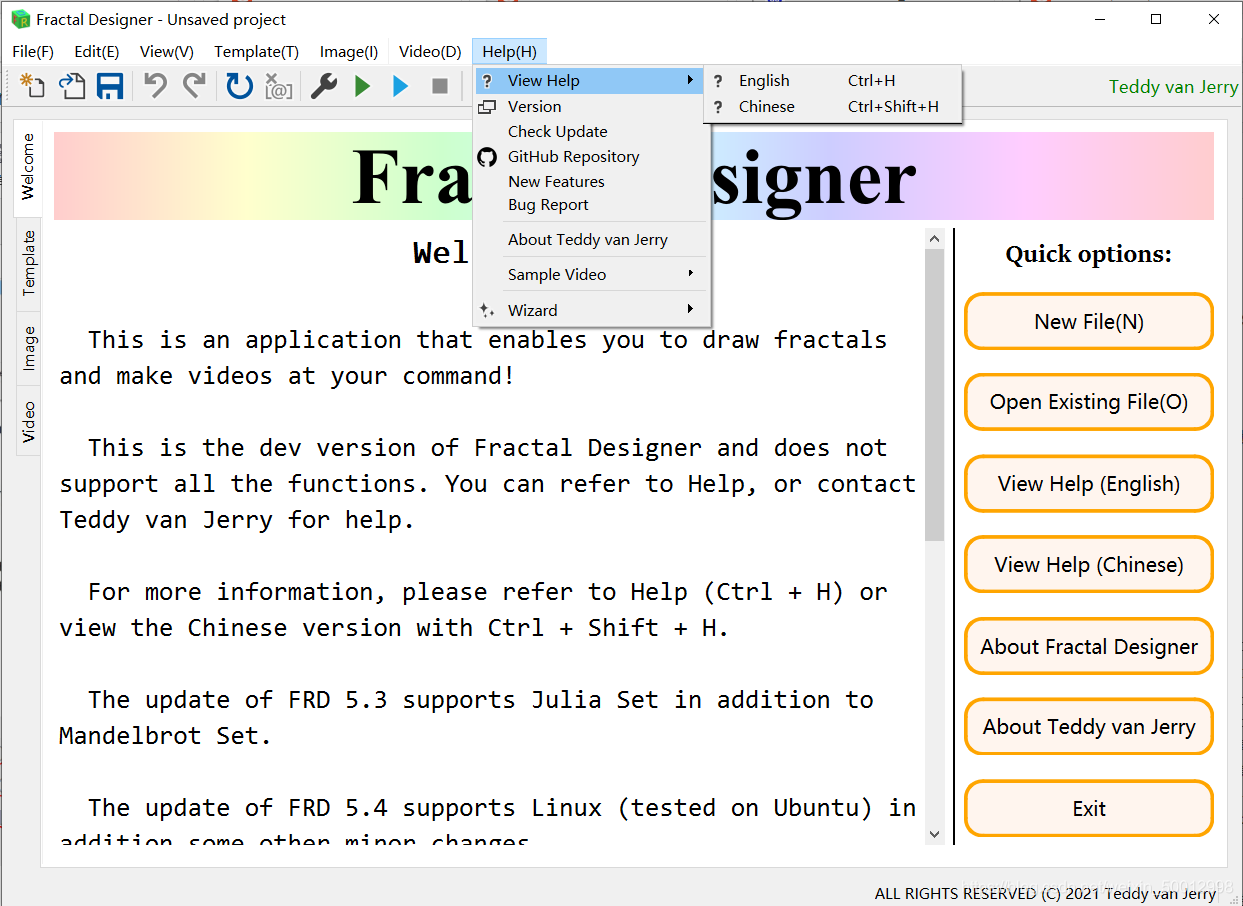
Tip 1 - 帮助文件
在 Help 菜单下的 View Help 中 English 查看英文版帮助(Ctrl + H),点击 Chinese 查看中文版帮助(Ctrl + Shift + H),即此博客。
此外,也有 Version(查看版本信息),Check Update(查看版本更新),GitHub Repository(查看 GitHub 仓库),New Features(查看新特征),Bug Report(Bug 上报),About Teddy van Jerry(进入 Teddy van Jerry 的 CSDN 主页),Sample Video,查看示例视频。
Tip 2 - 撤消与恢复
撤消(Undo),Ctrl + Z
恢复(Redo),Ctrl + Y
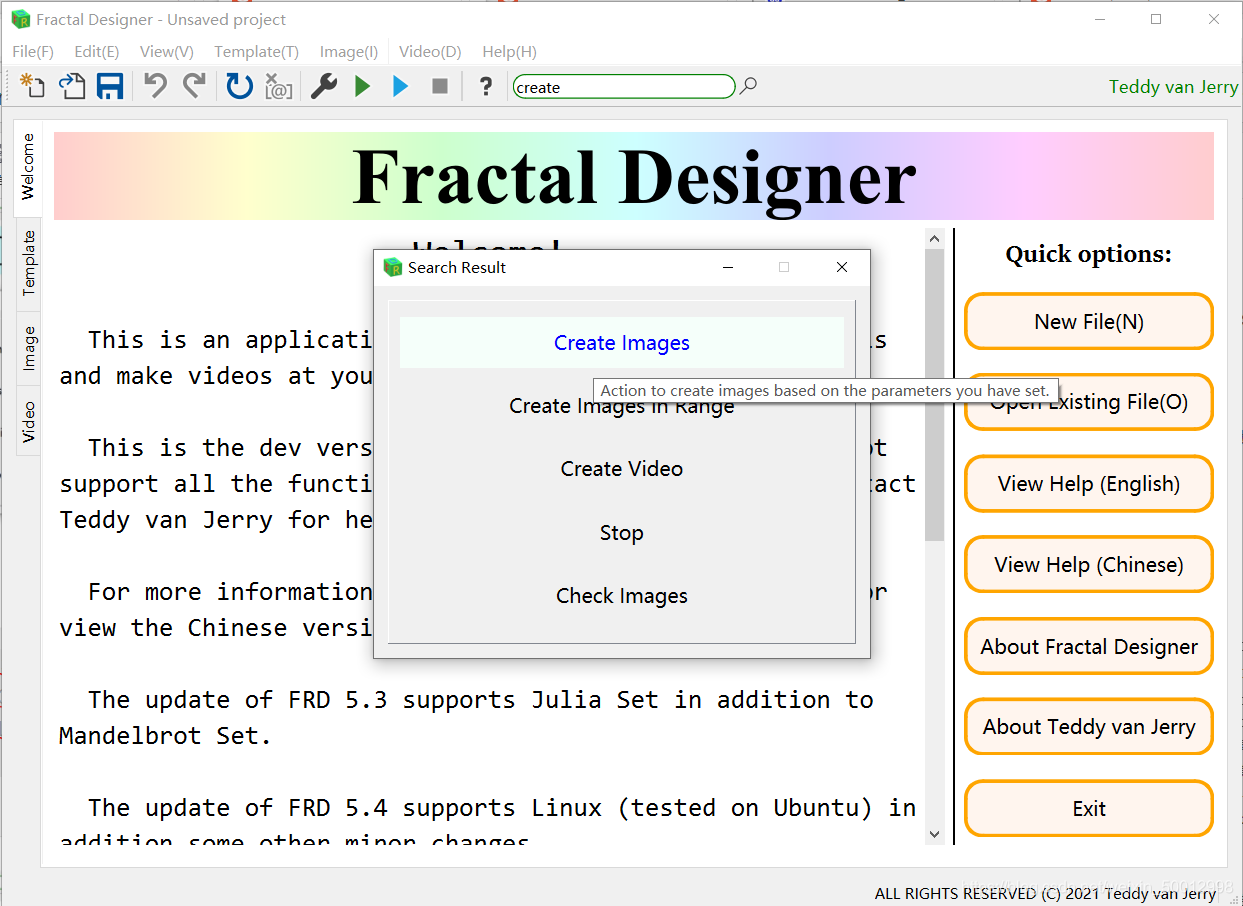
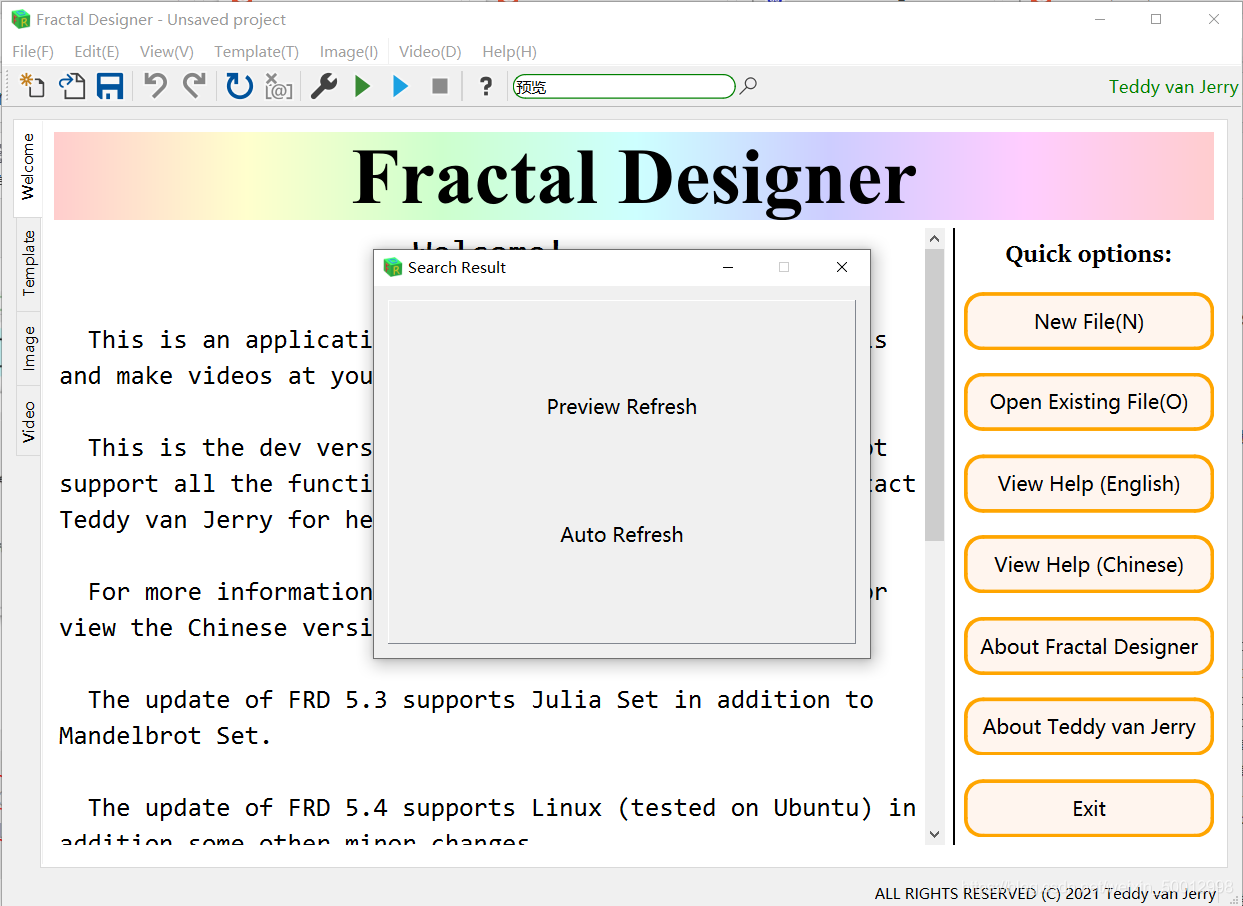
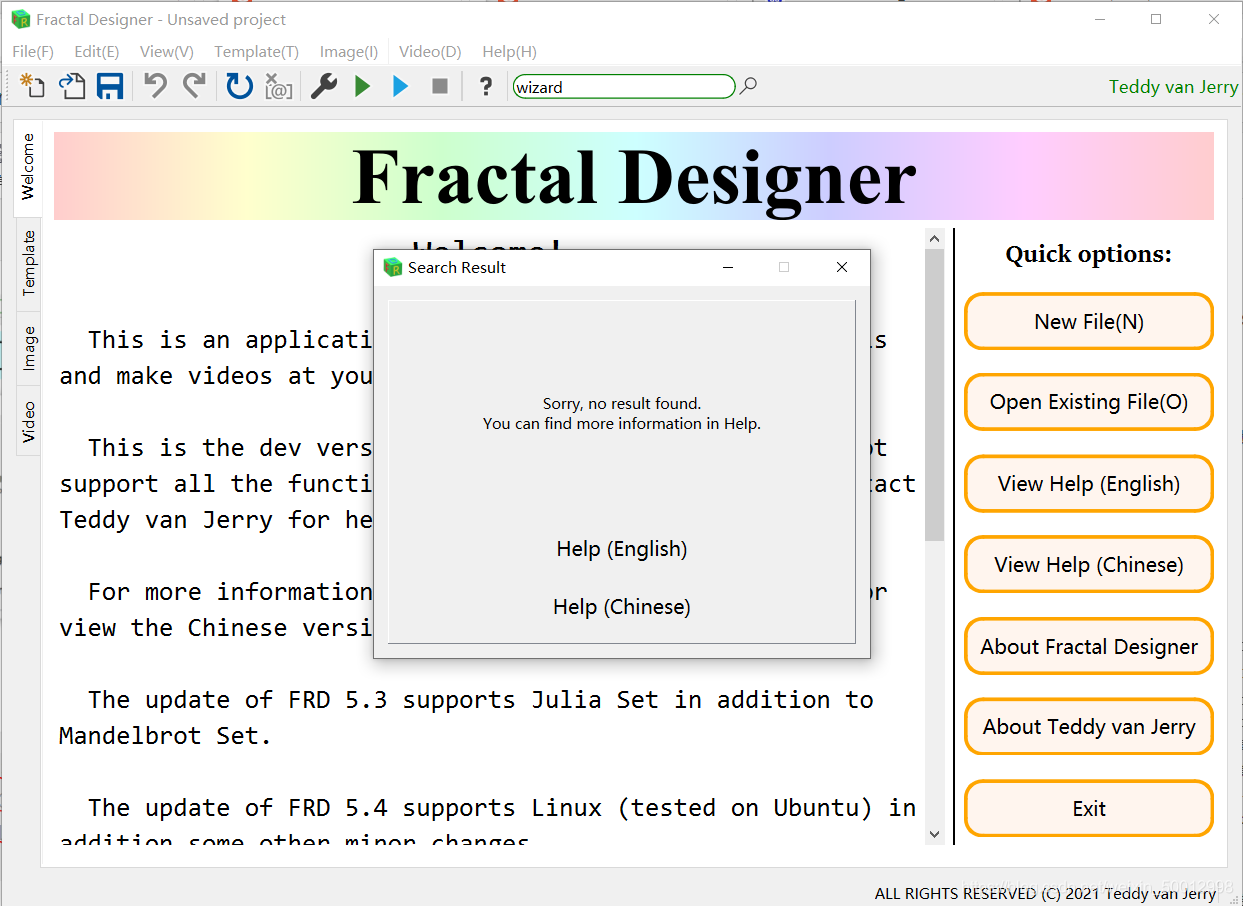
Tip 3 - 搜索功能
工具栏中有搜索功能,支持英文和中文搜索。
Tip: 中文搜索时建议将关键词用空格或英文逗号隔开。
Tip 4 - FRD 4 兼容模式
在 File(F) 中的 FRD 4 Compatibility 有相关操作。
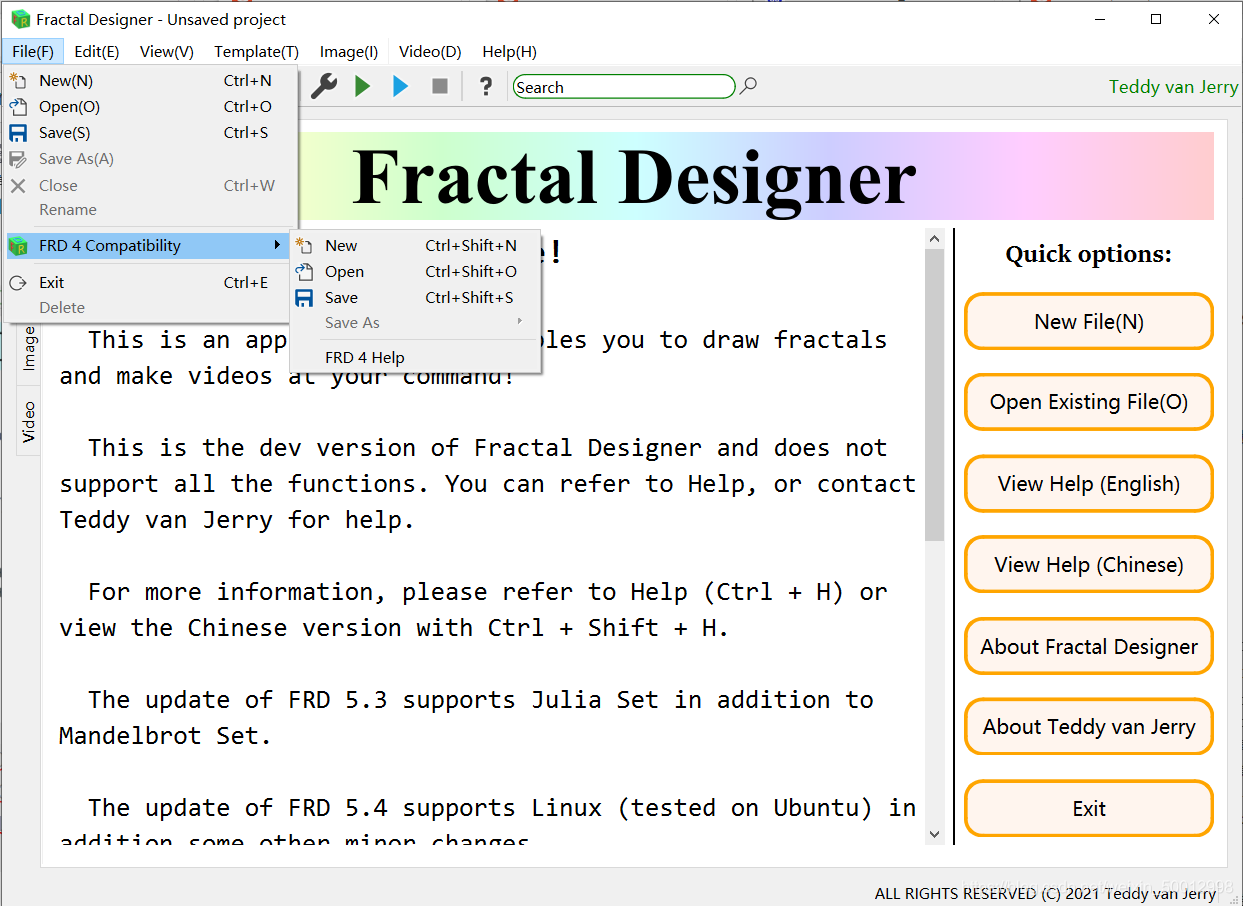
Warning: 使用兼容模式可能会有更多的 Bug,且在 Linux 上未经过测试。
Tip 5 - 其他功能
File 菜单:
- Close 关闭项目
- Exit 退出程序
Video 菜单:
- Install FFmpeg 下载 FFmpeg。(仅在 Windows 有效)
Image 菜单:
- Check Images 检查图片是否生成或遗漏,若有遗漏点击 Yes 重新生成遗漏图片。
- Delete Images 将生成的图片删除。

Windows 11

English Help
1. Start the Fractal Designer
If you want to create images and videos, click on the log in button on the right of the tool bar. There is also a search function in the tool bar.
Available Username (Passcode): CSDN (Southeast61), GitHub (Southeast61), SEU (SEU615205).
You can either build a new project (, Ctrl + N) or open a project (, Ctrl + O) built previously. Fractal Designer project is a file with the suffix .frd and can be run directly by double clicking it. (But the Fractal Designer has to be run at least once on your PC to make it valid.)
There is a sample project in the programme folder named Sample. Choose open project and you can see the parameters defined there.
2. Prepare for creating images
Before you set out to click the green create image button, you have to set parameters which are critical to the project.
First, choose the template.
This version provides Mandelbrot Set (Template 1), Julia Set (Template 2), Burning Ship Fractal (Template 3) and Generalized Newton Fractal (Template 4). If you choose Template 2/4, you need to set additional information in Template -> Additional template settings -> Template 2/4.
Second, define the value in terms of the iteration calculation. You can use the default value by clicking on the button Default. In template 1, 2 and 3, if the iterated point has the modulus greater than Maximum unclassified value, we conclude it as unconvergent point, else if it is less than Minimum unclassified value, we conclude it as convergent point, otherwise, the iteration keeps going until it reaches the Iteration limit. If it still can not be concluded, it is classified into unconvergent points. In Template 4, if the iterated point has the modulus greater than Maximum unclassified value, we conclude it as unconvergent point, else if it is close to the root limit (the extent of being close is set by Solution accuracy, which is mormally a very small positive number), it is classified into unconvergent points. If it still can not be concluded, it is classified into unconvergent points.
Third, define colours, click the Customize button and you can define the RGB value of both convergent points and unconvergent points. There are four channels, Red, Green, Blue, Alpha (Note that the video form mp4 DO NOT support the alpha channel and define alpha to 255 as Opaque, 0 as Transparent.) The t here is a parameter indicating the time with the range of 0 to 1. (Tip: In Template 4, Zn.X and Zn.Y should be major parameters as they are related to the roots of the formula.)
Fourth, define the route information. Click the Add and Remove or Clear button to edit. Click the Uniform Motion button to change t automatically to match the coordinates you have defined so the movement will be in a uniform motion.
t time (0 to 1)
x centre coordinate X
y centre coordinate Y
angle the rotating angle (The positive direction is counterclockwise.)
width the width of the image
v rate a value indicating the change of speed. (Normally, it is between -1 to 1. A positive value means slow to fast and vice versa.)
Tips:
- The invalid setting of t or width will be marked in the colour red.
- Remove button will only remove the last row.
- You can click on the table header to sort the table content.
- Use the sorting function well so you can add and remove rows easily.
- You can use the Route Tool (, Ctrl + T) which has the icon of a hammer to assist you. You can drag the image to move, and use the wheel to change the size of the image (the centre point remains the same and this needs additional click of the View button). Double click to set this point as the the centre point (this needs additional click of the View button). Clicking the Save Point (, Strl + S) to add Route Tool information to the main window Route Info table. Besides, you can set the relationship between Size and Width.
Please note that in this version (v 5.5), the v rate only supports angle.
Fifth, define other information related to the project.
Remember to save (Ctrl + S) the information you have defined.
Having done that, you can refresh (, Ctrl + F5) to preview your work. Dragging the slider, you can view colours at different t value. You can also set Auto Refresh in the Menu Image which enables the automatic refresh after t changes.
3. Create images
Before creating images, you have to save the project first.
Click on the green triangle (, Ctrl + B), start creating images. Default setting will run CPU to 100%, if you want to change that, use Thread Control in Menu Image.
The red Stop button (, Ctrl + .) can stop the creating thread immediately. The thread can not be resumed, but you can use Creating Images in Range (, Ctrl + Shift + B) to specify the range of images.
This process can be time-consuming.
4. Create video
Creating Video is based on FFmpeg. If you have not installed FFmpeg, find the FFmpeg option in Menu Video of the main window.
Define the video file name and the path. Click on the blue triangle (, Ctrl + B), and if it works well, it will be finished within several minutes and possibly several seconds. But do be patient as the main window can not be clicked during creating the video.
Sometimes the failure of creating video is due to the execution policy of PowerShell oe Shell on your PC, you can run the PowerShell file Create_Video.ps1/sh and Add_Music.ps1/sh which are in the video folder according to instructions given when failure occurs.
Caution: The path you choose to create the video should avoid files like ‘1.mp3’, ‘2.mp3’, … and ‘BGM.mp3’ as they are temporary files during creating videos.
5. Other information
- Be careful with the compatibility mode, and any careless actions can lead to the crash of it. It is advised not to use that. The compatibility mode does not support Linux platform.
- To report bugs, click on the Report Bug option in Menu Help.
- Choose the option Check for updates or follow Teddy-van-Jerry in GitHub or Teddy van Jerry in CSDN to check for updates.
- This help has the shortcut Ctrl + H, to view the Chinese version, you can use Ctrl + Shift + H.
- Fractal Designer provides online video samples in the Menu Help.
- New Features is also available to be checked in the Menu More of the Help window.
- Use the searching function well and it supports Chinese searching.
- All the editings can call the Undo (, Ctrl + X) and Redo (, Ctrl + Y) and supports momories up to 50 actions. (except the Compatibility Module.)
- Check Images () can check if there are missed images and you can choose to recreate those.
- Delete Images () can delete images already created.
- Be careful that finishing editing a line or a combo box (i.e. the focus is removed) can the information be recognized or saved.
- To close a project (), Ctrl + W. To exit the application (), Crtl + E.
- Fractal Designer 5.5 is licenced under The MIT Licence. © 2021 Teddy van Jerry
Fractal Designer - Version 5.5.3 - 2021/04/13
ALL RIGHTS RESERVED © 2021 Teddy van Jerry
欢迎转载,转载请注明出处。
See also

瓜分20万奖金 获得内推名额 丰厚实物奖励 易参与易上手
更多推荐


 2
2 0
0- 0


 已为社区贡献6条内容

所有评论(0)