

项目的需求是mysql到mysql
一、首先需要安装canal-server,之前的博客也简单写过,这就跳过了。
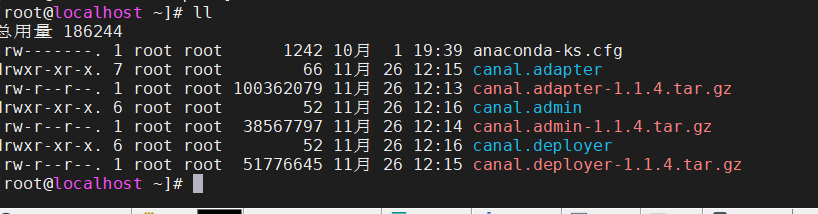
二、配置canal.adapter
- 下载canal.adapter 解压 https://github.com/alibaba/canal/releases
- 编辑
application.yml
server:
  port: 8081
spring:
  jackson:
    date-format: yyyy-MM-dd HH:mm:ss
    time-zone: GMT+8
    default-property-inclusion: non_null

canal.conf:
  mode: tcp # kafka rocketMQ
  canalServerHost: 127.0.0.1:11111
#  zookeeperHosts: slave1:2181
#  mqServers: 127.0.0.1:9092 #or rocketmq
#  flatMessage: true
  batchSize: 500
  syncBatchSize: 1000
  retries: 0
  timeout:
  accessKey:
  secretKey:
  srcDataSources:
    demoSrc:
      url: jdbc:mysql://192.168.1.104:3308/canal?useUnicode=true
      username: root
      password: root
  canalAdapters:
  - instance: example # canal instance Name or mq topic name
    groups:
    - groupId: g1
      outerAdapters:
      - name: logger
      - name: rdb
        key: demoDes
        properties:
          jdbc.driverClassName: com.mysql.jdbc.Driver
          jdbc.url: jdbc:mysql://192.168.1.104:3308/test?useUnicode=true
          jdbc.username: root
          jdbc.password: root
#      - name: rdb
#        key: oracle1
#        properties:
#          jdbc.driverClassName: oracle.jdbc.OracleDriver
#          jdbc.url: jdbc:oracle:thin:@localhost:49161:XE
#          jdbc.username: mytest
#          jdbc.password: m121212
#      - name: rdb
#        key: postgres1
#        properties:
#          jdbc.driverClassName: org.postgresql.Driver
#          jdbc.url: jdbc:postgresql://localhost:5432/postgres
#          jdbc.username: postgres
#          jdbc.password: 121212
#          threads: 1
#          commitSize: 3000
#      - name: hbase
#        properties:
#          hbase.zookeeper.quorum: 127.0.0.1
#          hbase.zookeeper.property.clientPort: 2181
#          zookeeper.znode.parent: /hbase
#      - name: es
#        hosts: 127.0.0.1:9300 # 127.0.0.1:9200 for rest mode
#        properties:
#          mode: transport # or rest
#          # security.auth: test:123456 #  only used for rest mode
#          cluster.name: elasticsearch
adapter.conf:
  datasourceConfigs:                # 数据源配置列表, 数据源将在适配器中用于ETL、数据同步回查等使用
    defaultDS:                      # 数据源 dataSourceKey, 适配器中通过该值获取指定数据源
      url: jdbc:mysql://192.168.1.104:3308/canal?useUnicode=true
      username: root
      password: root
  adapterConfigs:                   # 适配器内部配置列表
  - rdb/book.yml
  - rdb/cluster.yml
注意,最后这段是我参考官网的,写多个文件对应多个表
dataSourceKey: demoSrc
destination: example
groupId: g1
outerAdapterKey: demoDes
concurrent: true
dbMapping:
  database: canal
  table: tb_book2
  targetTable: test.tb_book2
  targetPk:
    id: id
  mapAll: true
  etlCondition: "where c_time>={}"
  commitBatch: 3000 # 批量提交的大小
注意如果是多个主键可以换行对应
三、测试

其他的配置可以查看官网
基本说明
canal 1.1.1版本之后, 增加客户端数据落地的适配及启动功能, 目前支持功能:
- 客户端启动器
- 同步管理REST接口
- 日志适配器, 作为DEMO
- HBase的数据同步(表对表同步), ETL功能
- (后续支持) ElasticSearch多表数据同步,ETL功能
环境版本
- 操作系统:无要求
- java版本: jdk1.8 以上
- canal 版本: 请下载最新的安装包,本文以当前v1.1.1 的canal.deployer-1.1.1.tar.gz为例
- MySQL版本 :5.7.18
- HBase版本: Apache HBase 1.1.2, 若和服务端版本不一致可自行替换客户端HBase依赖
一、适配器启动器
client-adapter分为适配器和启动器两部分, 适配器为多个fat jar, 每个适配器会将自己所需的依赖打成一个包, 以SPI的方式让启动器动态加载
启动器为 SpringBoot 项目, 支持canal-client启动的同时提供相关REST管理接口, 运行目录结构为:
- bin
    restart.sh
    startup.bat
    startup.sh
    stop.sh
- lib
    client-adapter.logger-1.1.1-jar-with-dependencies.jar
    client-adapter.hbase-1.1.1-jar-with-dependencies.jar
    ...
- conf
    application.yml
    - hbase
        mytest_person2.yml
- logs
以上目录结构最终会打包成 canal-adapter-launcher.tar.gz 压缩包
二、启动器
2.1 启动器配置 application.yml
canal相关配置部分说明
canal.conf:
  canalServerHost: 127.0.0.1:11111  # 对应单机模式下的canal server的ip:port
  zookeeperHosts: slave1:2181       # 对应集群模式下的zk地址, 如果配置了canalServerHost, 则以canalServerHost为准
  bootstrapServers: slave1:6667     # kafka或rocketMQ地址, 与canalServerHost不能并存
  flatMessage: true                 # 扁平message开关, 是否以json字符串形式投递数据, 仅在kafka/rocketMQ模式下有效
  canalInstances:                   # canal实例组, 如果是tcp模式可配置此项
  - instance: example               # 对应canal destination
    groups:                  # 对应适配器分组, 分组间的适配器并行运行
    - outAdapters:                  # 适配器列表, 分组内的适配串行运行
      - name: logger                # 适配器SPI名
      - name: hbase
        properties:                 # HBase相关连接参数
          hbase.zookeeper.quorum: slave1
          hbase.zookeeper.property.clientPort: 2181
          zookeeper.znode.parent: /hbase
  mqTopics:                         # MQ topic组, 如果是kafka或者rockeMQ模式可配置此项, 与canalInstances不能并存
  - mqMode: kafka                   # MQ的模式: kafak/rocketMQ
    topic: example                  # MQ topic
    groups:                         # group组
    - groupId: g2                   # group id
      outAdapters:                  # 适配器列表, 以下配置和canalInstances中一样
      - name: logger
适配器相关配置部分说明
adapter.conf:
  datasourceConfigs:                # 数据源配置列表, 数据源将在适配器中用于ETL、数据同步回查等使用
    defaultDS:                      # 数据源 dataSourceKey, 适配器中通过该值获取指定数据源
      url: jdbc:mysql://127.0.0.1:3306/mytest?useUnicode=true
      username: root
      password: 121212
  adapterConfigs:                   # 适配器内部配置列表
  - hbase/mytest_person2.yml        # 类型/配置文件名, 这里示例就是对应HBase适配器hbase目录下的mytest_person2.yml文件
2.2 同步管理REST接口
2.2.1 查询所有订阅同步的canal destination或MQ topic
curl http://127.0.0.1:8081/destinations2.2.2 数据同步开关
curl http://127.0.0.1:8081/syncSwitch/example/off -X PUT针对 example 这个canal destination/MQ topic 进行开关操作. off代表关闭, 该destination/topic下的同步将阻塞或者断开连接不再接收数据, on代表开启
注: 如果在配置文件中配置了 zookeeperHosts 项, 则会使用分布式锁来控制HA中的数据同步开关, 如果是单机模式则使用本地锁来控制开关
2.2.3 数据同步开关状态
curl http://127.0.0.1:8081/syncSwitch/example查看指定 canal destination/MQ topic 的数据同步开关状态
2.2.4 手动ETL
curl http://127.0.0.1:8081/etl/hbase/mytest_person2.yml -X POST -d "params=2018-10-21 00:00:00"导入数据到指定类型的库
2.2.5 查看相关库总数据
curl http://127.0.0.1:8081/count/hbase/mytest_person2.yml2.3 启动canal-adapter示例
2.3.1 启动canal server (单机模式), 参考: Canal QuickStart
2.3.2 修改conf/application.yml为:
server:
  port: 8081
logging:
  level:
    com.alibaba.otter.canal.client.adapter.hbase: DEBUG
spring:
  jackson:
    date-format: yyyy-MM-dd HH:mm:ss
    time-zone: GMT+8
    default-property-inclusion: non_null

canal.conf:
  canalServerHost: 127.0.0.1:11111
  flatMessage: true
  canalInstances:
  - instance: example
    adapterGroups:
    - outAdapters:
      - name: logger
启动
bin/startup.sh三、HBase适配器
3.1 修改启动器配置: application.yml
server:
  port: 8081
logging:
  level:
    com.alibaba.otter.canal.client.adapter.hbase: DEBUG
spring:
  jackson:
    date-format: yyyy-MM-dd HH:mm:ss
    time-zone: GMT+8
    default-property-inclusion: non_null

canal.conf:
  canalServerHost: 127.0.0.1:11111
  flatMessage: true
  srcDataSources:
    defaultDS:
      url: jdbc:mysql://127.0.0.1:3306/mytest?useUnicode=true
      username: root
      password: 121212
  canalInstances:
  - instance: example
    adapterGroups:
    - outAdapters:
      - name: hbase
        properties:
          hbase.zookeeper.quorum: slave1
          hbase.zookeeper.property.clientPort: 2181
          zookeeper.znode.parent: /hbase
adapter将会自动加载 conf/hbase 下的所有.yml结尾的配置文件
3.2 适配器表映射文件
修改 conf/hbase/mytest_person.yml文件:
dataSourceKey: defaultDS            # 对应application.yml中的datasourceConfigs下的配置
hbaseMapping:                       # mysql--HBase的单表映射配置
  mode: STRING                      # HBase中的存储类型, 默认统一存为String, 可选: #PHOENIX  #NATIVE   #STRING
                                    # NATIVE: 以java类型为主, PHOENIX: 将类型转换为Phoenix对应的类型
  destination: example              # 对应 canal destination/MQ topic 名称
  database: mytest                  # 数据库名/schema名
  table: person                     # 表名
  hbaseTable: MYTEST.PERSON         # HBase表名
  family: CF                        # 默认统一Column Family名称
  uppercaseQualifier: true          # 字段名转大写, 默认为true
  commitBatch: 3000                 # 批量提交的大小, ETL中用到
  #rowKey: id,type                  # 复合字段rowKey不能和columns中的rowKey并存
                                    # 复合rowKey会以 '|' 分隔
  columns:                          # 字段映射, 如果不配置将自动映射所有字段,
                                    # 并取第一个字段为rowKey, HBase字段名以mysql字段名为主
    id: ROWKE
    name: CF:NAME
    email: EMAIL                    # 如果column family为默认CF, 则可以省略
    type:                           # 如果HBase字段和mysql字段名一致, 则可以省略
    c_time:
    birthday:
如果涉及到类型转换,可以如下形式:
...
  columns:
    id: ROWKE$STRING
    ...
    type: TYPE$BYTE
    ...
类型转换涉及到Java类型和Phoenix类型两种, 分别定义如下:
#Java 类型转换, 对应配置 mode: NATIVE
$DEFAULT
$STRING
$INTEGER
$LONG
$SHORT
$BOOLEAN
$FLOAT
$DOUBLE
$BIGDECIMAL
$DATE
$BYTE
$BYTES
#Phoenix 类型转换, 对应配置 mode: PHOENIX
$DEFAULT                  对应PHOENIX里的VARCHAR
$UNSIGNED_INT             对应PHOENIX里的UNSIGNED_INT           4字节
$UNSIGNED_LONG            对应PHOENIX里的UNSIGNED_LONG          8字节
$UNSIGNED_TINYINT         对应PHOENIX里的UNSIGNED_TINYINT       1字节
$UNSIGNED_SMALLINT        对应PHOENIX里的UNSIGNED_SMALLINT      2字节
$UNSIGNED_FLOAT           对应PHOENIX里的UNSIGNED_FLOAT         4字节
$UNSIGNED_DOUBLE          对应PHOENIX里的UNSIGNED_DOUBLE        8字节
$INTEGER                  对应PHOENIX里的INTEGER                4字节
$BIGINT                   对应PHOENIX里的BIGINT                 8字节
$TINYINT                  对应PHOENIX里的TINYINT                1字节
$SMALLINT                 对应PHOENIX里的SMALLINT               2字节
$FLOAT                    对应PHOENIX里的FLOAT                  4字节
$DOUBLE                   对应PHOENIX里的DOUBLE                 8字节
$BOOLEAN                  对应PHOENIX里的BOOLEAN                1字节
$TIME                     对应PHOENIX里的TIME                   8字节
$DATE                     对应PHOENIX里的DATE                   8字节
$TIMESTAMP                对应PHOENIX里的TIMESTAMP              12字节
$UNSIGNED_TIME            对应PHOENIX里的UNSIGNED_TIME          8字节
$UNSIGNED_DATE            对应PHOENIX里的UNSIGNED_DATE          8字节
$UNSIGNED_TIMESTAMP       对应PHOENIX里的UNSIGNED_TIMESTAMP     12字节
$VARCHAR                  对应PHOENIX里的VARCHAR                动态长度
$VARBINARY                对应PHOENIX里的VARBINARY              动态长度
$DECIMAL                  对应PHOENIX里的DECIMAL                动态长度
如果不配置将以java对象原生类型默认映射转换
3.3 启动HBase数据同步
创建HBase表
在HBase shell中运行:
create 'MYTEST.PERSON', {NAME=>'CF'}启动canal-adapter启动器
bin/startup.sh验证
修改mysql mytest.person表的数据, 将会自动同步到HBase的MYTEST.PERSON表下面, 并会打出DML的log
四、关系型数据库适配器
RDB adapter 用于适配mysql到任意关系型数据库(需支持jdbc)的数据同步及导入
4.1 修改启动器配置: application.yml, 这里以oracle目标库为例
server:
  port: 8081
logging:
  level:
    com.alibaba.otter.canal.client.adapter.rdb: DEBUG
......

canal.conf:
  canalServerHost: 127.0.0.1:11111
  srcDataSources:
    defaultDS:
      url: jdbc:mysql://127.0.0.1:3306/mytest?useUnicode=true
      username: root
      password: 121212
  canalInstances:
  - instance: example
    groups:
    - outAdapters:
      - name: rdb                                               # 指定为rdb类型同步
        key: oracle1                                            # 指定adapter的唯一key, 与表映射配置中outerAdapterKey对应
        properties:
          jdbc.driverClassName: oracle.jdbc.OracleDriver        # jdbc驱动名, jdbc的jar包需要自行放致lib目录下
          jdbc.url: jdbc:oracle:thin:@localhost:49161:XE        # jdbc url
          jdbc.username: mytest                                 # jdbc username
          jdbc.password: m121212                                # jdbc password
          threads: 5                                            # 并行执行的线程数, 默认为1
          commitSize: 3000                                      # 批次提交的最大行数
其中 outAdapter 的配置: name统一为rdb, key为对应的数据源的唯一标识需和下面的表映射文件中的outerAdapterKey对应, properties为目标库jdb的相关参数 adapter将会自动加载 conf/rdb 下的所有.yml结尾的表映射配置文件
4.2 适配器表映射文件
修改 conf/rdb/mytest_user.yml文件:
dataSourceKey: defaultDS        # 源数据源的key, 对应上面配置的srcDataSources中的值
destination: example            # cannal的instance或者MQ的topic
outerAdapterKey: oracle1        # adapter key, 对应上面配置outAdapters中的key
concurrent: true                # 是否按主键hase并行同步, 并行同步的表必须保证主键不会更改及主键不能为其他同步表的外键!!
dbMapping:
  database: mytest              # 源数据源的database/shcema
  table: user                   # 源数据源表名
  targetTable: mytest.tb_user   # 目标数据源的库名.表名
  targetPk:                     # 主键映射
    id: id                      # 如果是复合主键可以换行映射多个
#  mapAll: true                 # 是否整表映射, 要求源表和目标表字段名一模一样 (如果targetColumns也配置了映射,则以targetColumns配置为准)
  targetColumns:                # 字段映射, 格式: 目标表字段: 源表字段, 如果字段名一样源表字段名可不填
    id:
    name:
    role_id:
    c_time:
    test1:
导入的类型以目标表的元类型为准, 将自动转换
4.3 启动RDB数据同步
将目标库的jdbc jar包放入lib文件夹, 这里放入ojdbc6.jar
启动canal-adapter启动器
bin/startup.sh验证
修改mysql mytest.user表的数据, 将会自动同步到Oracle的MYTEST.TB_USER表下面, 并会打出DML的log
五、ElasticSearch适配器
5.1 修改启动器配置: application.yml
server:
  port: 8081
logging:
  level:
    com.alibaba.otter.canal.client.adapter.es: DEBUG
spring:
  jackson:
    date-format: yyyy-MM-dd HH:mm:ss
    time-zone: GMT+8
    default-property-inclusion: non_null

canal.conf:
  canalServerHost: 127.0.0.1:11111
  flatMessage: true
  srcDataSources:
    defaultDS:
      url: jdbc:mysql://127.0.0.1:3306/mytest?useUnicode=true
      username: root
      password: 121212
  canalInstances:
  - instance: example
    adapterGroups:
    - outAdapters:
      - name: es
        hosts: 127.0.0.1:9300               # es 集群地址, 逗号分隔
        properties:
          cluster.name: elasticsearch       # es cluster name
adapter将会自动加载 conf/es 下的所有.yml结尾的配置文件
5.2 适配器表映射文件
修改 conf/es/mytest_user.yml文件:
dataSourceKey: defaultDS        # 源数据源的key, 对应上面配置的srcDataSources中的值
destination: example            # cannal的instance或者MQ的topic
esMapping:
  _index: mytest_user           # es 的索引名称
  _type: _doc                   # es 的doc名称
  _id: _id                      # es 的_id, 如果不配置该项必须配置下面的pk项_id则会由es自动分配
#  pk: id                       # 如果不需要_id, 则需要指定一个属性为主键属性
  # sql映射
  sql: "select a.id as _id, a.name as _name, a.role_id as _role_id, b.role_name as _role_name,
        a.c_time as _c_time, c.labels as _labels from user a
        left join role b on b.id=a.role_id
        left join (select user_id, group_concat(label order by id desc separator ';') as labels from label
        group by user_id) c on c.user_id=a.id"
#  objFields:
#    _labels: array:;           # 数组或者对象属性, array:; 代表以;字段里面是以;分隔的
#    _obj: obj:{"test":"123"}
  etlCondition: "where a.c_time>='{0}'"     # etl 的条件参数
  commitBatch: 3000                         # 提交批大小
sql映射说明:
sql支持多表关联自由组合, 但是有一定的限制:
- 主表不能为子查询语句
- 只能使用left outer join即最左表一定要是主表
- 关联从表如果是子查询不能有多张表
- 主sql中不能有where查询条件(从表子查询中可以有where条件但是不推荐, 可能会造成数据同步的不一致, 比如修改了where条件中的字段内容)
- 关联条件只允许主外键的'='操作不能出现其他常量判断比如: on a.role_id=b.id and b.statues=1
- 关联条件必须要有一个字段出现在主查询语句中比如: on a.role_id=b.id 其中的 a.role_id 或者 b.id 必须出现在主select语句中
Elastic Search的mapping 属性与sql的查询值将一一对应(不支持 select *), 比如: select a.id as _id, a.name, a.email as _email from user, 其中name将映射到es mapping的name field, _email将 映射到mapping的_email field, 这里以别名(如果有别名)作为最终的映射字段. 这里的_id可以填写到配置文件的 _id: _id映射.
5.2.1.单表映射索引示例sql:
select a.id as _id, a.name, a.role_id, a.c_time from user a该sql对应的es mapping示例:
{
    "mytest_user": {
        "mappings": {
            "_doc": {
                "properties": {
                    "name": {
                        "type": "text"
                    },
                    "role_id": {
                        "type": "long"
                    },
                    "c_time": {
                        "type": "date"
                    }
                }
            }
        }
    }
}
5.2.2.单表映射索引示例sql带函数或运算操作:
select a.id as _id, concat(a.name,'_test') as name, a.role_id+10000 as role_id, a.c_time from user a函数字段后必须跟上别名, 该sql对应的es mapping示例:
{
    "mytest_user": {
        "mappings": {
            "_doc": {
                "properties": {
                    "name": {
                        "type": "text"
                    },
                    "role_id": {
                        "type": "long"
                    },
                    "c_time": {
                        "type": "date"
                    }
                }
            }
        }
    }
}
5.2.3.多表映射(一对一, 多对一)索引示例sql:
select a.id as _id, a.name, a.role_id, b.role_name, a.c_time from user a
left join role b on b.id = a.role_id
注:这里join操作只能是left outer join, 第一张表必须为主表!!
该sql对应的es mapping示例:
{
    "mytest_user": {
        "mappings": {
            "_doc": {
                "properties": {
                    "name": {
                        "type": "text"
                    },
                    "role_id": {
                        "type": "long"
                    },
                    "role_name": {
                        "type": "text"
                    },
                    "c_time": {
                        "type": "date"
                    }
                }
            }
        }
    }
}
5.2.4.多表映射(一对多)索引示例sql:
select a.id as _id, a.name, a.role_id, c.labels, a.c_time from user a
left join (select user_id, group_concat(label order by id desc separator ';') as labels from label
        group by user_id) c on c.user_id=a.id
注:left join 后的子查询只允许一张表, 即子查询中不能再包含子查询或者关联!!
该sql对应的es mapping示例:
{
    "mytest_user": {
        "mappings": {
            "_doc": {
                "properties": {
                    "name": {
                        "type": "text"
                    },
                    "role_id": {
                        "type": "long"
                    },
                    "c_time": {
                        "type": "date"
                    },
                    "labels": {
                        "type": "text"
                    }
                }
            }
        }
    }
}
5.2.5.其它类型的sql示例:
- geo type
select ... concat(IFNULL(a.latitude, 0), ',', IFNULL(a.longitude, 0)) AS location, ...- 复合主键
select concat(a.id,'_',b.type) as _id, ... from user a left join role b on b.id=a.role_id- 数组字段
select a.id as _id, a.name, a.role_id, c.labels, a.c_time from user a
left join (select user_id, group_concat(label order by id desc separator ';') as labels from label
        group by user_id) c on c.user_id=a.id
配置中使用:
objFields:
  labels: array:;
5.3 启动ES数据同步
启动canal-adapter启动器
bin/startup.sh验证
- 新增mysql mytest.user表的数据, 将会自动同步到es的mytest_user索引下面, 并会打出DML的log
- 修改mysql mytest.role表的role_name, 将会自动同步es的mytest_user索引中的role_name数据
- 新增或者修改mysql mytest.label表的label, 将会自动同步es的mytest_user索引中的labels数据


 已为社区贡献9条内容

所有评论(0)