
Hive教程(07)- Hive自定义用户名密码验证(已开源)
文章目录01 引言02 打包鉴权jar2.1 步骤1:新建项目2.2 步骤2:编写鉴权代码2.2 步骤3:打包03 配置鉴权3.1 步骤一:上传jar包3.2 步骤二:配置hite-site.xml3.3 步骤三:配置user.password.conf3.4 步骤四:配置hadoop core-site.xml文件04 启动验证4.1 步骤一:重启hadoop4.2 步骤二:重启hiveserv
文章目录
01 引言
本文的打包代码已上传到github,有兴趣的同学可以clone下来看看:https://github.com/ylw-github/hive-custom-auth
在前面的教程,已经初步了解了Hive的数据模型、数据类型和操作的命令,有兴趣的同学可以参阅:
- 《Hive教程(01)- 初识Hive》
- 《Hive教程(02)- Hive安装》
- 《Hive教程(03)- Hive数据模型》
- 《Hive教程(04)- Hive数据类型》
- 《Hive教程(05)- Hive命令汇总》
- 《Hive教程(06)- Hive SerDe序列化与反序列化》
在前六篇的博客,我们大致知道了hive的主要内容了,到最后,我们是需要使用写java代码,通过jdbc来操作hive的,那么在讲解hive jdbc之前,需要讲解的是hive的用户名和密码验证设置。
02 打包鉴权jar
项目结构很简单,如下:
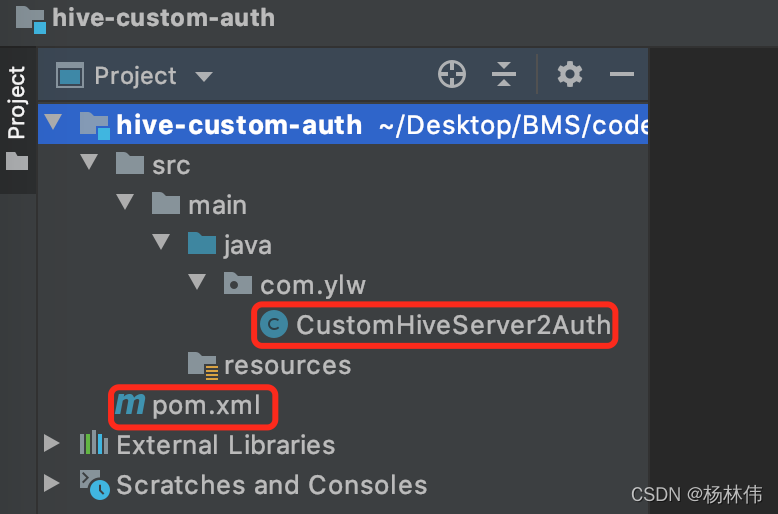
2.1 步骤1:新建项目
IDEA在项目根目录新建maven项目并新增pom.xml,内容如下(依赖了hadoop-common、hive-common、hive-service):
<?xml version="1.0" encoding="UTF-8"?>
<project xmlns="http://maven.apache.org/POM/4.0.0"
         xmlns:xsi="http://www.w3.org/2001/XMLSchema-instance"
         xsi:schemaLocation="http://maven.apache.org/POM/4.0.0 http://maven.apache.org/xsd/maven-4.0.0.xsd">
    <modelVersion>4.0.0</modelVersion>

    <groupId>com.ylw</groupId>
    <artifactId>hive-custom-auth</artifactId>
    <version>1.0.0</version>
    <packaging>jar</packaging>

    <developers>
        <developer>
            <name>Yang Lin Wei</name>
            <url>https://yanglinwei.blog.csdn.net/</url>
        </developer>
    </developers>

    <dependencies>
        <dependency>
            <groupId>org.apache.hadoop</groupId>
            <artifactId>hadoop-common</artifactId>
            <version>2.3.0</version>
        </dependency>

        <dependency>
            <groupId>org.apache.hive</groupId>
            <artifactId>hive-common</artifactId>
            <version>2.3.0</version>
        </dependency>

        <dependency>
            <groupId>org.apache.hive</groupId>
            <artifactId>hive-service</artifactId>
            <version>2.3.0</version>
        </dependency>

    </dependencies>

</project>
2.2 步骤2:编写鉴权代码
新建CustomHiveServer2Auth类,代码如下,其实就是md5加密校验:
package com.ylw;

import org.apache.hadoop.conf.Configuration;
import org.apache.hadoop.hive.conf.HiveConf;
import org.apache.hive.service.auth.PasswdAuthenticationProvider;

import javax.security.sasl.AuthenticationException;
import java.io.BufferedReader;
import java.io.File;
import java.io.FileReader;
import java.io.IOException;
import java.security.MessageDigest;
import java.security.NoSuchAlgorithmException;

public class CustomHiveServer2Auth implements PasswdAuthenticationProvider {
    @Override
    public void Authenticate(String username, String password) throws AuthenticationException {

        boolean ok = false;
        String passMd5 = new MD5().md5(password);
        HiveConf hiveConf = new HiveConf();
        Configuration conf = new Configuration(hiveConf);
        String filePath = conf.get("hive.server2.custom.authentication.file");
        System.out.println("hive.server2.custom.authentication.file [" + filePath + "] ..");
        File file = new File(filePath);
        BufferedReader reader = null;
        try {
            reader = new BufferedReader(new FileReader(file));
            String tempString = null;
            while ((tempString = reader.readLine()) != null) {
                String[] datas = tempString.split(",", -1);
                if (datas.length != 2) {
                    continue;
                }
                // ok
                if (datas[0].equals(username) && datas[1].equals(passMd5)) {
                    ok = true;
                    break;
                }
            }
            reader.close();
        } catch (Exception e) {
            e.printStackTrace();
            throw new AuthenticationException("read auth config file error, [" + filePath + "] ..", e);
        } finally {
            if (reader != null) {
                try {
                    reader.close();
                } catch (IOException e1) {
                }
            }
        }
        if (ok) {
            System.out.println("user [" + username + "] auth check ok .. ");
        } else {
            System.out.println("user [" + username + "] auth check fail .. ");
            throw new AuthenticationException("user [" + username + "] auth check fail .. ");
        }
    }

    // MD5加密
    class MD5 {
        private MessageDigest digest;
        private char hexDigits[] = {'0', '1', '2', '3', '4', '5', '6', '7', '8', '9', 'a', 'b', 'c', 'd', 'e', 'f'};

        public MD5() {
            try {
                digest = MessageDigest.getInstance("MD5");
            } catch (NoSuchAlgorithmException e) {
                throw new RuntimeException(e);
            }
        }

        public String md5(String str) {
            byte[] btInput = str.getBytes();
            digest.reset();
            digest.update(btInput);
            byte[] md = digest.digest();
            // 把密文转换成十六进制的字符串形式
            int j = md.length;
            char strChar[] = new char[j * 2];
            int k = 0;
            for (int i = 0; i < j; i++) {
                byte byte0 = md[i];
                strChar[k++] = hexDigits[byte0 >>> 4 & 0xf];
                strChar[k++] = hexDigits[byte0 & 0xf];
            }
            return new String(strChar);
        }
    }

}
2.2 步骤3:打包
IDEA右侧工具栏,打开maven,直接package:
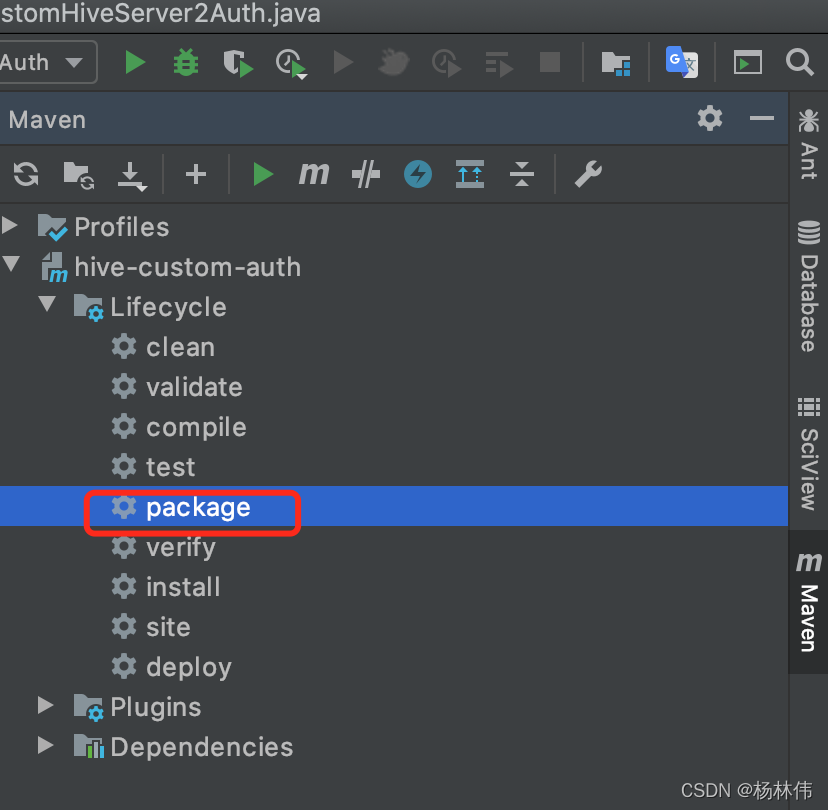
打包好后,取出target目录下的hive-custom-auth-1.0.0.jar包并放到桌面。
ok,鉴权的jar包已经打好了,接下来hive要应用这个jar包来鉴权,看看怎么使用。
03 配置鉴权
3.1 步骤一:上传jar包
cp /Desktop/hive-custom-auth-1.0.0.jar /usr/local/Cellar/hive/3.1.2_3/libexec/lib
3.2 步骤二:配置hite-site.xml
① 打开
vi /usr/local/Cellar/hive/3.1.2_3/libexec/conf/hive-site.xml
②编辑,输入:
<property>
        <name>hive.server2.authentication</name>
        <value>CUSTOM</value>
    </property>
    <property>
        <name>hive.server2.custom.authentication.class</name>
        <value>com.ylw.CustomHiveServer2Auth</value>
    </property>
    <property>
        <name>hive.server2.custom.authentication.file</name>
        <value>/usr/local/Cellar/hive/3.1.2_3/libexec/conf/user.password.conf</value>
    </property>
3.3 步骤三:配置user.password.conf
在3.2步骤配置的目录下,新建user.password.conf文件:
vi /usr/local/Cellar/hive/3.1.2_3/libexec/conf/user.password.conf
并配置用户名和密码,内容如下(账号为root,密码为123(明文,下面写的是md5加密后的密码)):
root,202cb962ac59075b964b07152d234b70
3.4 步骤四:配置hadoop core-site.xml文件
ok,到这一步其实算是完成了,但是如果我们使用beeline是登录不了的,接下来还要配置hadoop的core-site.xml文件,看看怎么配置。
cd /usr/local/Cellar/hadoop/3.3.1/libexec/etc/hadoop
vi core-site.xml
加入配置:
<property>
  <name>hadoop.proxyuser.用户名.hosts</name>
  <value>*</value>
</property>

<property>
    <name>hadoop.proxyuser.用户名.groups</name>
    <value>*</value>
</property>
注意:这里很重要,上述的用户名是电脑的用户名,如果不加上这两个配置,使用beeline是登录不上的!
04 启动验证
到了这一步,终于可以验证了,因为我们配置了hadoop和hive,所以这两个有关的服务都需要重启。
4.1 步骤一:重启hadoop
cd /usr/local/Cellar/hadoop/3.3.1/sbin
./stop-all.sh
./start-all.sh
4.2 步骤二:重启hiveserver2
hiveserver2 --hiveconf hive.server2.thrift.port 10001
注意:这里是制订了端口(10001)启动hiveserver的,启动过程比较缓慢,需要等候几分钟。
4.3 步骤三:检查hiveserver2是否启动成功
终端查询10001端口,如果出现如下,表示hiveserver启动成功,否则,耐心等待:

这里可以使用命令来查看端口,如mac系统下的命令:
lsof -i:10001
4.4 步骤四:使用beeline连接验证
另外打开新的终端,并输入:
beeline
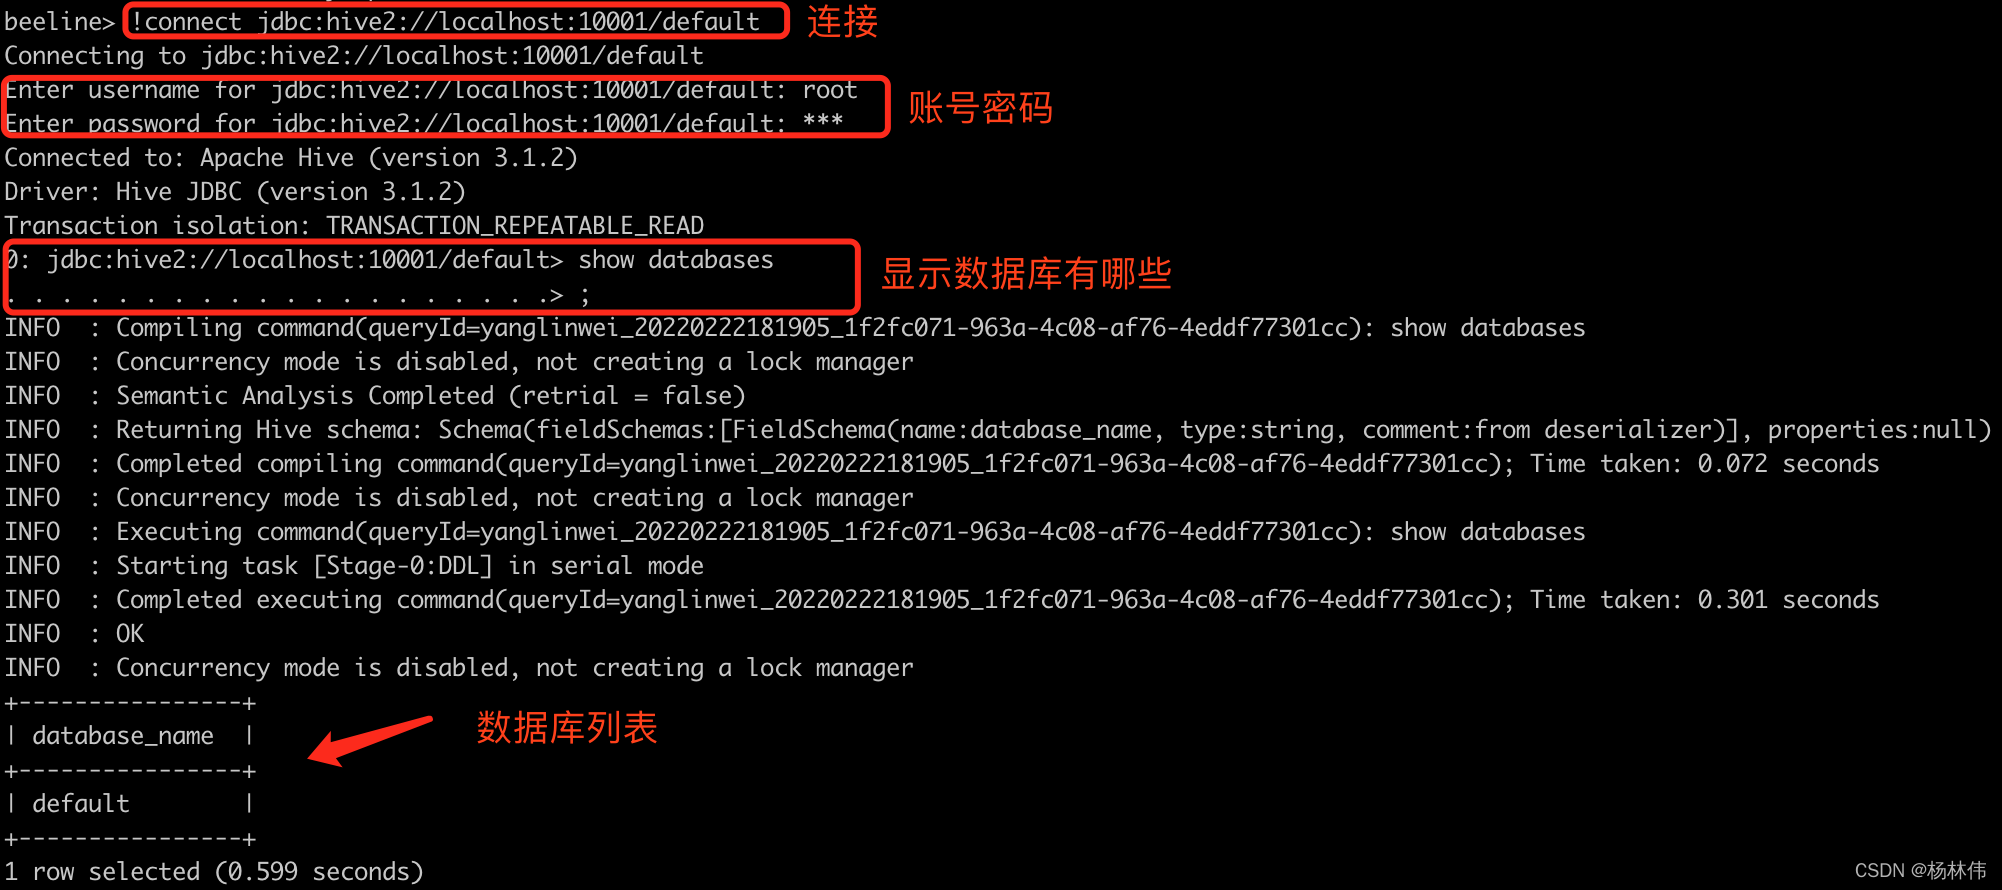
接着输入连接命令:
!connect jdbc:hive2://localhost:10001/default
输入用户名和密码:
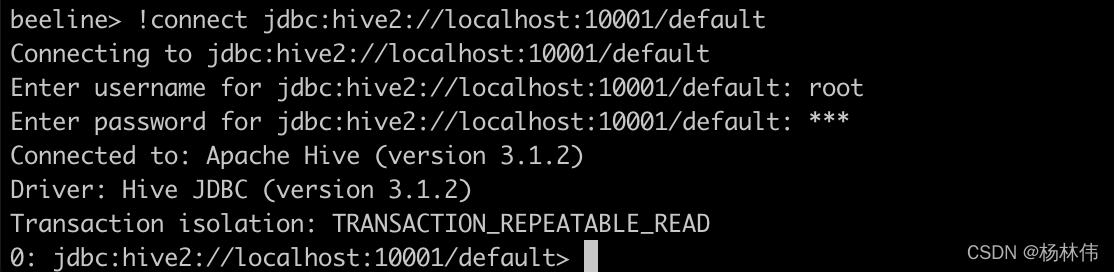
连接成功:
同时也可以看到hiveserver控制台里有验证成功的提示:

05 文末
本文的打包代码已上传到github,有兴趣的同学可以clone下来看看:https://github.com/ylw-github/hive-custom-auth
本文主要讲解了使用beeline来连接自定义用户名和密码的hive服务器,谢谢大家的阅读,本文完!

瓜分20万奖金 获得内推名额 丰厚实物奖励 易参与易上手
更多推荐
 1
1 0
0- 0


 已为社区贡献25条内容

所有评论(0)