【鸿蒙实战开发教程】HarmonyOS next开发网络请求封装(Api11Release)
我这里base地址使用的wan安卓的api有很多小伙伴不知道该从哪里开始学习鸿蒙开发技术?也不知道鸿蒙开发的知识点重点掌握的又有哪些?自学时频繁踩坑,导致浪费大量时间。结果还是一知半解。所以有一份实用的鸿蒙(HarmonyOS NEXT)全栈开发资料用来跟着学习是非常有必要的。这份鸿蒙(HarmonyOS NEXT)资料包含了鸿蒙开发必掌握的核心知识要点,内容包含了。
前言
根据研究机构Counterpoint Research发布的最新数据,2024年第一季度,鸿蒙OS份额由去年一季度的8%上涨至17%,iOS份额则从20%下降至16%。 这意味着,华为鸿蒙OS在中国市场的份额超越苹果iOS,已成中国第二大操作系统。
随着鸿蒙市场份额的不断提升,相应的岗位也会迎来一个爆发式的增长。这对于想要换赛道的程序员来说是一个非常好的消息,话说大家最近有想法转型鸿蒙开发吗?
本文主要讲一下鸿蒙开发中网络请求封装
鸿蒙相关版本信息:
HarmonyOS NEXT,Developer Preview2,Api Version 11 Release
电脑系统:macM1 编译器:DevEco Studio NEXT Developer Preview2,4.1.7.300
(API9对应的mac版本的模拟器无法识别的问题在此版本编译器已经修复)
模拟器也是一样的Preview2版本(需要申请)
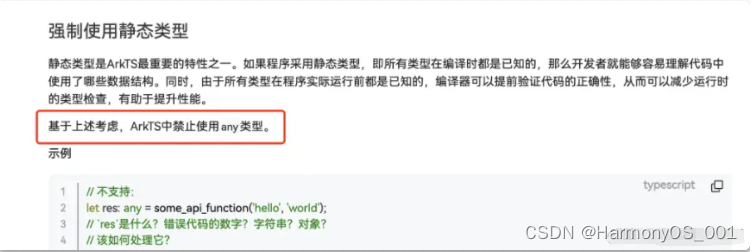
最近开始基于鸿蒙NEXT版本也就是俗话说的纯血鸿蒙进行开发,本来是不打算写这个文章因为用API9写的时候当时是封装了一套网络请求的,但是~API 11改了一些地方: any 被禁止使用了(这是影响最大的地方其他的改变也造成了一些影响但是我就不过多描写了),然后就导致报错严重!!

下面就开始进入主题:
首先在module.json5中配置基础网络权限
"requestPermissions": [
    {
      "name": "ohos.permission.INTERNET",
    }
]
定义base常量
我这里base地址使用的wan安卓的api

封装泛型工具类

注意data,不能像之前那样
data: T = null
会报错,而且必须都有初始值
封装request
async function requestSync<T>(path: string, method: http.RequestMethod, extraData?: Object): Promise<Response<T>> {
  return new Promise<Response<T>>((resolve, reject) => {
    let url = NetConstants.BASE_URL + path;
    let header: HeaderInterFace = {
      ApiVersion: '272',
      'Content-Type': 'application/json',
      platform: '',
      'encryption-mode': 'base64',
      auth: NetConstants.AUTH,
      channel: 'JYB',
      timeout : NetConstants.TIMEOUT
    }
    if (method === http.RequestMethod.POST) {
      header = {
        ApiVersion: '272',
        'Content-Type': 'application/x-www-form-urlencoded',
        platform: '',
        'encryption-mode': 'base64',
        auth: NetConstants.AUTH,
        channel: 'JYB',
        timeout : NetConstants.TIMEOUT
      }
    }
    let httpRequest = http.createHttp();
    hilog.info(0, NetConstants.NET_TAG, `start request, path: ${path}, method: ${method}, extraData: ` + JSON.stringify(extraData));
    httpRequest.request(
      url,
      {
        method: method,
        expectDataType: http.HttpDataType.OBJECT,
        header: header,
        extraData: extraData
      },
      (err, data) => {
        let res = new Response<T>()
        if (!err && data.responseCode === 200) {
          //Object.assign("", "");对象合并
          if (typeof data.result === 'string') {
            res.data = JSON.parse(data.result)
          } else {
            // Object.assign(res, data.result);
            res.data = data.result as T
          }
          hilog.info(0, NetConstants.NET_TAG, `request success, path: ${path}, result: ${JSON.stringify(res)}`)
        } else {
          hilog.error(0, NetConstants.NET_TAG, `request error, path: ${path}, error: ${JSON.stringify(err)}`)
          res.errorCode = data?.responseCode??-1
          res.errorMsg = err?.message??""
        }
        resolve(res);
      }
    )
  })
}

//封装接口
export default class Api {
  private static instance: Api;

  private constructor() {
  }

  static net(): Api {
    if (Api.instance === undefined) {
      Api.instance = new Api();
    }
    return Api.instance;
  }

  async login(username: string, password: string): Promise<Response<UserData>> {
    return requestSync("/user/login", http.RequestMethod.POST, `username=${username}&password=${password}`);
  }

  async logout(): Promise<Response<string>> {
    return requestSync("/user/logout/json", http.RequestMethod.GET);
  }

  async getUserInfo(): Promise<Response<UserData>> {
    return requestSync("/lg/coin/userinfo/json", http.RequestMethod.GET);
  }

}

interface HeaderInterFace {
  'ApiVersion': string,
  'Content-Type': string,
  'platform': string,
  'encryption-mode': string,
  'auth': string,
  'channel': string,
  'timeout': number
}
我这里没有编写处理token和加密加密相关的,这两个其实也不复杂,大家可以自己添加。
我这里只写了三个接口,但是其实相当于只有一个post请求一个get请求,如果需要delete、put请求自己添加。
试一下:
一个简单的登陆页:
@Entry
@Component
export struct Login {

  @State showLoading: boolean = false;
  @State title: string = "登录";
  private account: string = "";
  private password: string = "";

  async login(){
    if (!this.account) {
      toast("请输入用户名");
      return;
    }
    if (!this.password) {
      toast("请输入密码");
      return;
    }
    this.showLoading = true;
    let res = await Api.net().login(this.account, this.password);
    this.showLoading = false;
    if (res.isSuccessWithData()) {
      toast("登录成功");
    } else {
      toast(res.errorMsg);
    }
  }

  build() {

    Stack(){
      Column() {
        TextInput({
          placeholder: "请输入用户名"
        })
          .fontSize(15)
          .fontColor($r("app.color.text_h1"))
          .type(InputType.Email)
          .onChange((value) => {
            this.account = value
          })
        TextInput({
          placeholder: "请输入密码"
        })
          .margin({ top: 16 })
          .fontSize(15)
          .fontColor($r("app.color.text_h1"))
          .type(InputType.Password)
          .onChange((value) => {
            this.password = value
          })
        Button("登录", {
          type: ButtonType.Capsule
        })
          .width('100%')
          .margin({ top: 50 })
          .fontSize(15)
          .fontColor($r("app.color.white"))
          .backgroundColor($r("app.color.color_shubihong"))
          .onClick((e) => {
            this.login();
          })
      }
      .width('100%')
      .margin({ top: 120 })
      .padding({ left: 16, right: 16 })
    }
    .width('100%')
    .height('100%')

  }

}
重点是这句:

请求结果:

总结
以上网路请求的封装更多的是自己的使用习惯,也清楚有很多需要改进的空间,如果有大佬能更进一步当然更好。
写在最后
有很多小伙伴不知道该从哪里开始学习鸿蒙开发技术?也不知道鸿蒙开发的知识点重点掌握的又有哪些?自学时频繁踩坑,导致浪费大量时间。结果还是一知半解。所以有一份实用的鸿蒙(HarmonyOS NEXT)全栈开发资料用来跟着学习是非常有必要的。
这份鸿蒙(HarmonyOS NEXT)资料包含了鸿蒙开发必掌握的核心知识要点,内容包含了
最新鸿蒙全栈开发学习线路
鸿蒙HarmonyOS开发教学视频


大厂面试真题


鸿蒙OpenHarmony源码剖析

这份资料能帮住各位小伙伴理清自己的学习思路,更加快捷有效的掌握鸿蒙开发的各种知识。有需要的小伙伴自行领取,,先到先得~无套路领取!!
获取这份完整版高清学习路线,请点击→鸿蒙全栈开发学习资料

开放原子开发者工作坊旨在鼓励更多人参与开源活动,与志同道合的开发者们相互交流开发经验、分享开发心得、获取前沿技术趋势。工作坊有多种形式的开发者活动,如meetup、训练营等,主打技术交流,干货满满,真诚地邀请各位开发者共同参与!
更多推荐
 已为社区贡献8条内容


所有评论(0)